Step 7: Activate Scorbit
Adding Scorbit Support
Installing Scorbit in a [machine_type_short] requires an extra step to prepare the software that runs on the game's MPU.
There are two aspects to this, installing the Scorbit mobile app to register and log into your Scorbit account, and next downloading the Scorbit Desktop Utility to modify your game's embedded system to be compatible with Scorbit. This is a simple process involving use of a separate USB flash drive, such as the one provided by Scorbit, to peform the update operation.
Warning
Scorbit does not modify the actual running game code of the game in any way. This patch allows Scorbit to read the game's memory in parallel to the game code's normal operation. However, as is always the case, making any modifications to your game may void your warranty.
Install Scorbit App
Download and install the Scorbit app on your iOS or Android phone. If you haven't yet registered, go through the sign up process and validate your account.
![]()
.png)
Apple: https://apps.apple.com/us/app/scorbit/id1505831174
Android: https://play.google.com/store/apps/details?id=com.scorbit
Create Your Machine
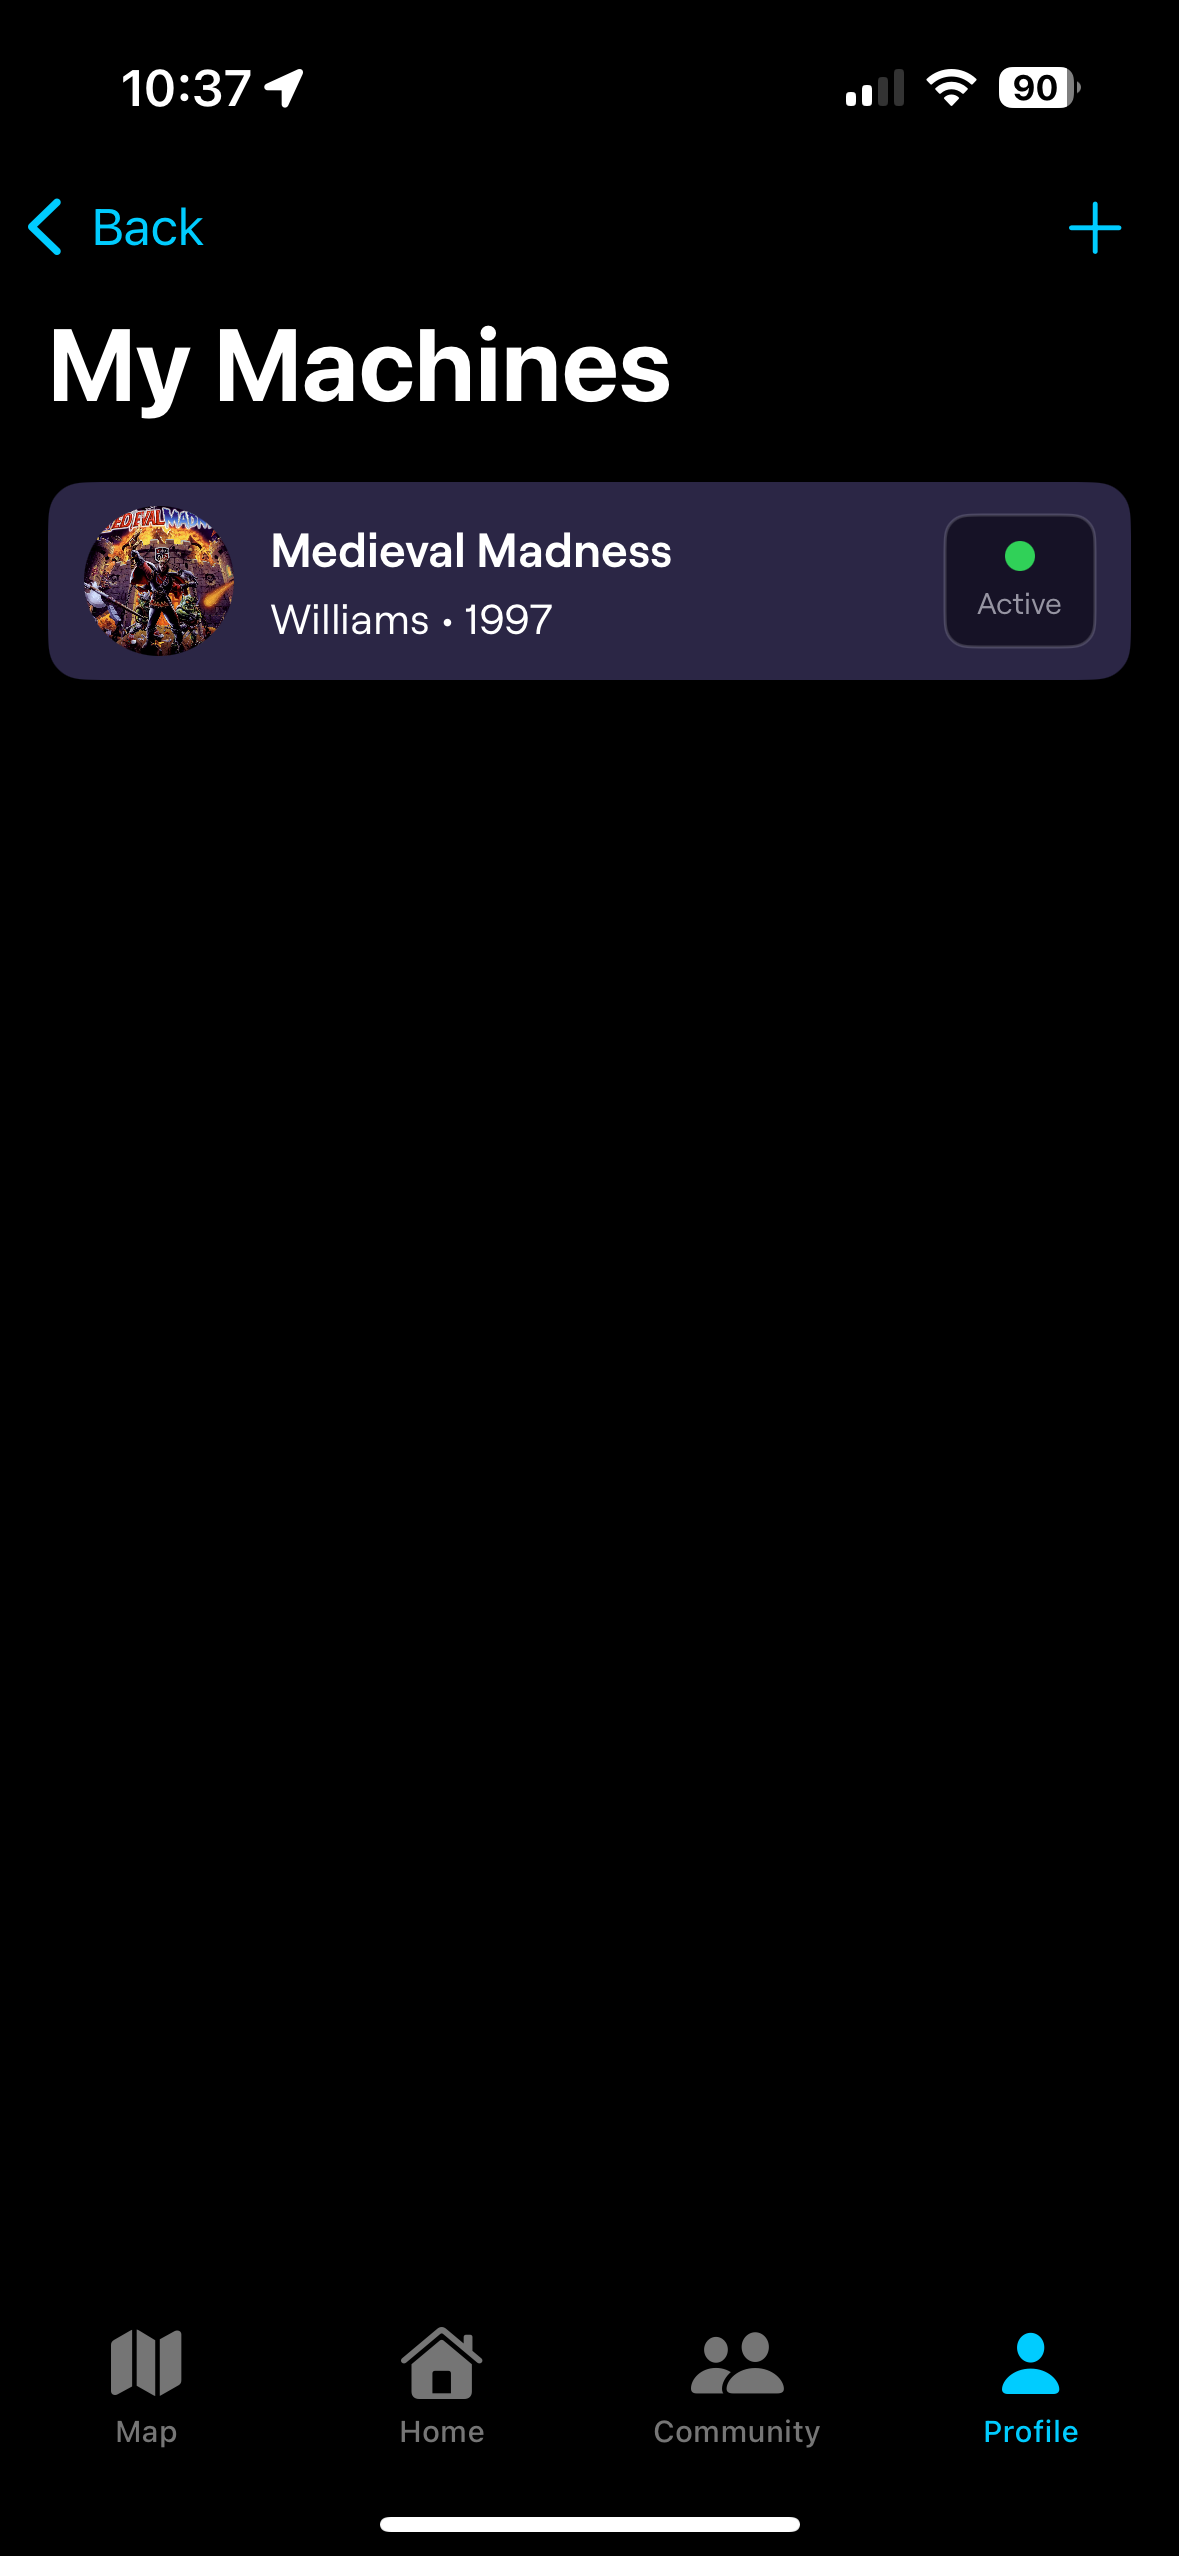
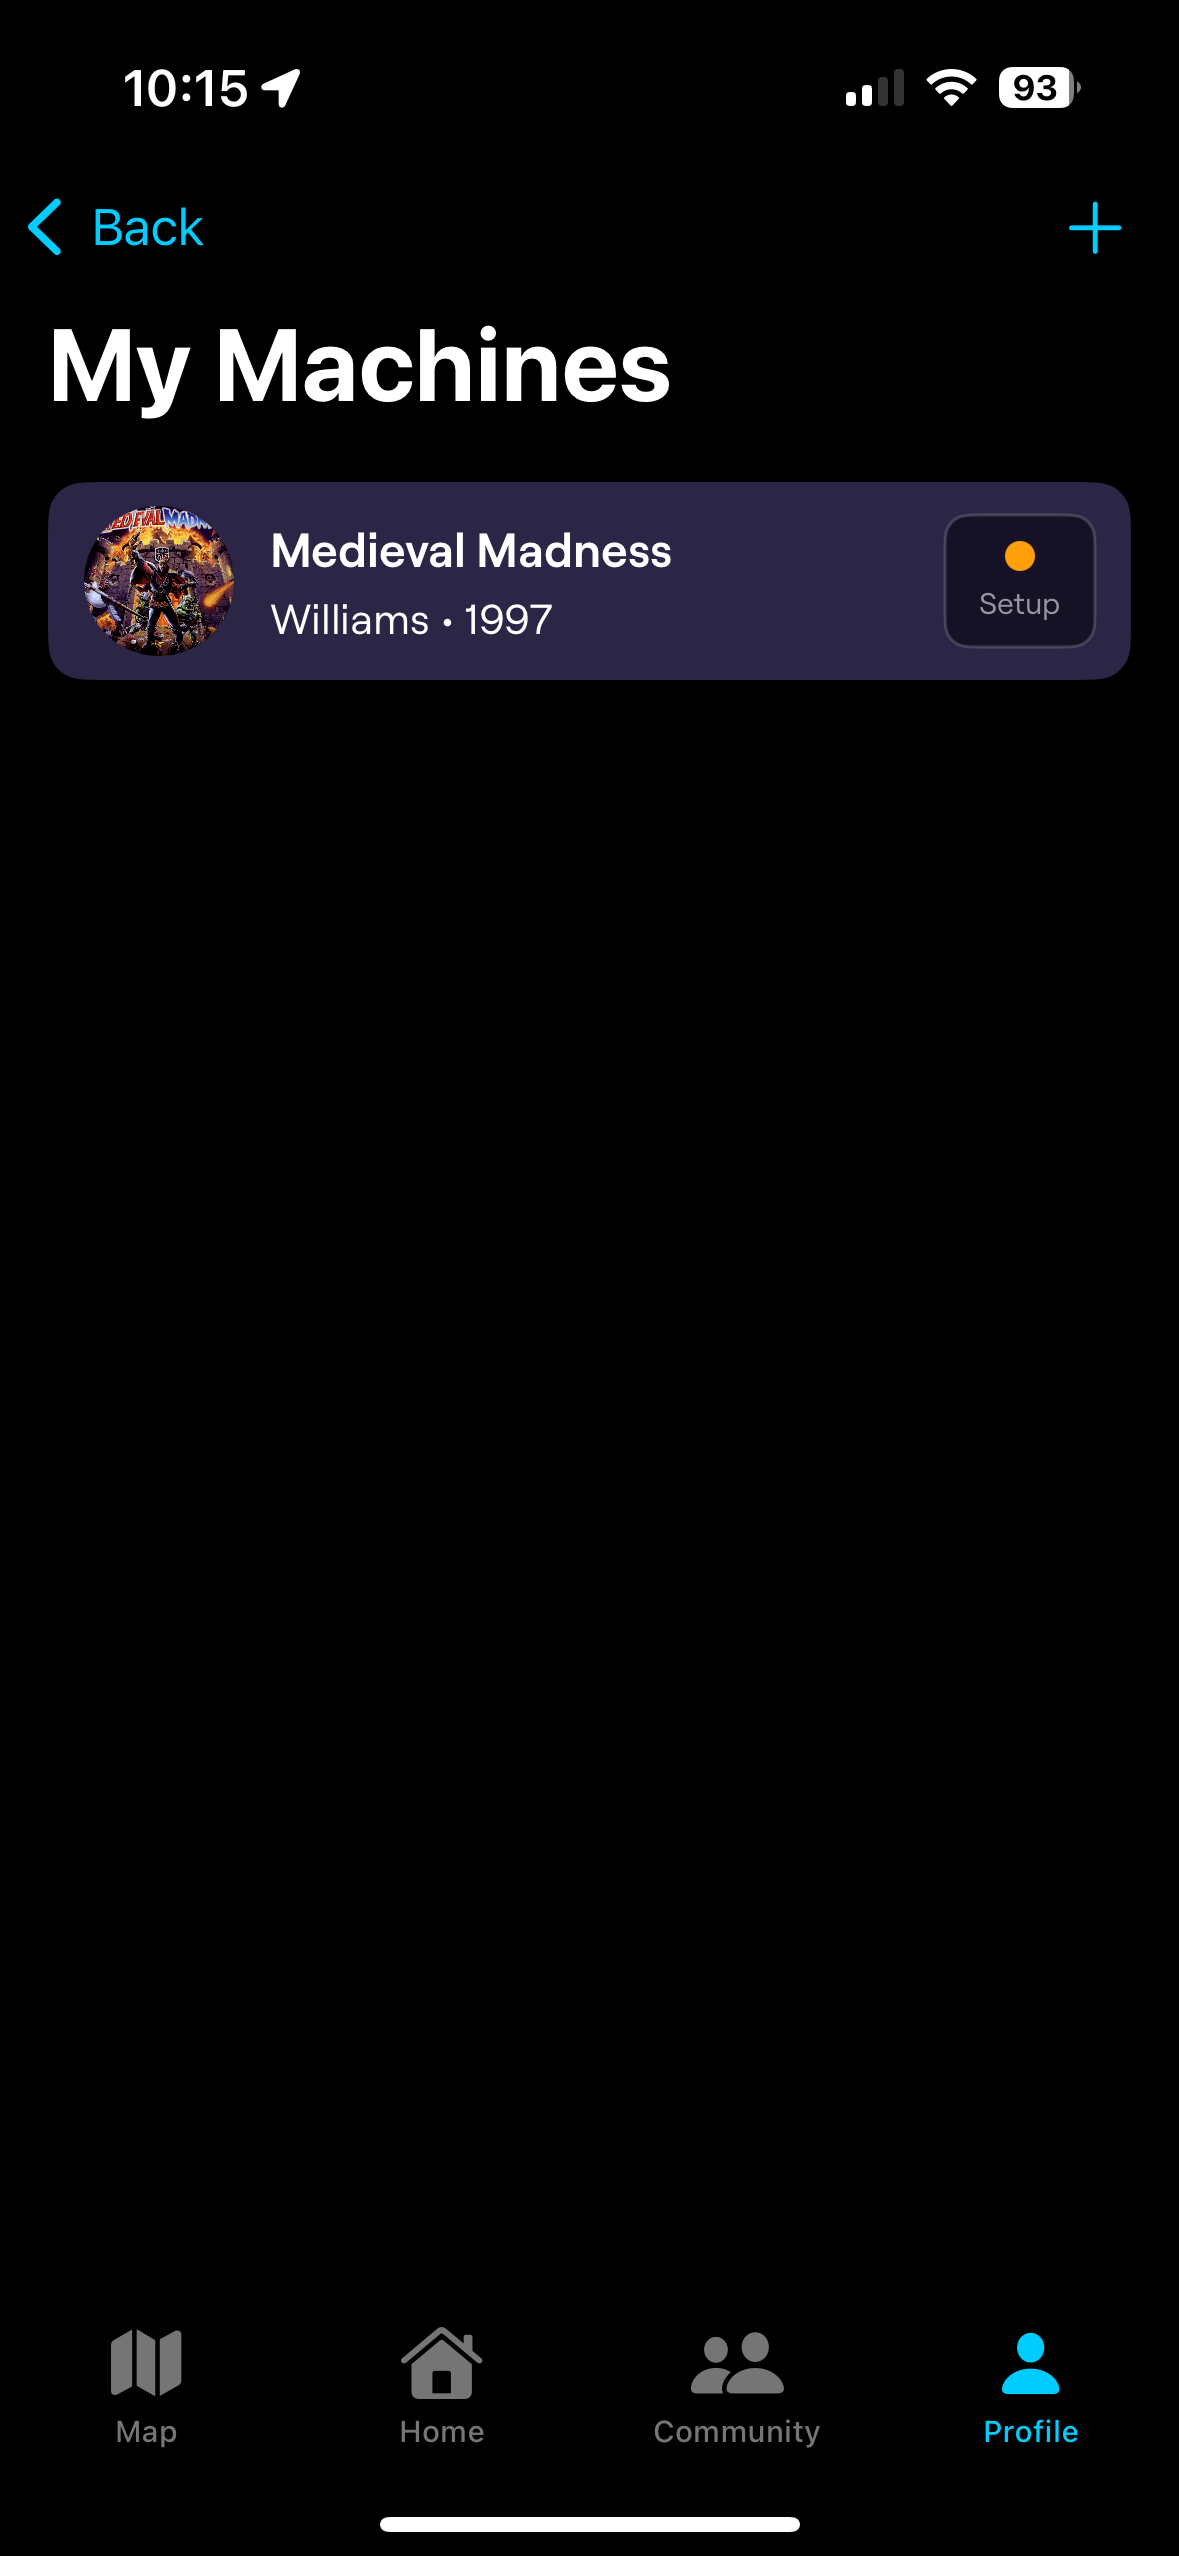
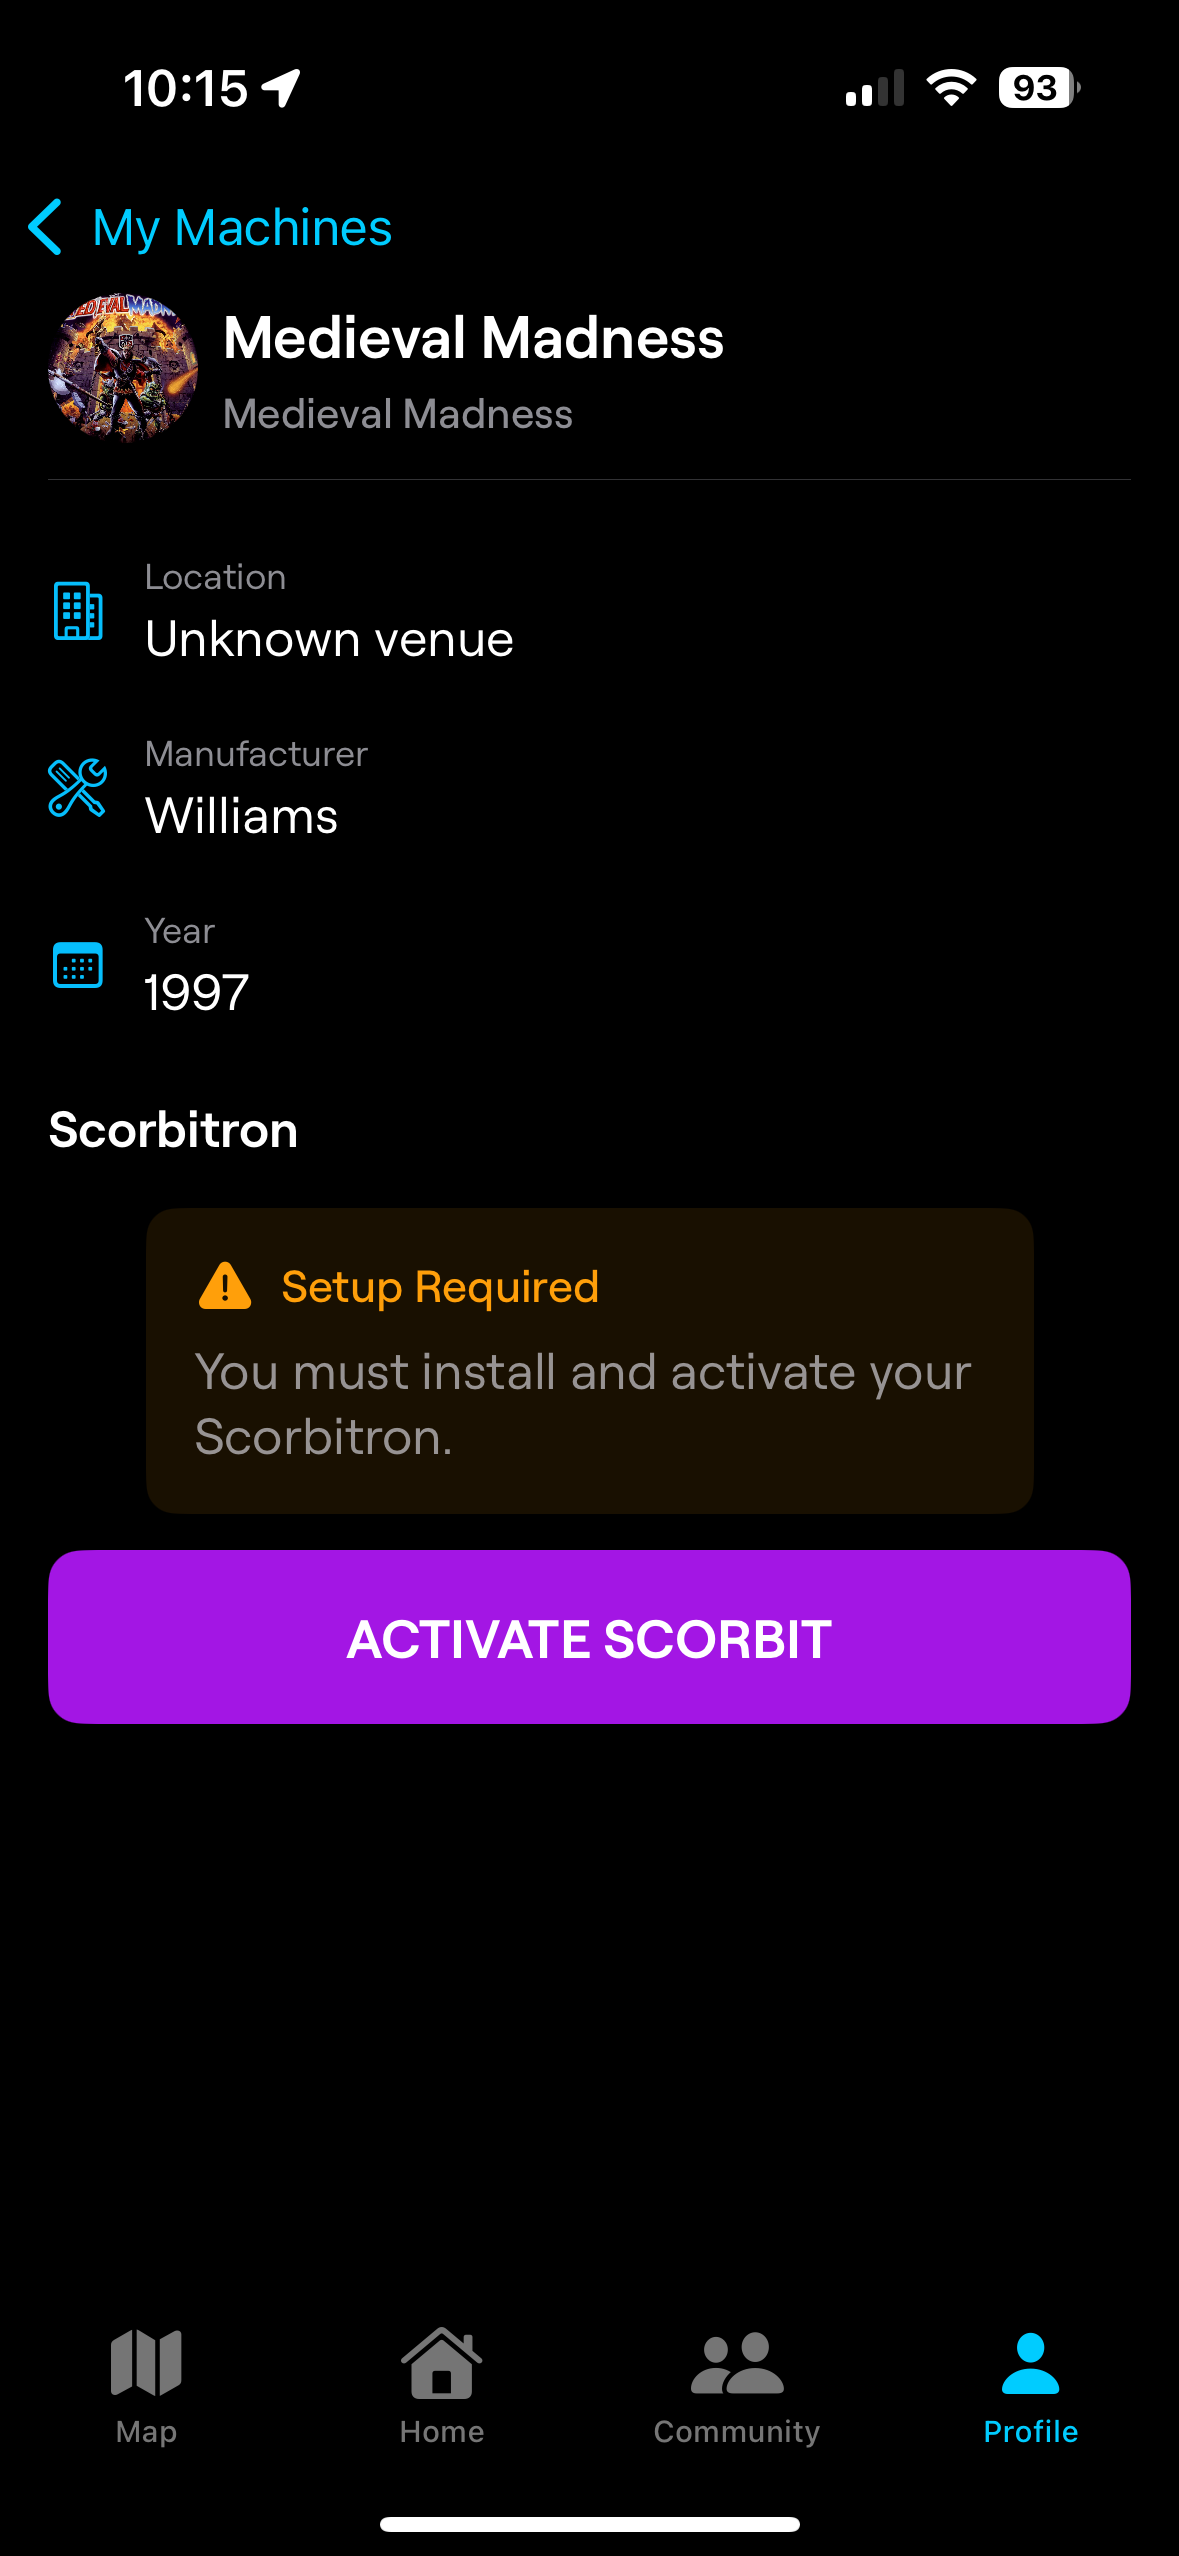
Scorbit needs a virtual representatin of your machine on the platform first. Go to your user profile, click the settings icon at the top of the screen, and select My Machines.
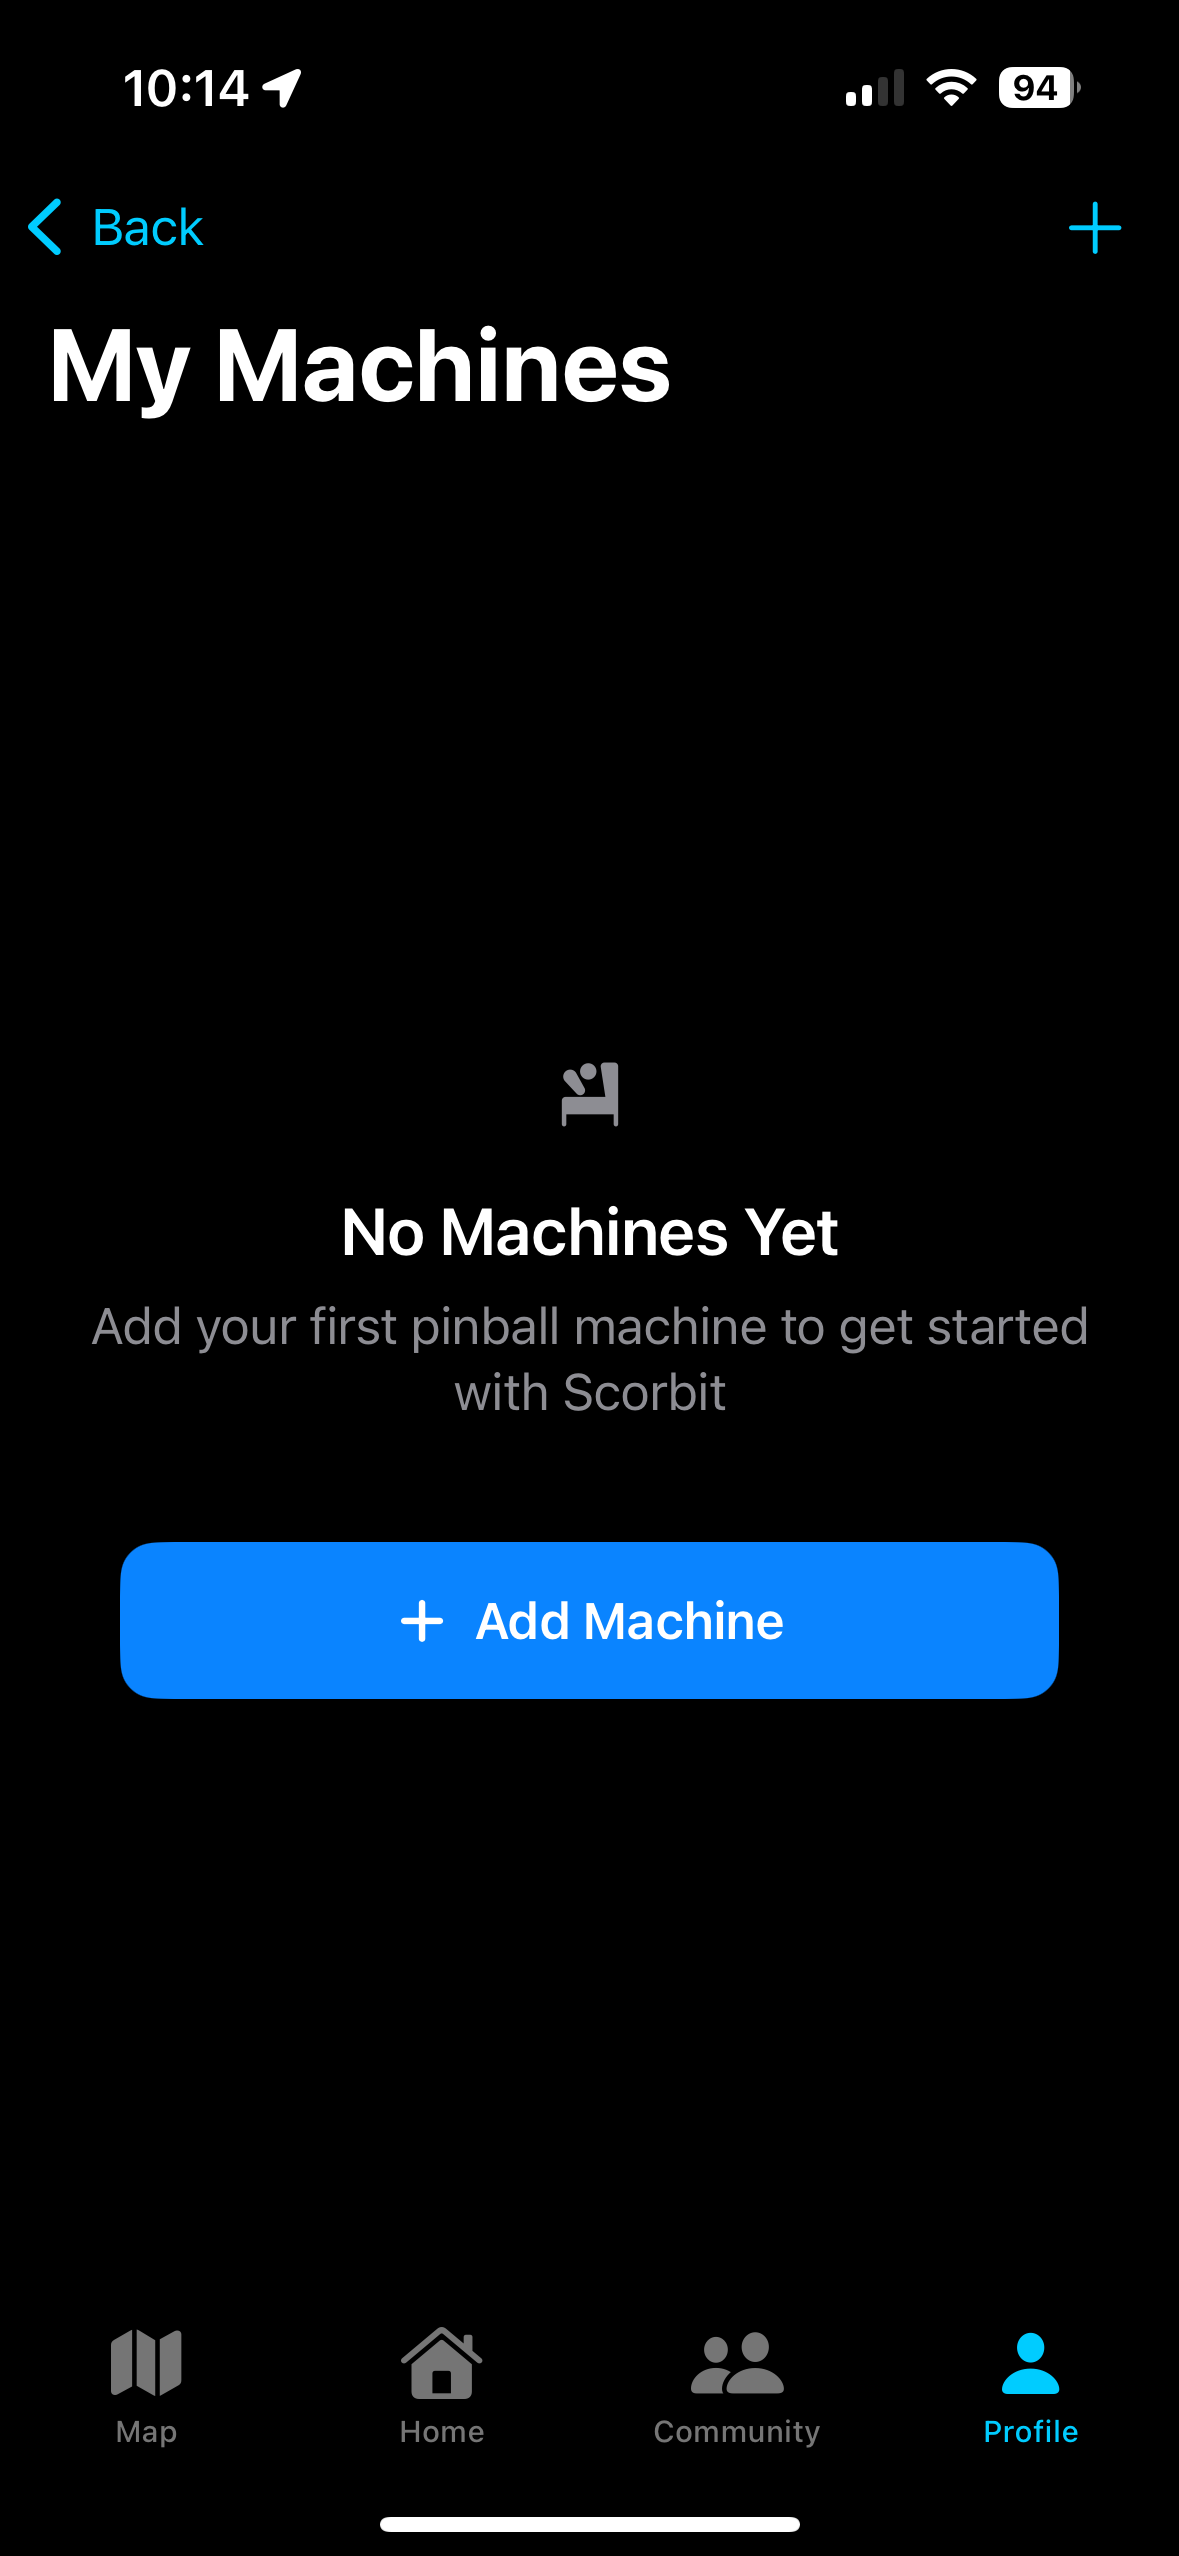
If your machine is already listed here, click the Setup icon next to it and skip to the Activate section below. Otherwise, click the Add Machine button or "+" sign to create a machine.

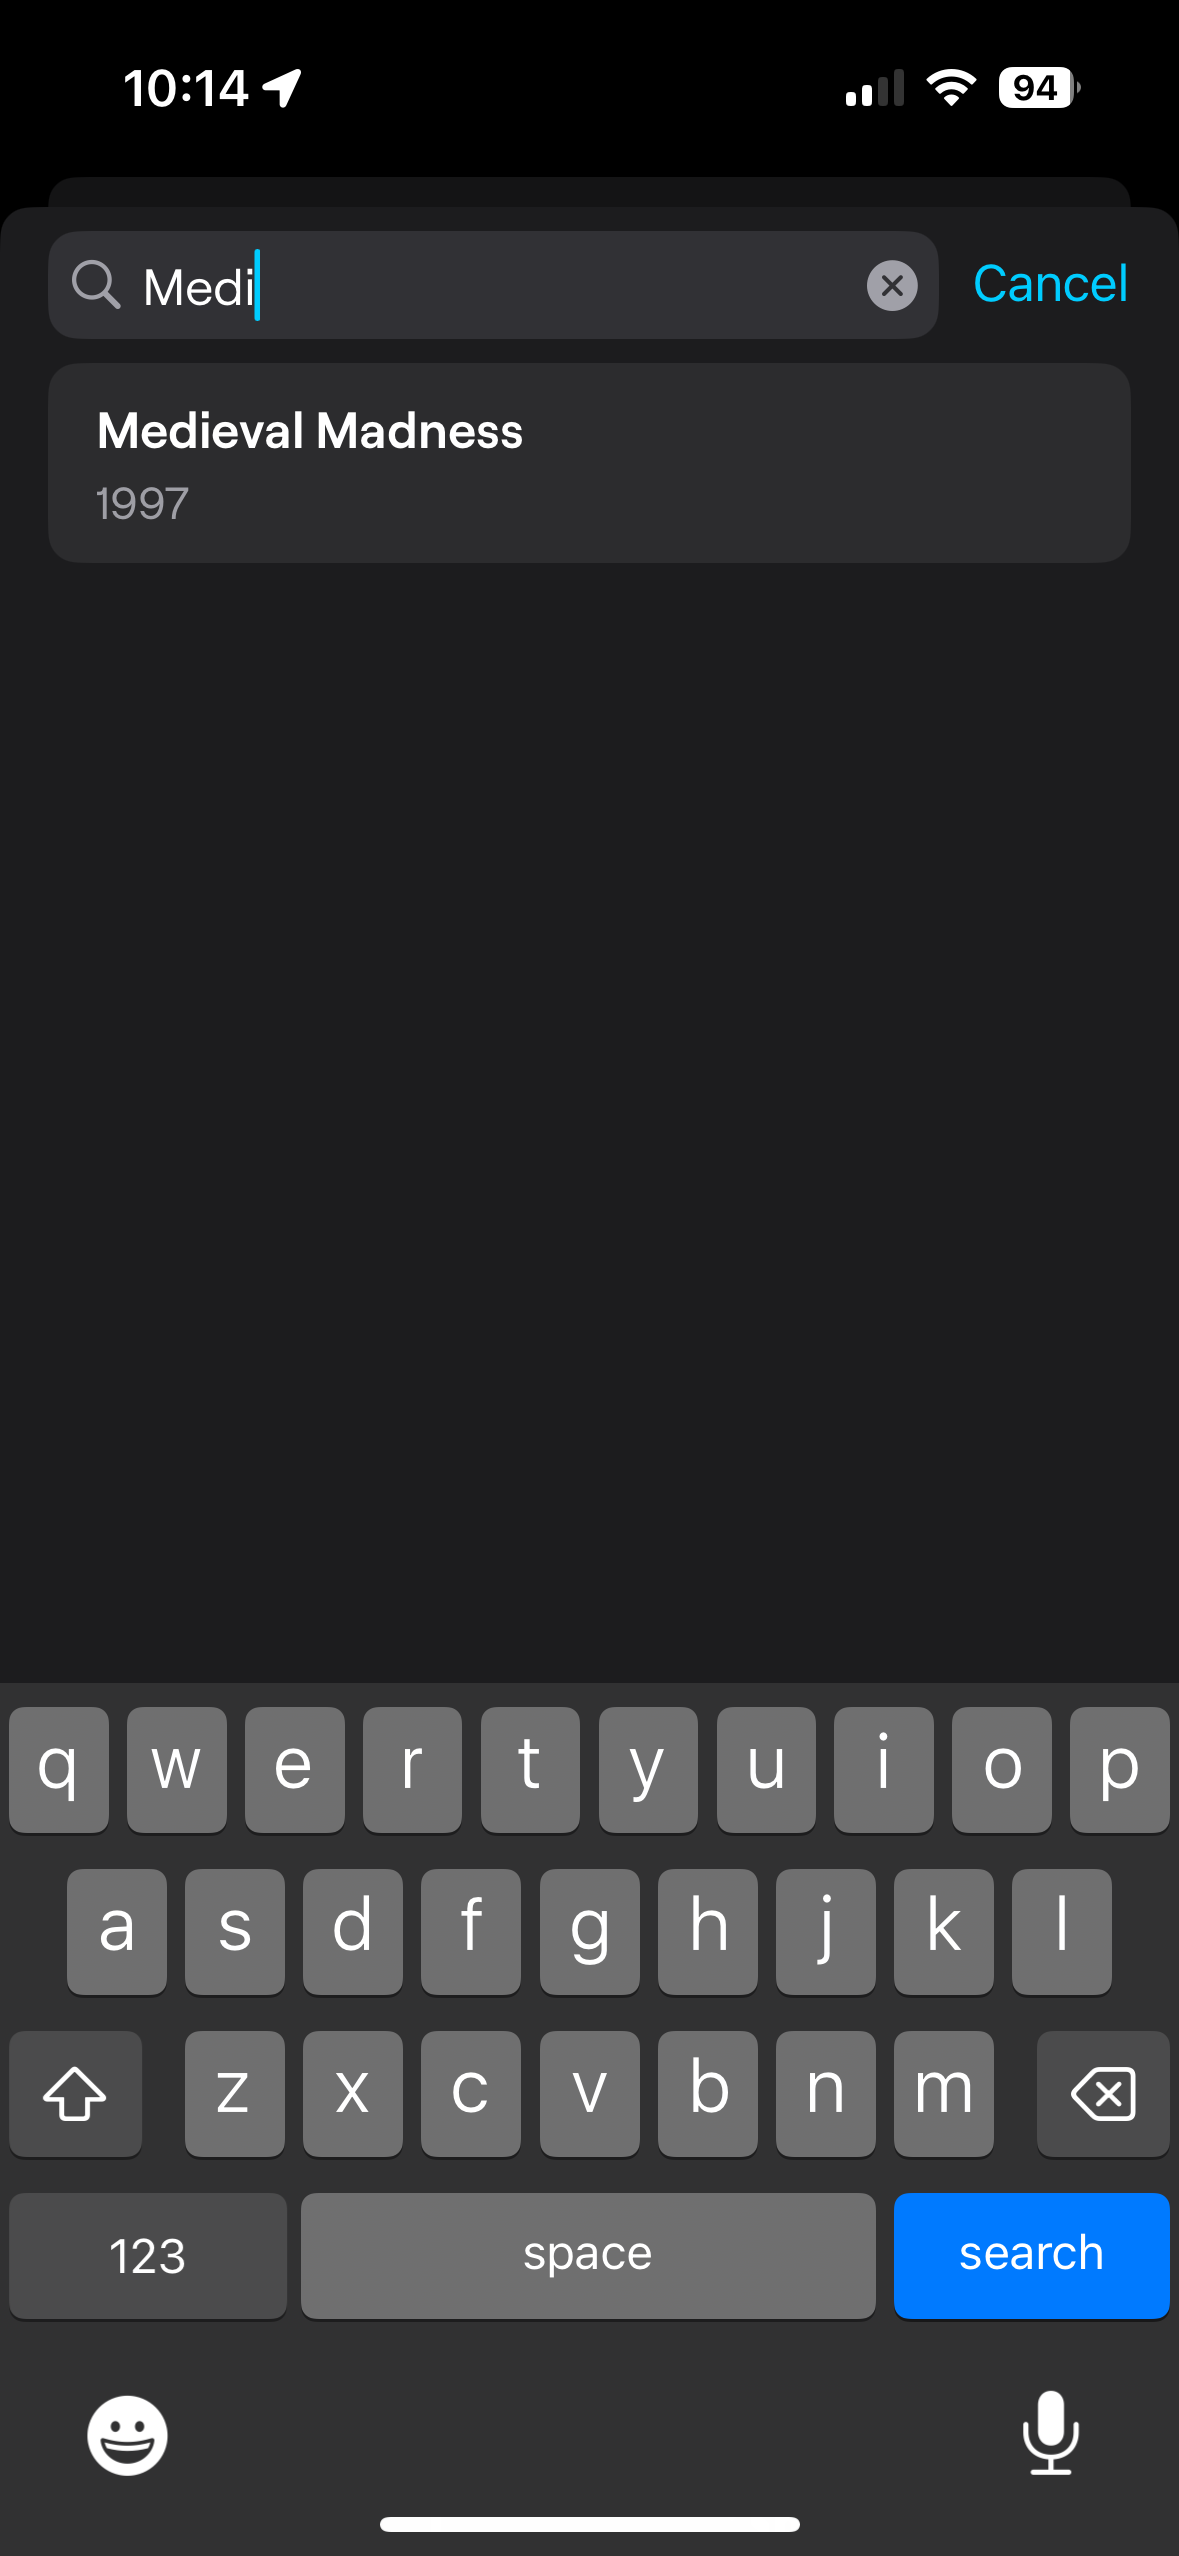
Select your machine by name using the search feature. The choices will appear as you type.
Note the different options for the game title if they exist. We call these different names "variants." Scorbit sometimes has different leaaderboards for machines that have different physics, upper playfields or different options.Choose the appropriate variant for your machine.
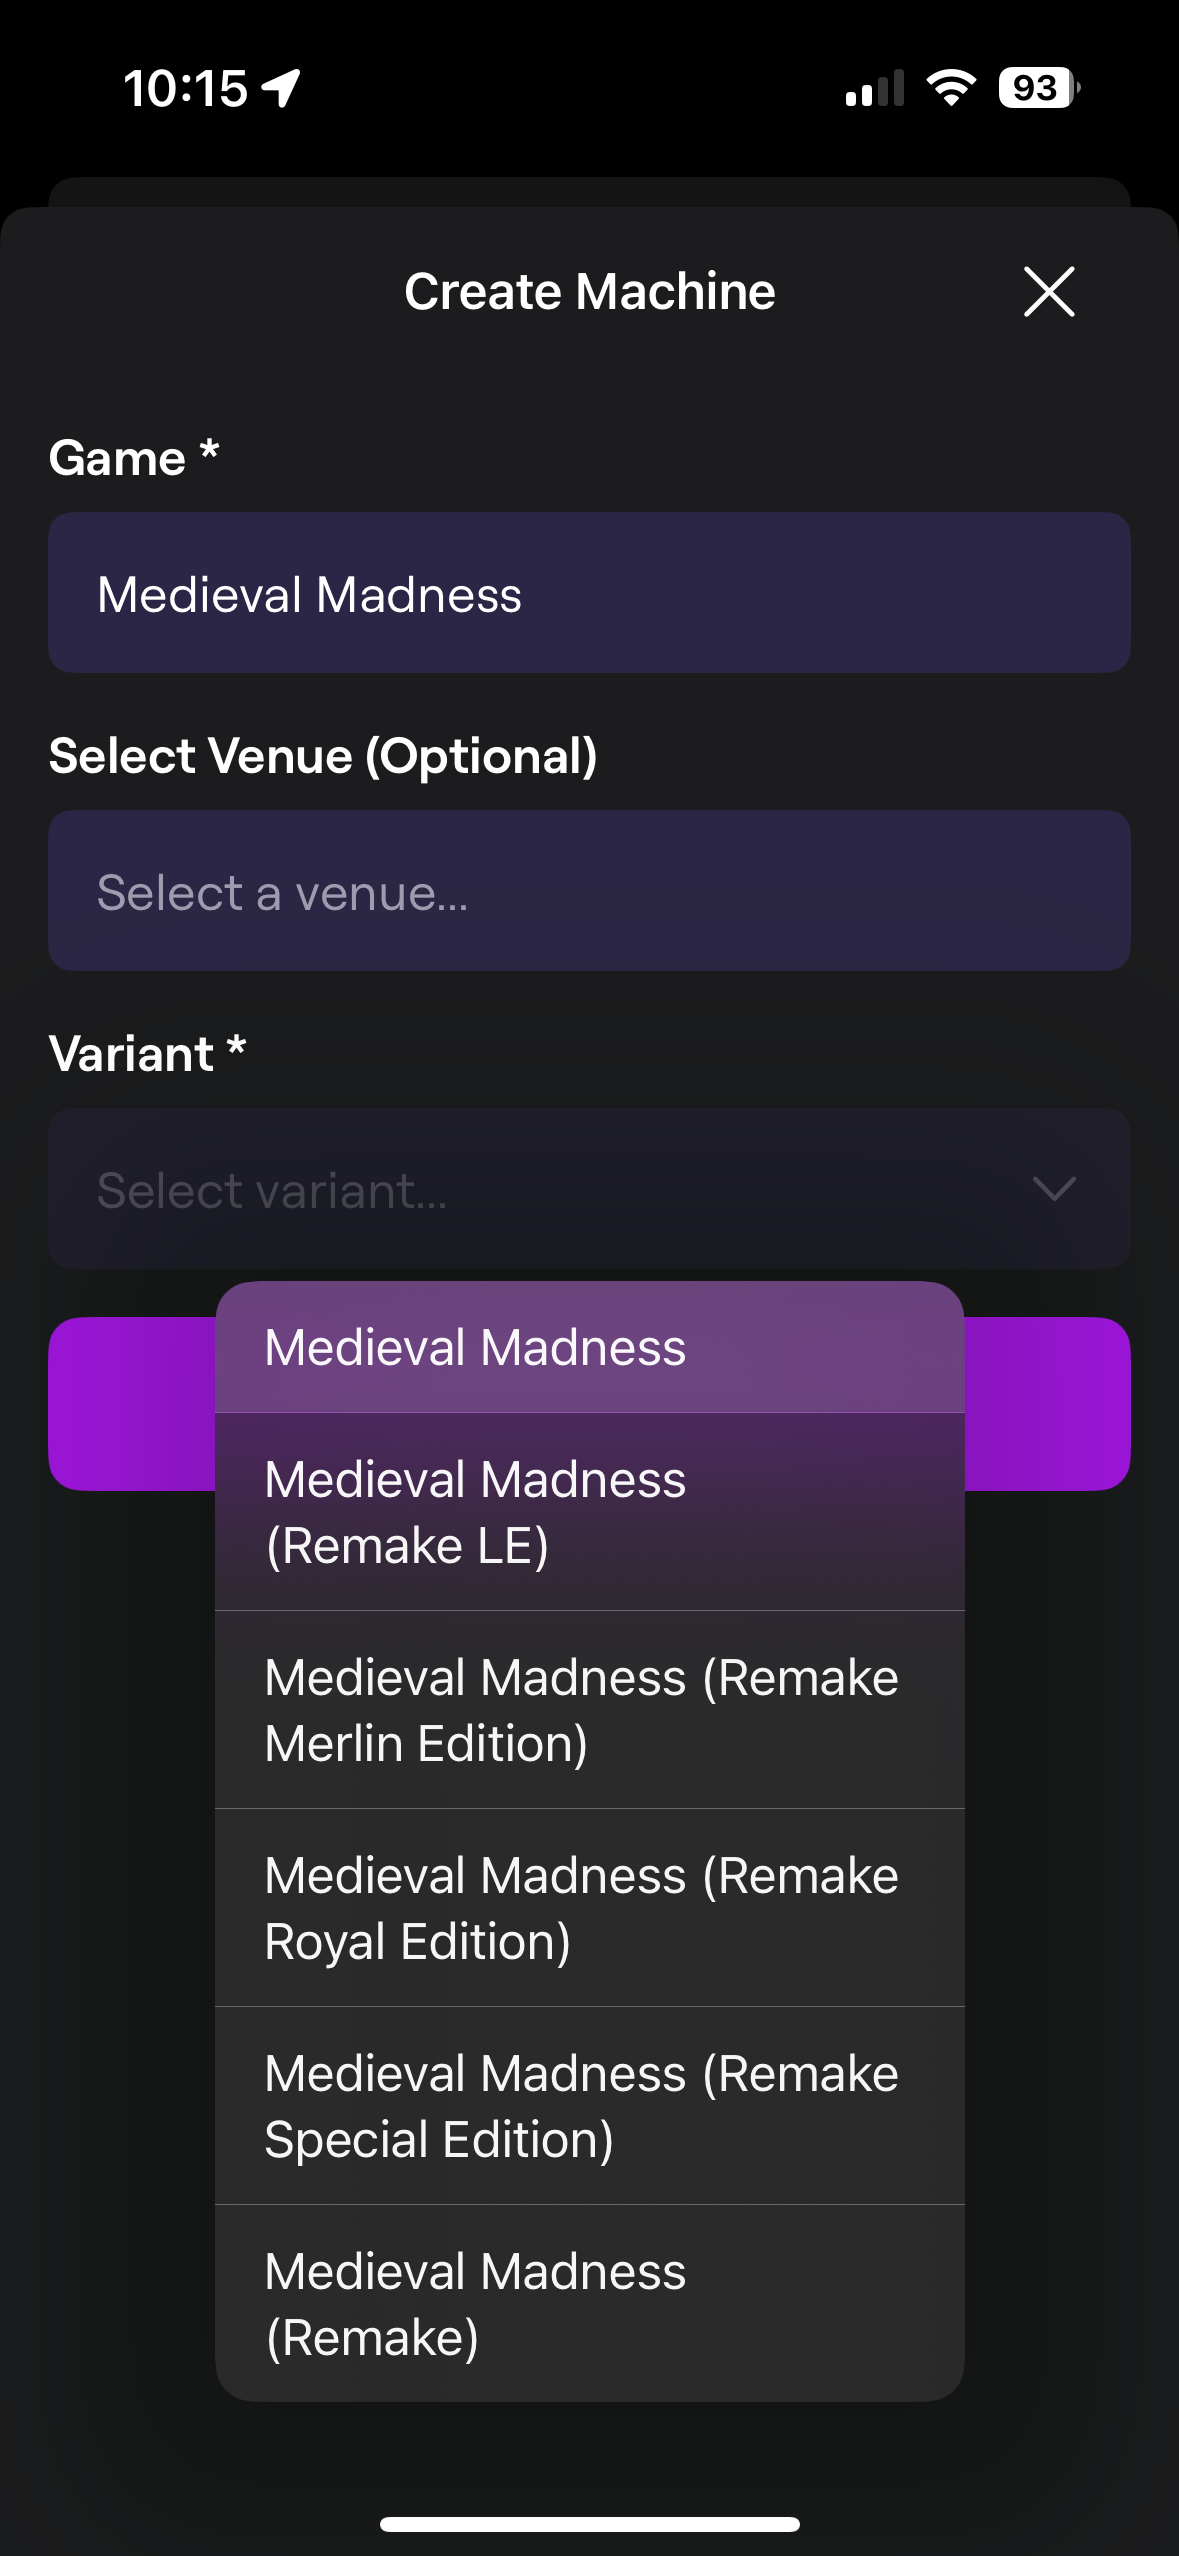
Tip
Many modern games have VPIN (virtual pinball) versions of the games that are run using emulators, such as PinMAME, on a computer. These "virtual tables" also can work with Scorbit. Make sure to not accidentally select the wrong variant, such as a VPIN, when you mean to use a physical machine, or vice versa.
Once complete, the app will return you to the Machine list. Tap on the setup button to the right of the machine.
Download Scorbit Desktop Utility
Download the Scorbit Desktop Utility from Scorbit here.
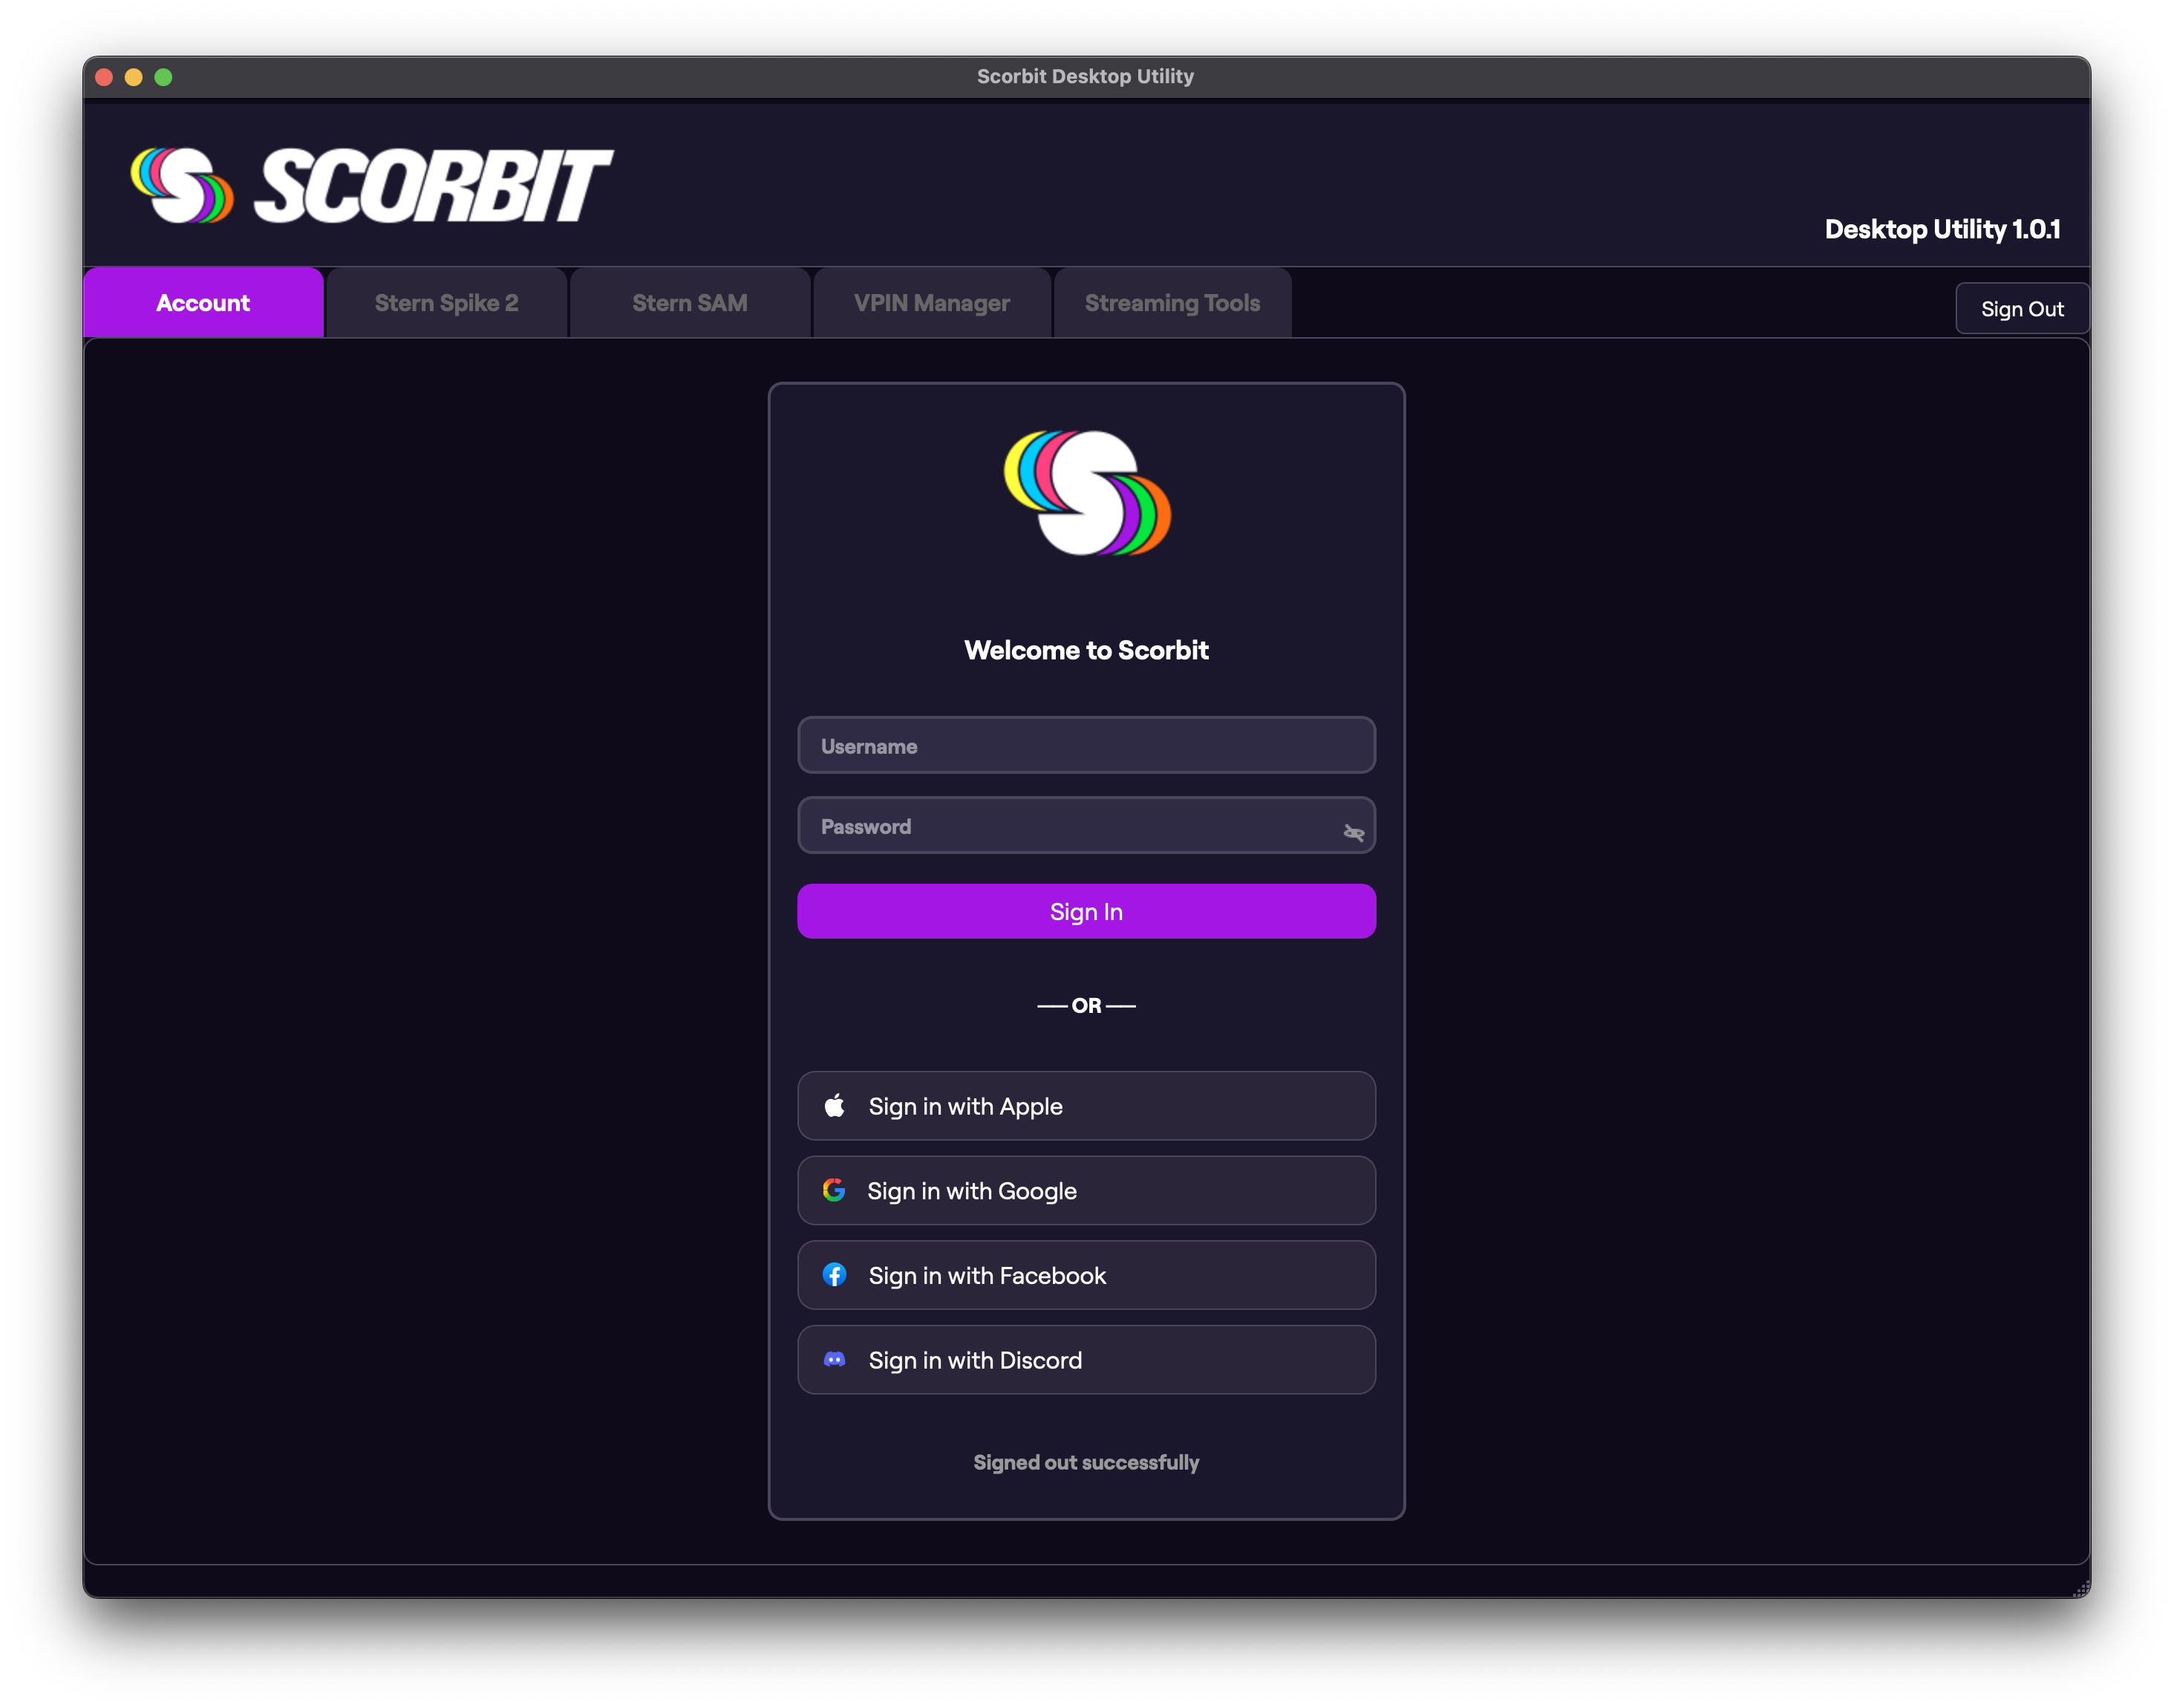
Login to Scorbit
Using the username/password you used with the Scorbit mobile app previously, log into Scorbit.
Select the Spike 2 Tab
The Spike 2 tab will display a screen with all the Spike 2 machines you have created in the mobile app on the left. Select the one that you are currently installing.
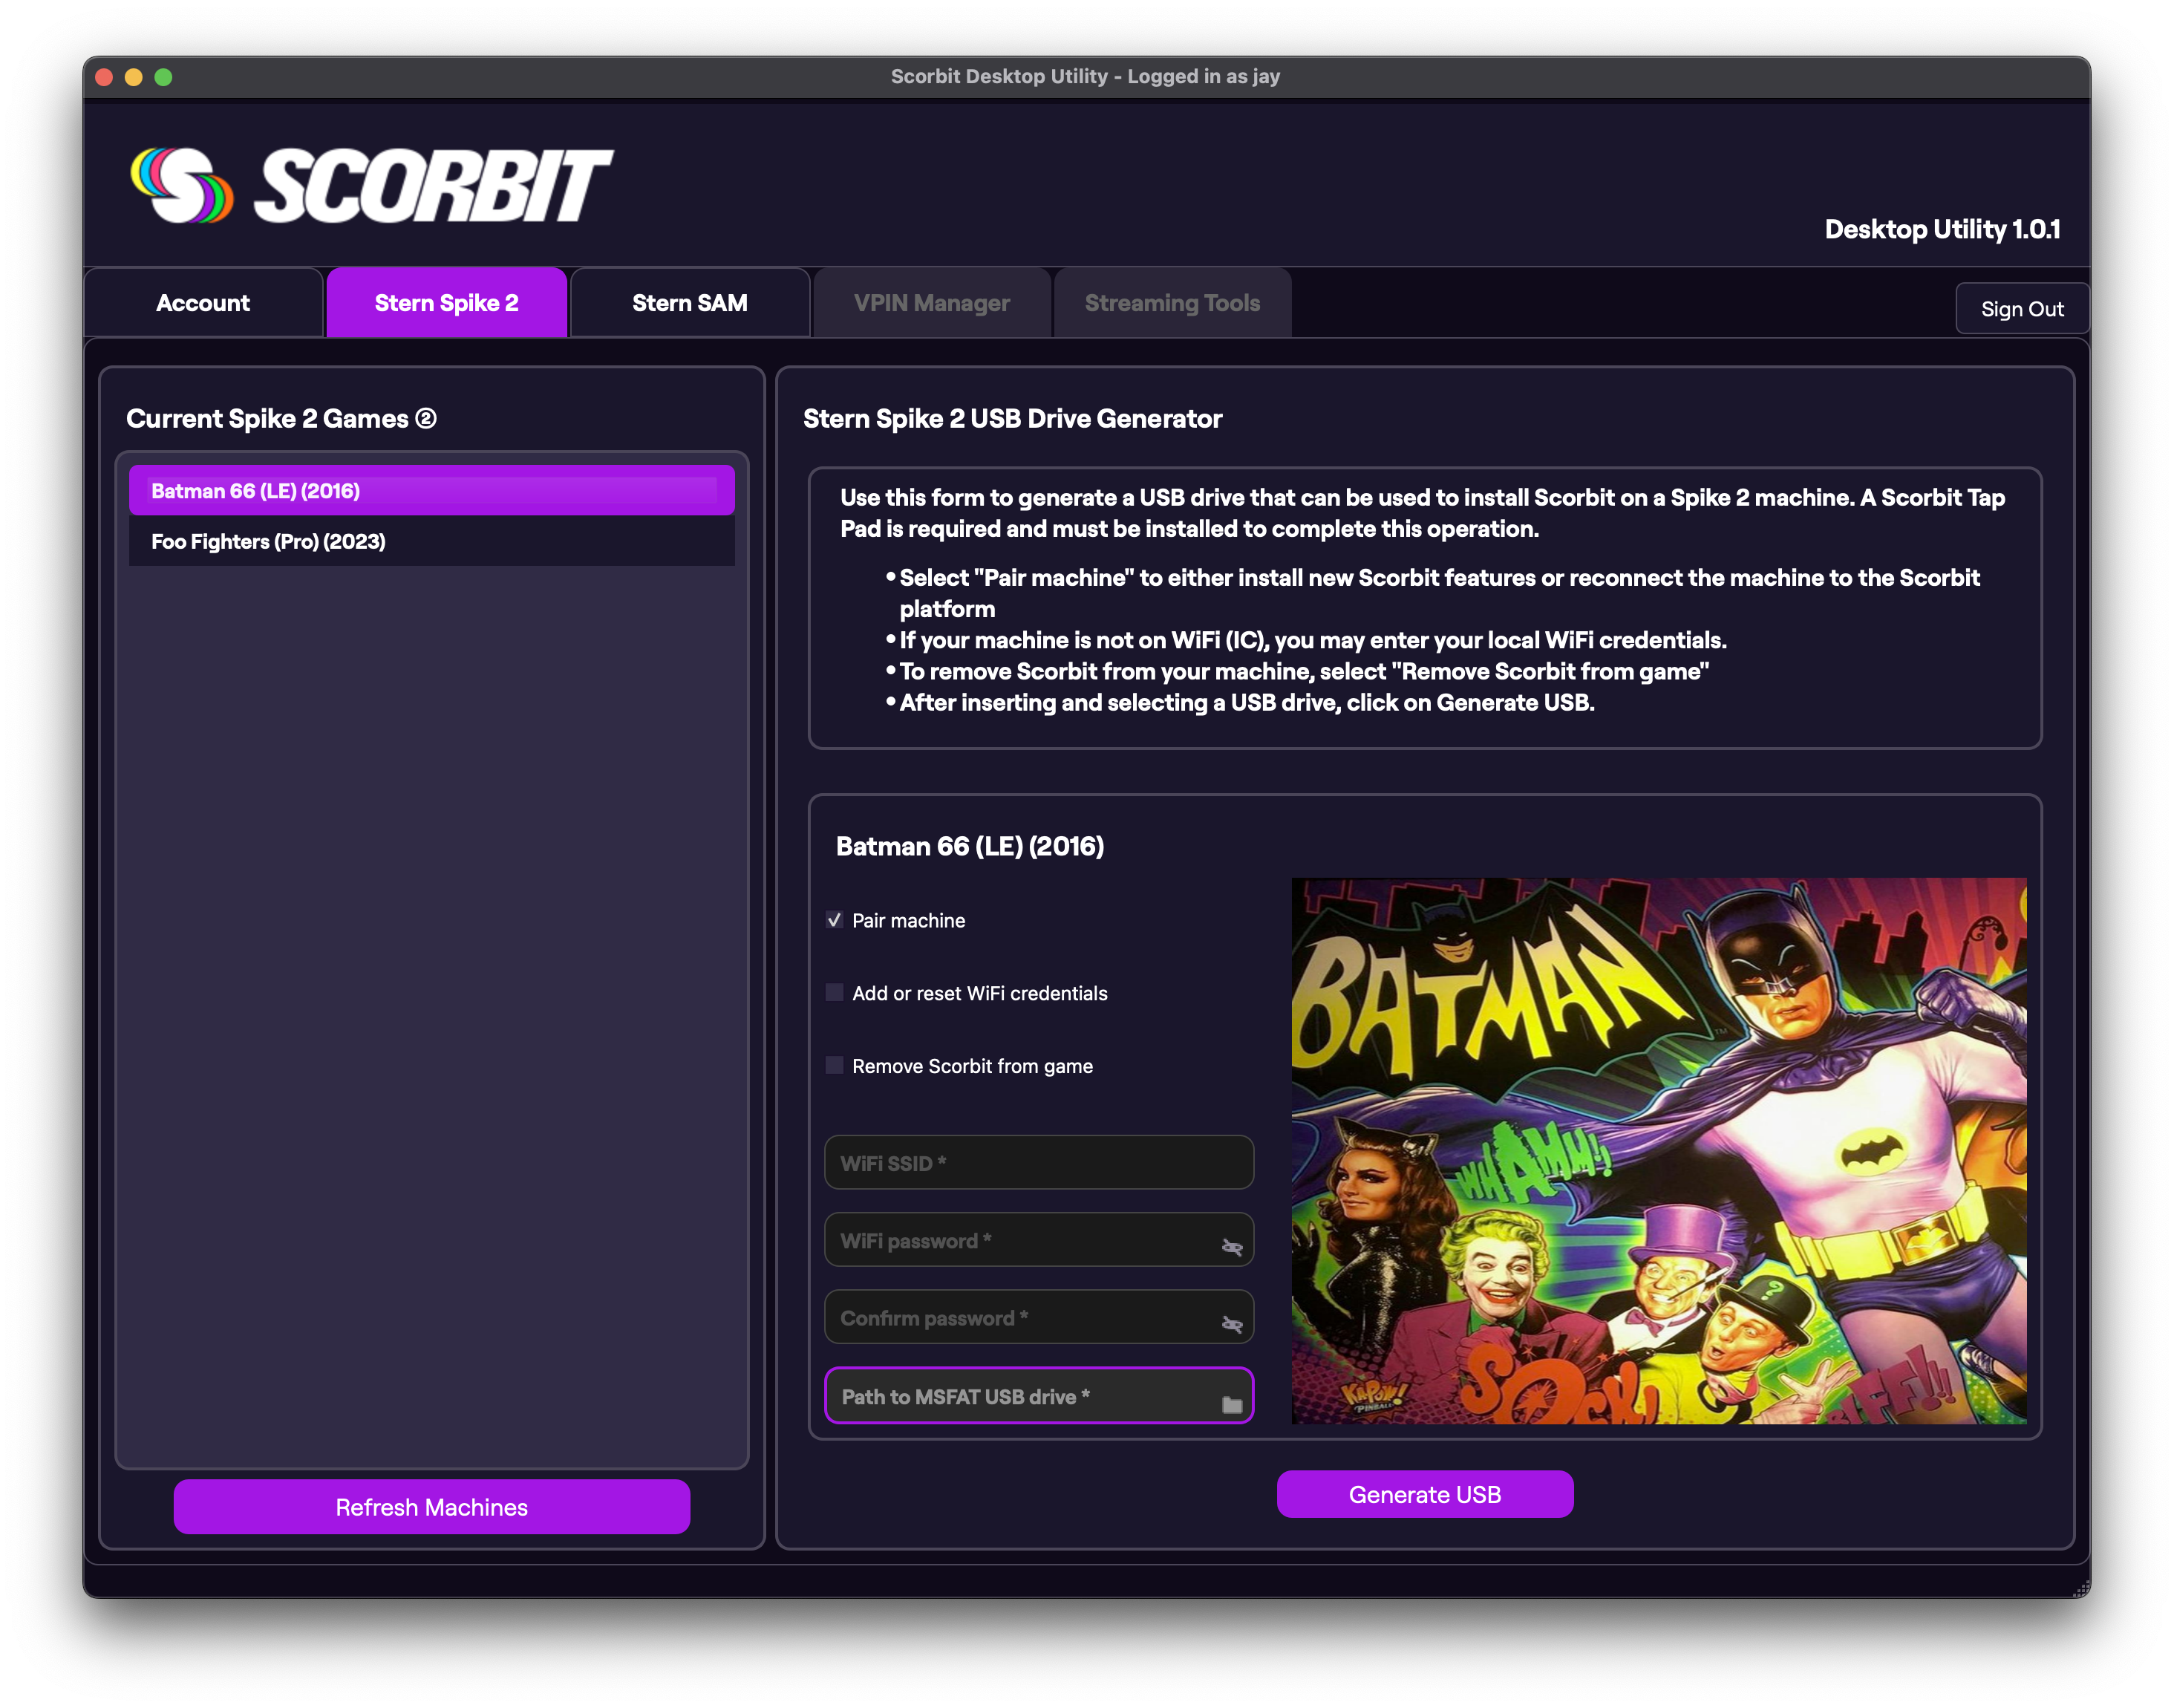
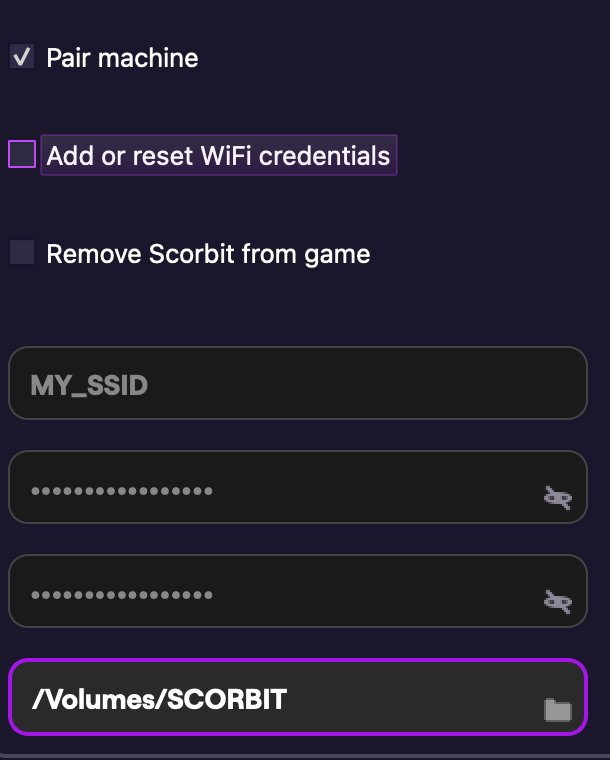
Prepare the USB Drive Options
The screen gives you multiple options:
Pair machine
If this machine is not already connected to Scorbit, always select Pair machine. If the machine had been previously connected, only select this if you need to perform a "re-pairing" to refresh the Scorbit configuration.
Add or reset WiFi credentials
For a machine that is already on Stern IC, there is no need to add WiFi, and this can be left unchecked. Only if the machine is not on IC, select this option and enter your local WiFi SSID and password. If at a later time you need to change the WiFi credentials, such as a new WiFi network, and you are not using Stern IC menu, you can leave Pair machine unchecked and check this option, and only the WiFi info will be updated.
Tip
Scorbit can work perfectly alongside Stern Insider Connected. If you have the option, we recommend that you use the built-in WiFi network menu on the Stern machine to connect to your local WiFi before installing Scorbit.
Warning
If you use Stern Insider Connected, be aware that Stern offers you the useful feature of auto-updating your game code when Stern makes it available. When enabled, as Stern code updates are downloaded and installed, Scorbit may stop working until a compatible Scorbit update is processed automatically. Please be aware that Scorbit works to get these compatibility updates installed as soon as possible. If this lag time concerns you, we recommend disabling your Stern auto-update feature and checking on the Scorbit Discord for announcements when the updates become available before manually triggering updates to your Stern game code.
Remove Scorbit from game
If the machine currently has Scorbit installed and you wish to remove it, select this option.
Connect USB Drive to Computer
Insert a blank USB drive (we recommend using a 16GB or greater USB drive) into your computer using the folder icon. Note that all information on this drive will be removed in the next step!
Generate USB
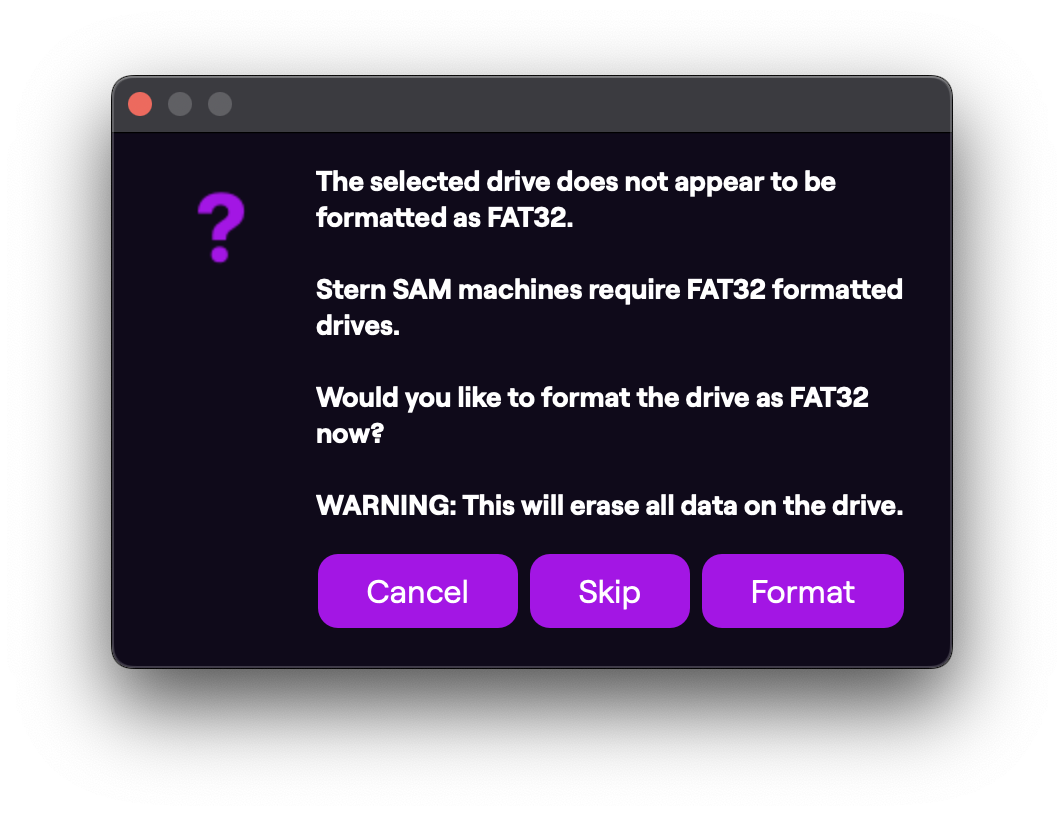
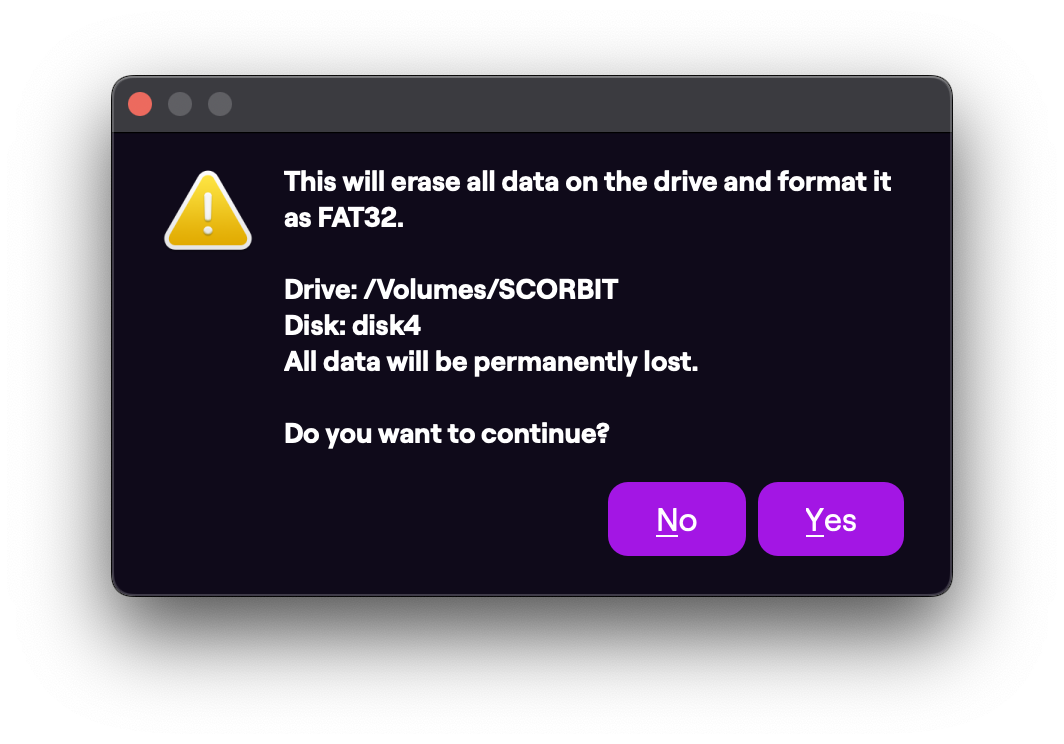
When ready, select the Generate USB function. The application will now check the drive for compatibility. If the drive needs to be reformatted for FAT-32, it will ask you to perform this action, and will wipe the USB drive of all data.


It will then prepare and copy the necessary files to the USB drive.


Once complete, eject the USB drive and move on to the next step.
Install Scorbit on Machine
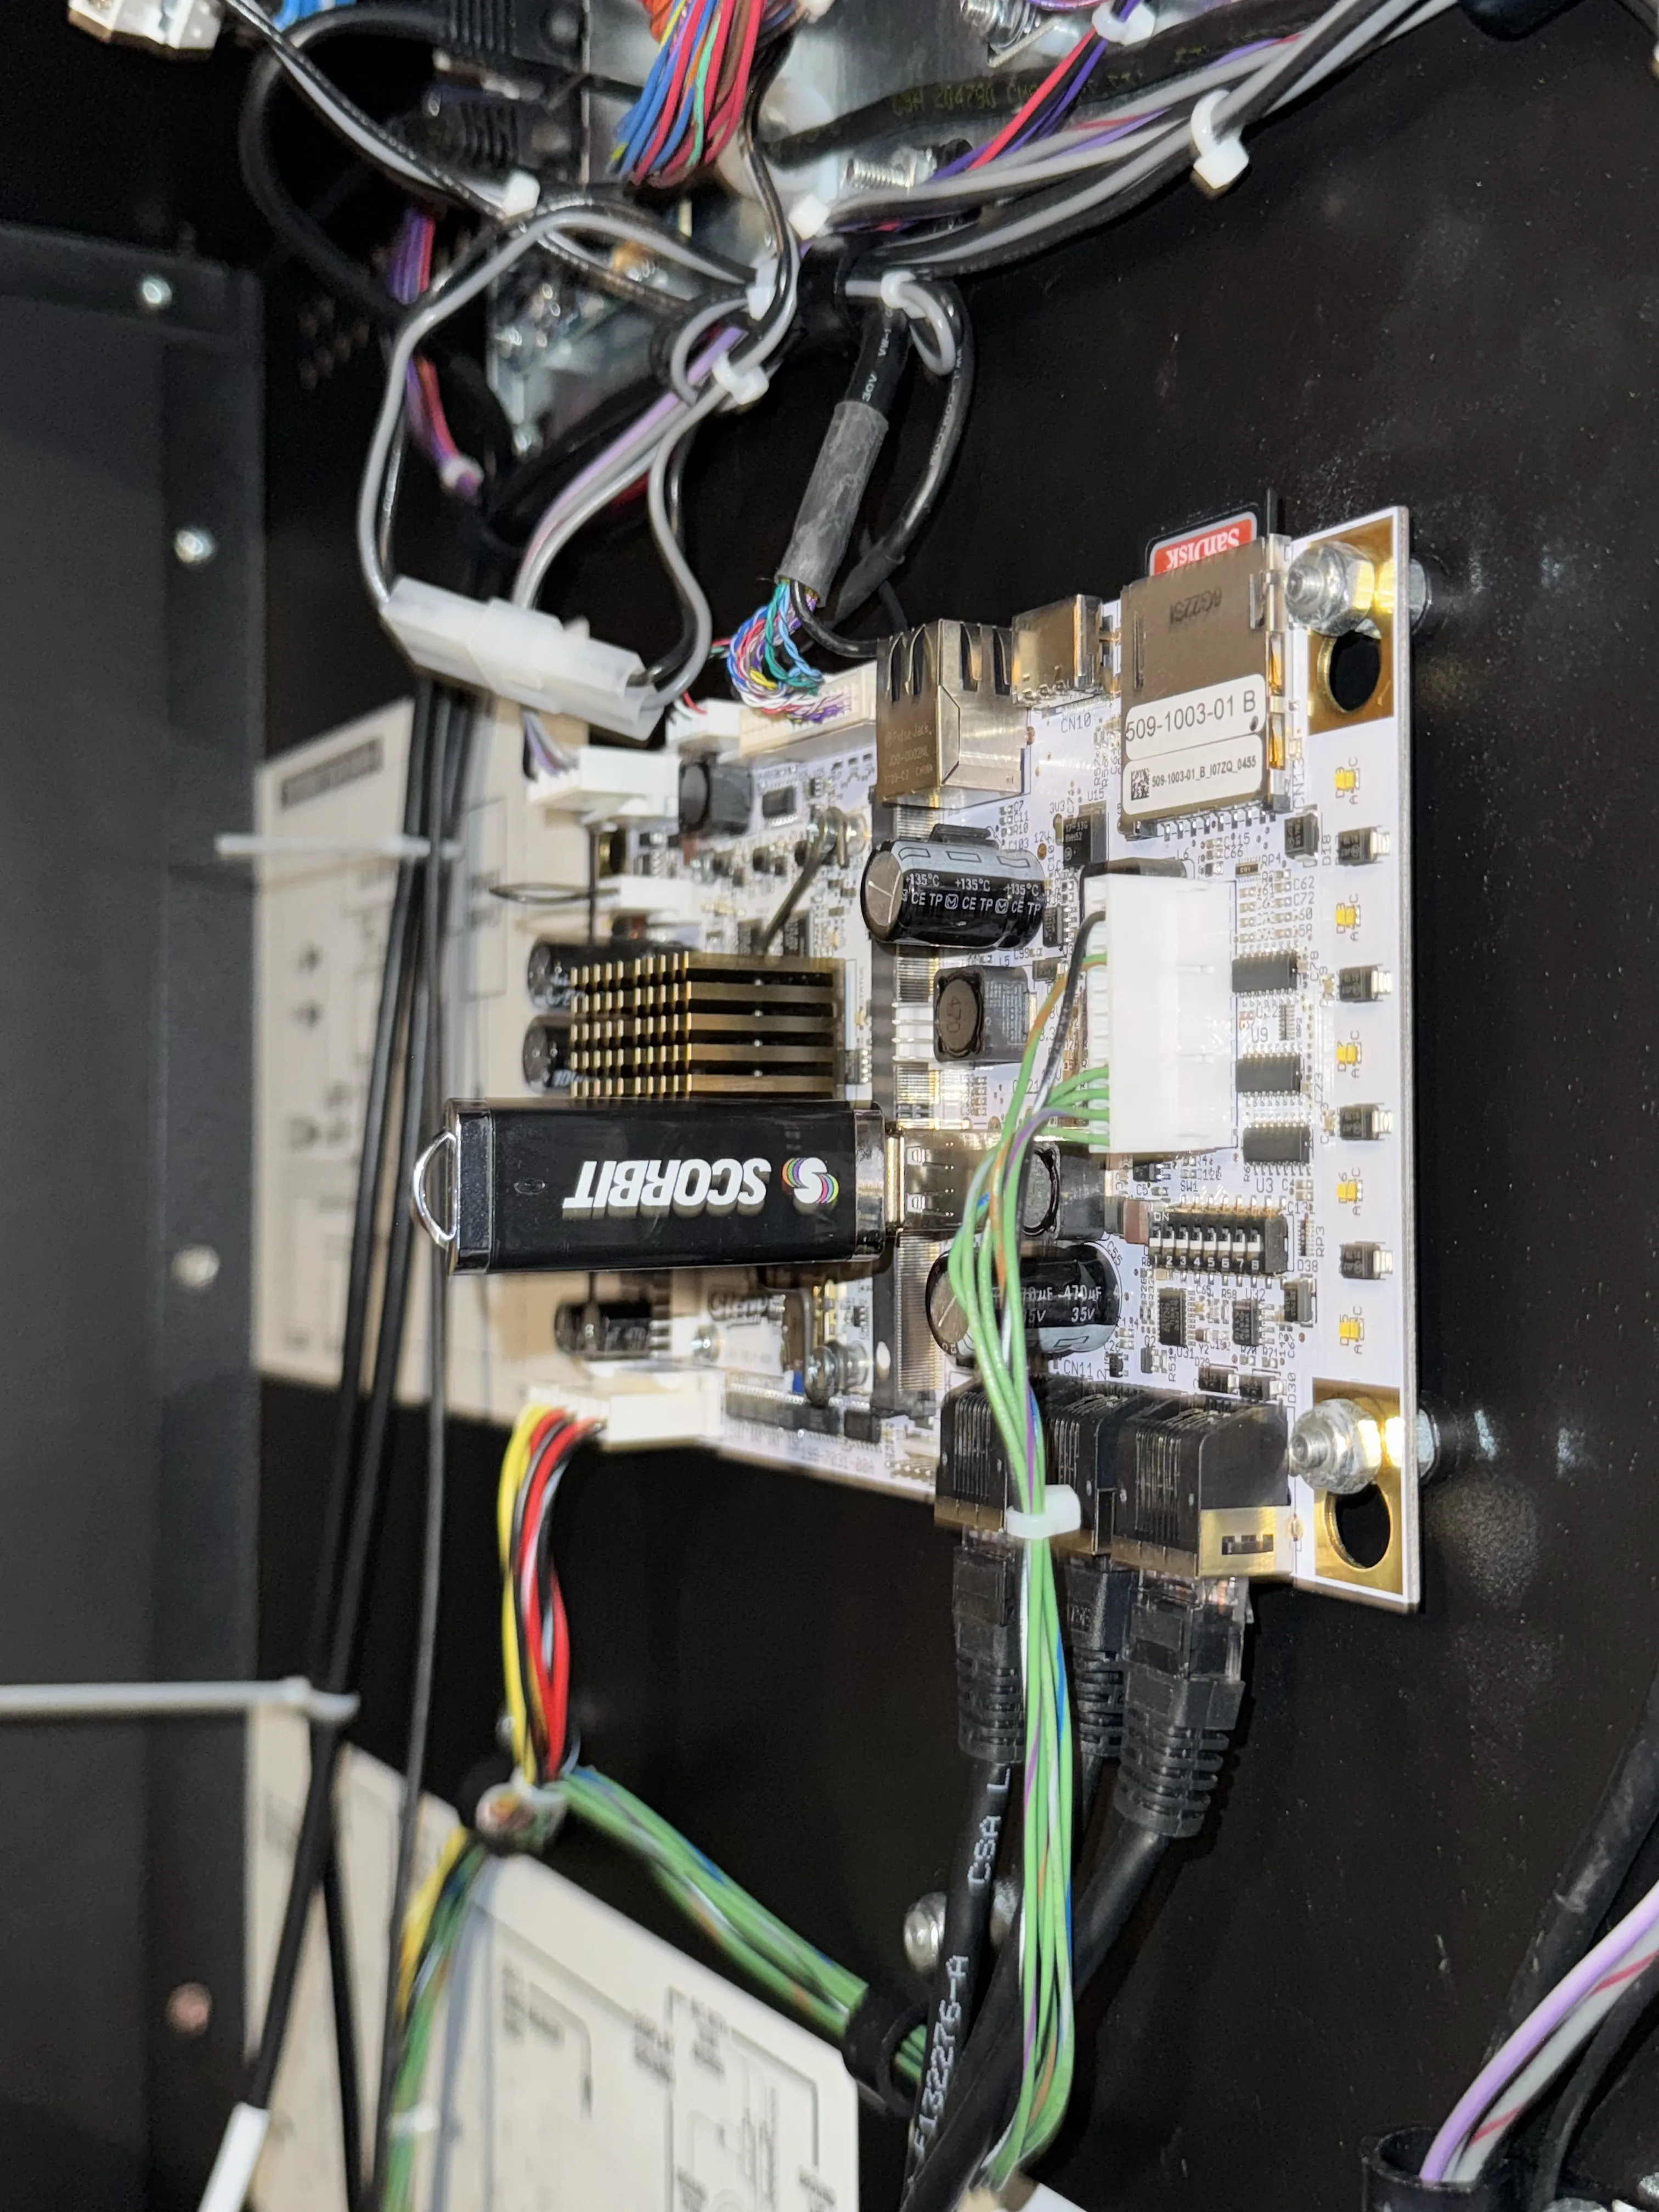
Power down your [machine_type_short] and remove the backglass. Unplug the Scorbit Tap Pad fron the MPU USB port. Insert your new USB flash drive into the port along side the WiFi dongle currently installed.
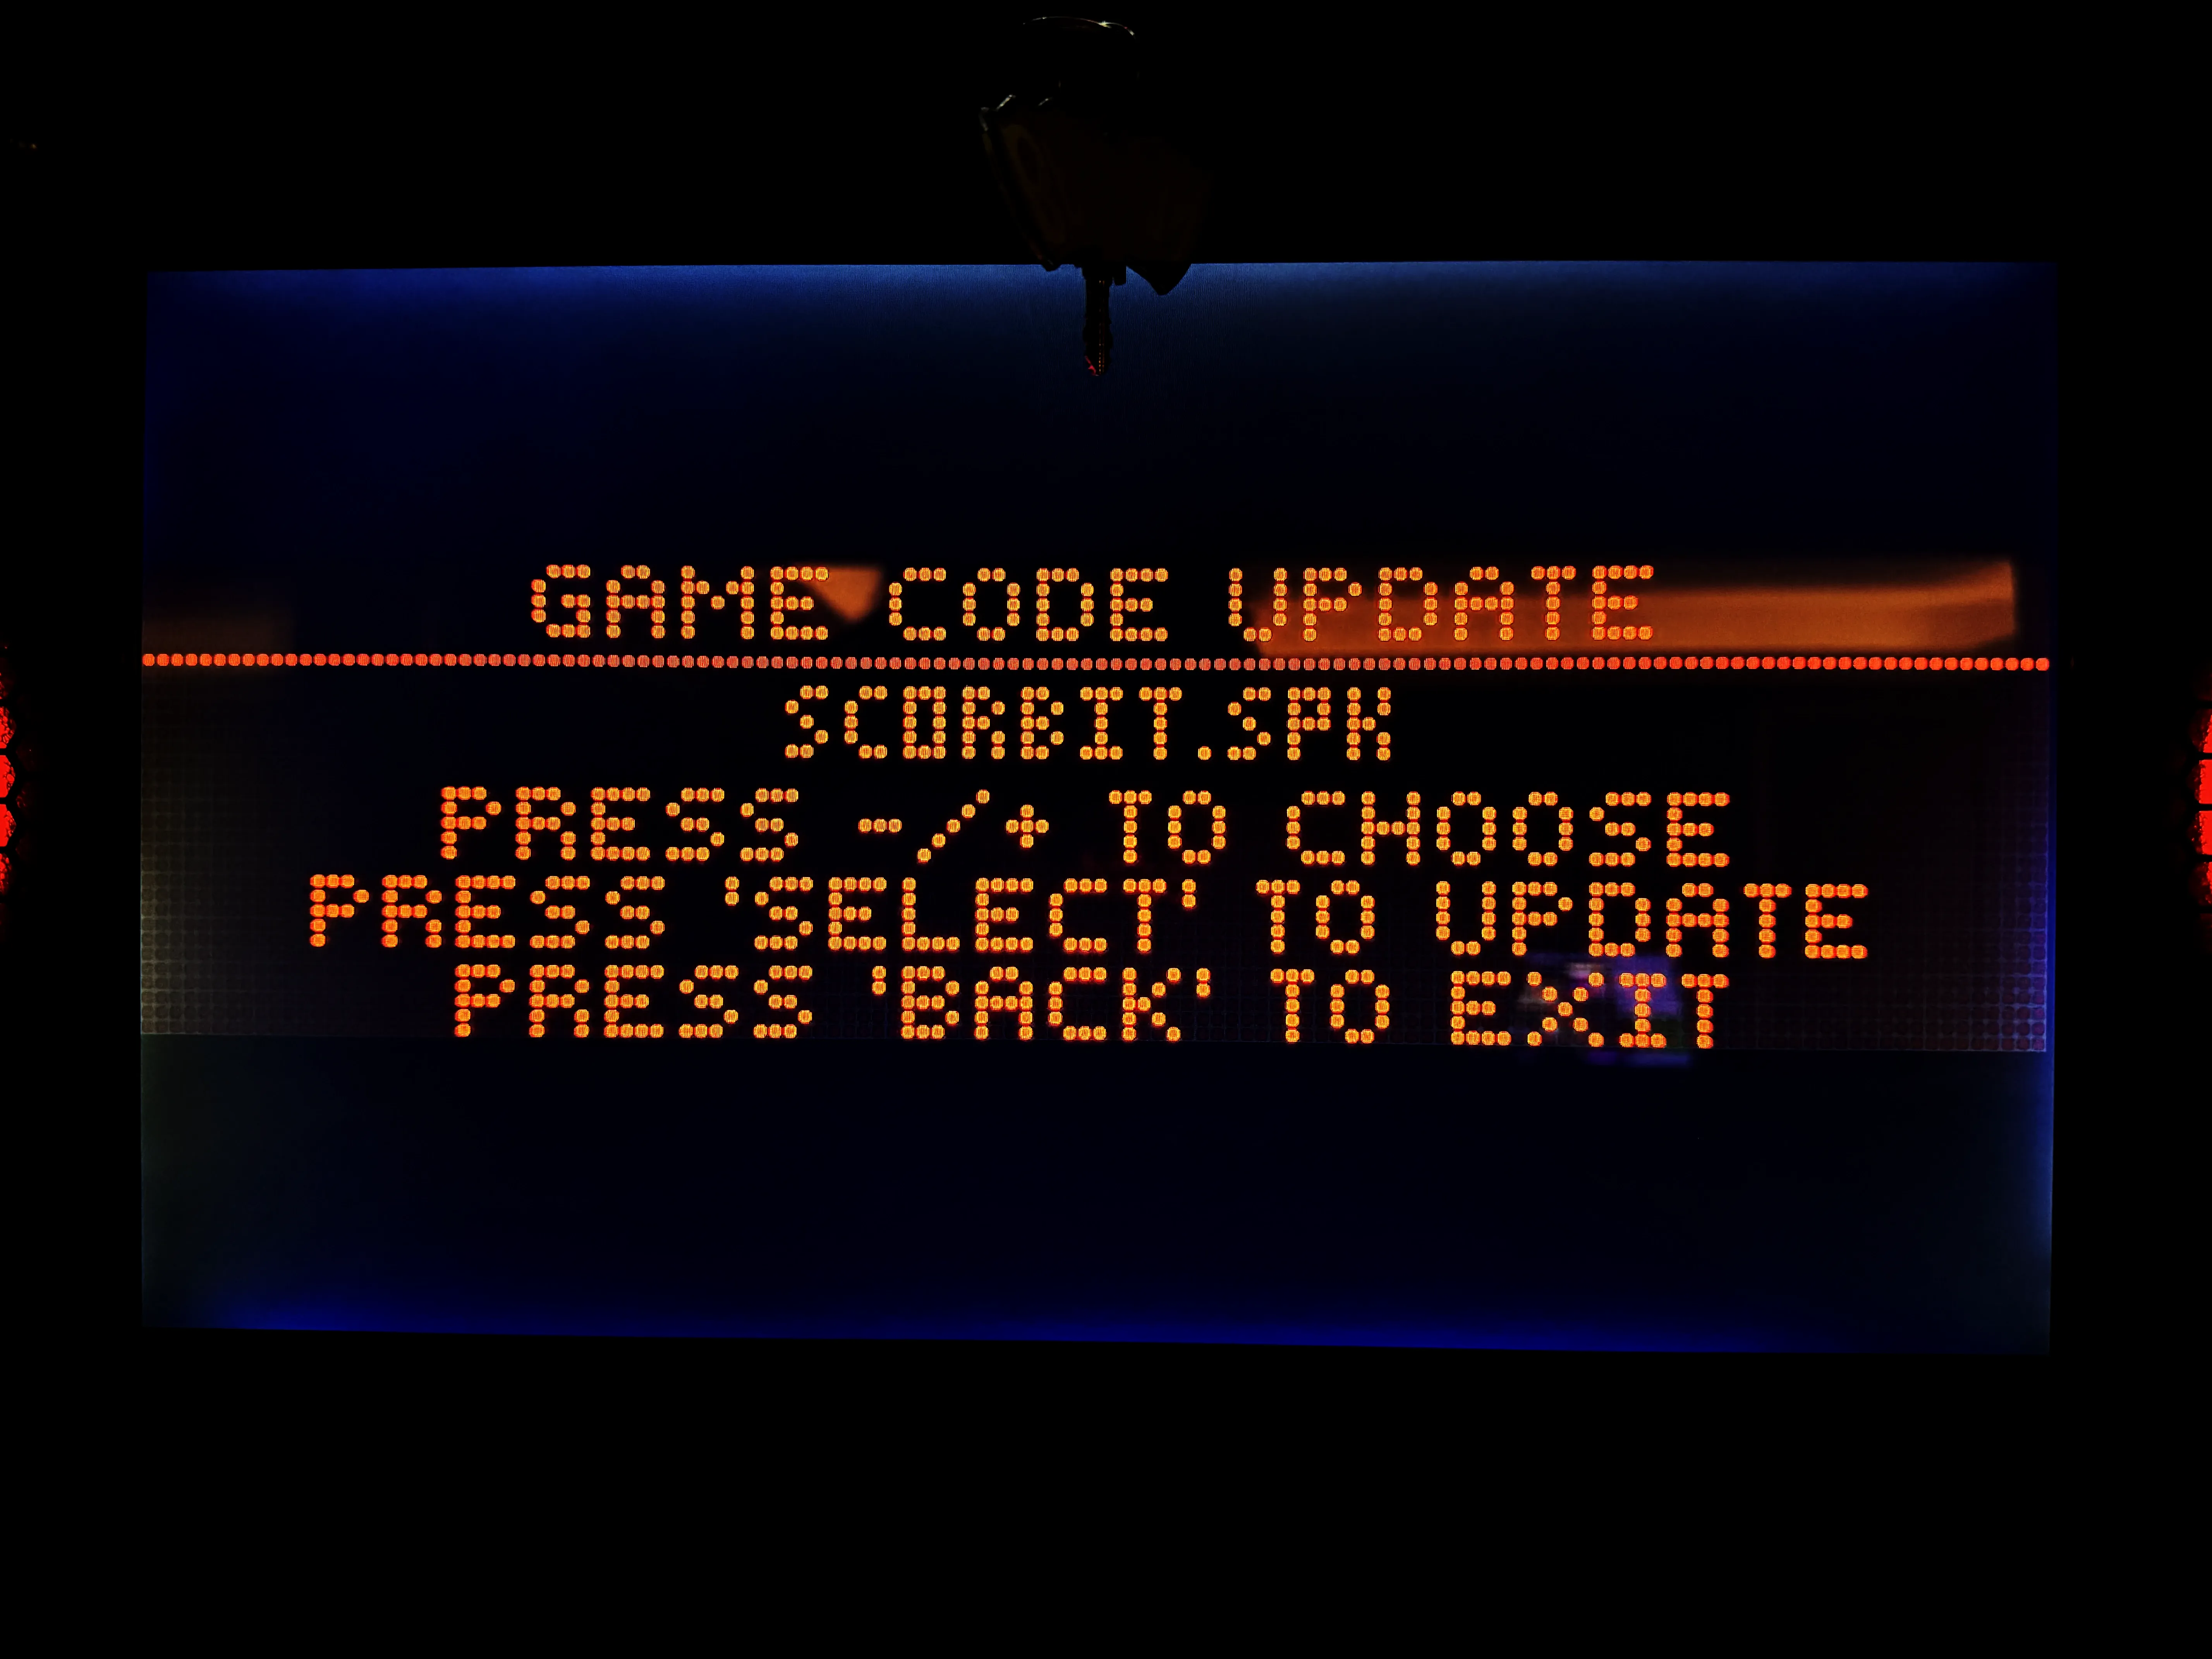
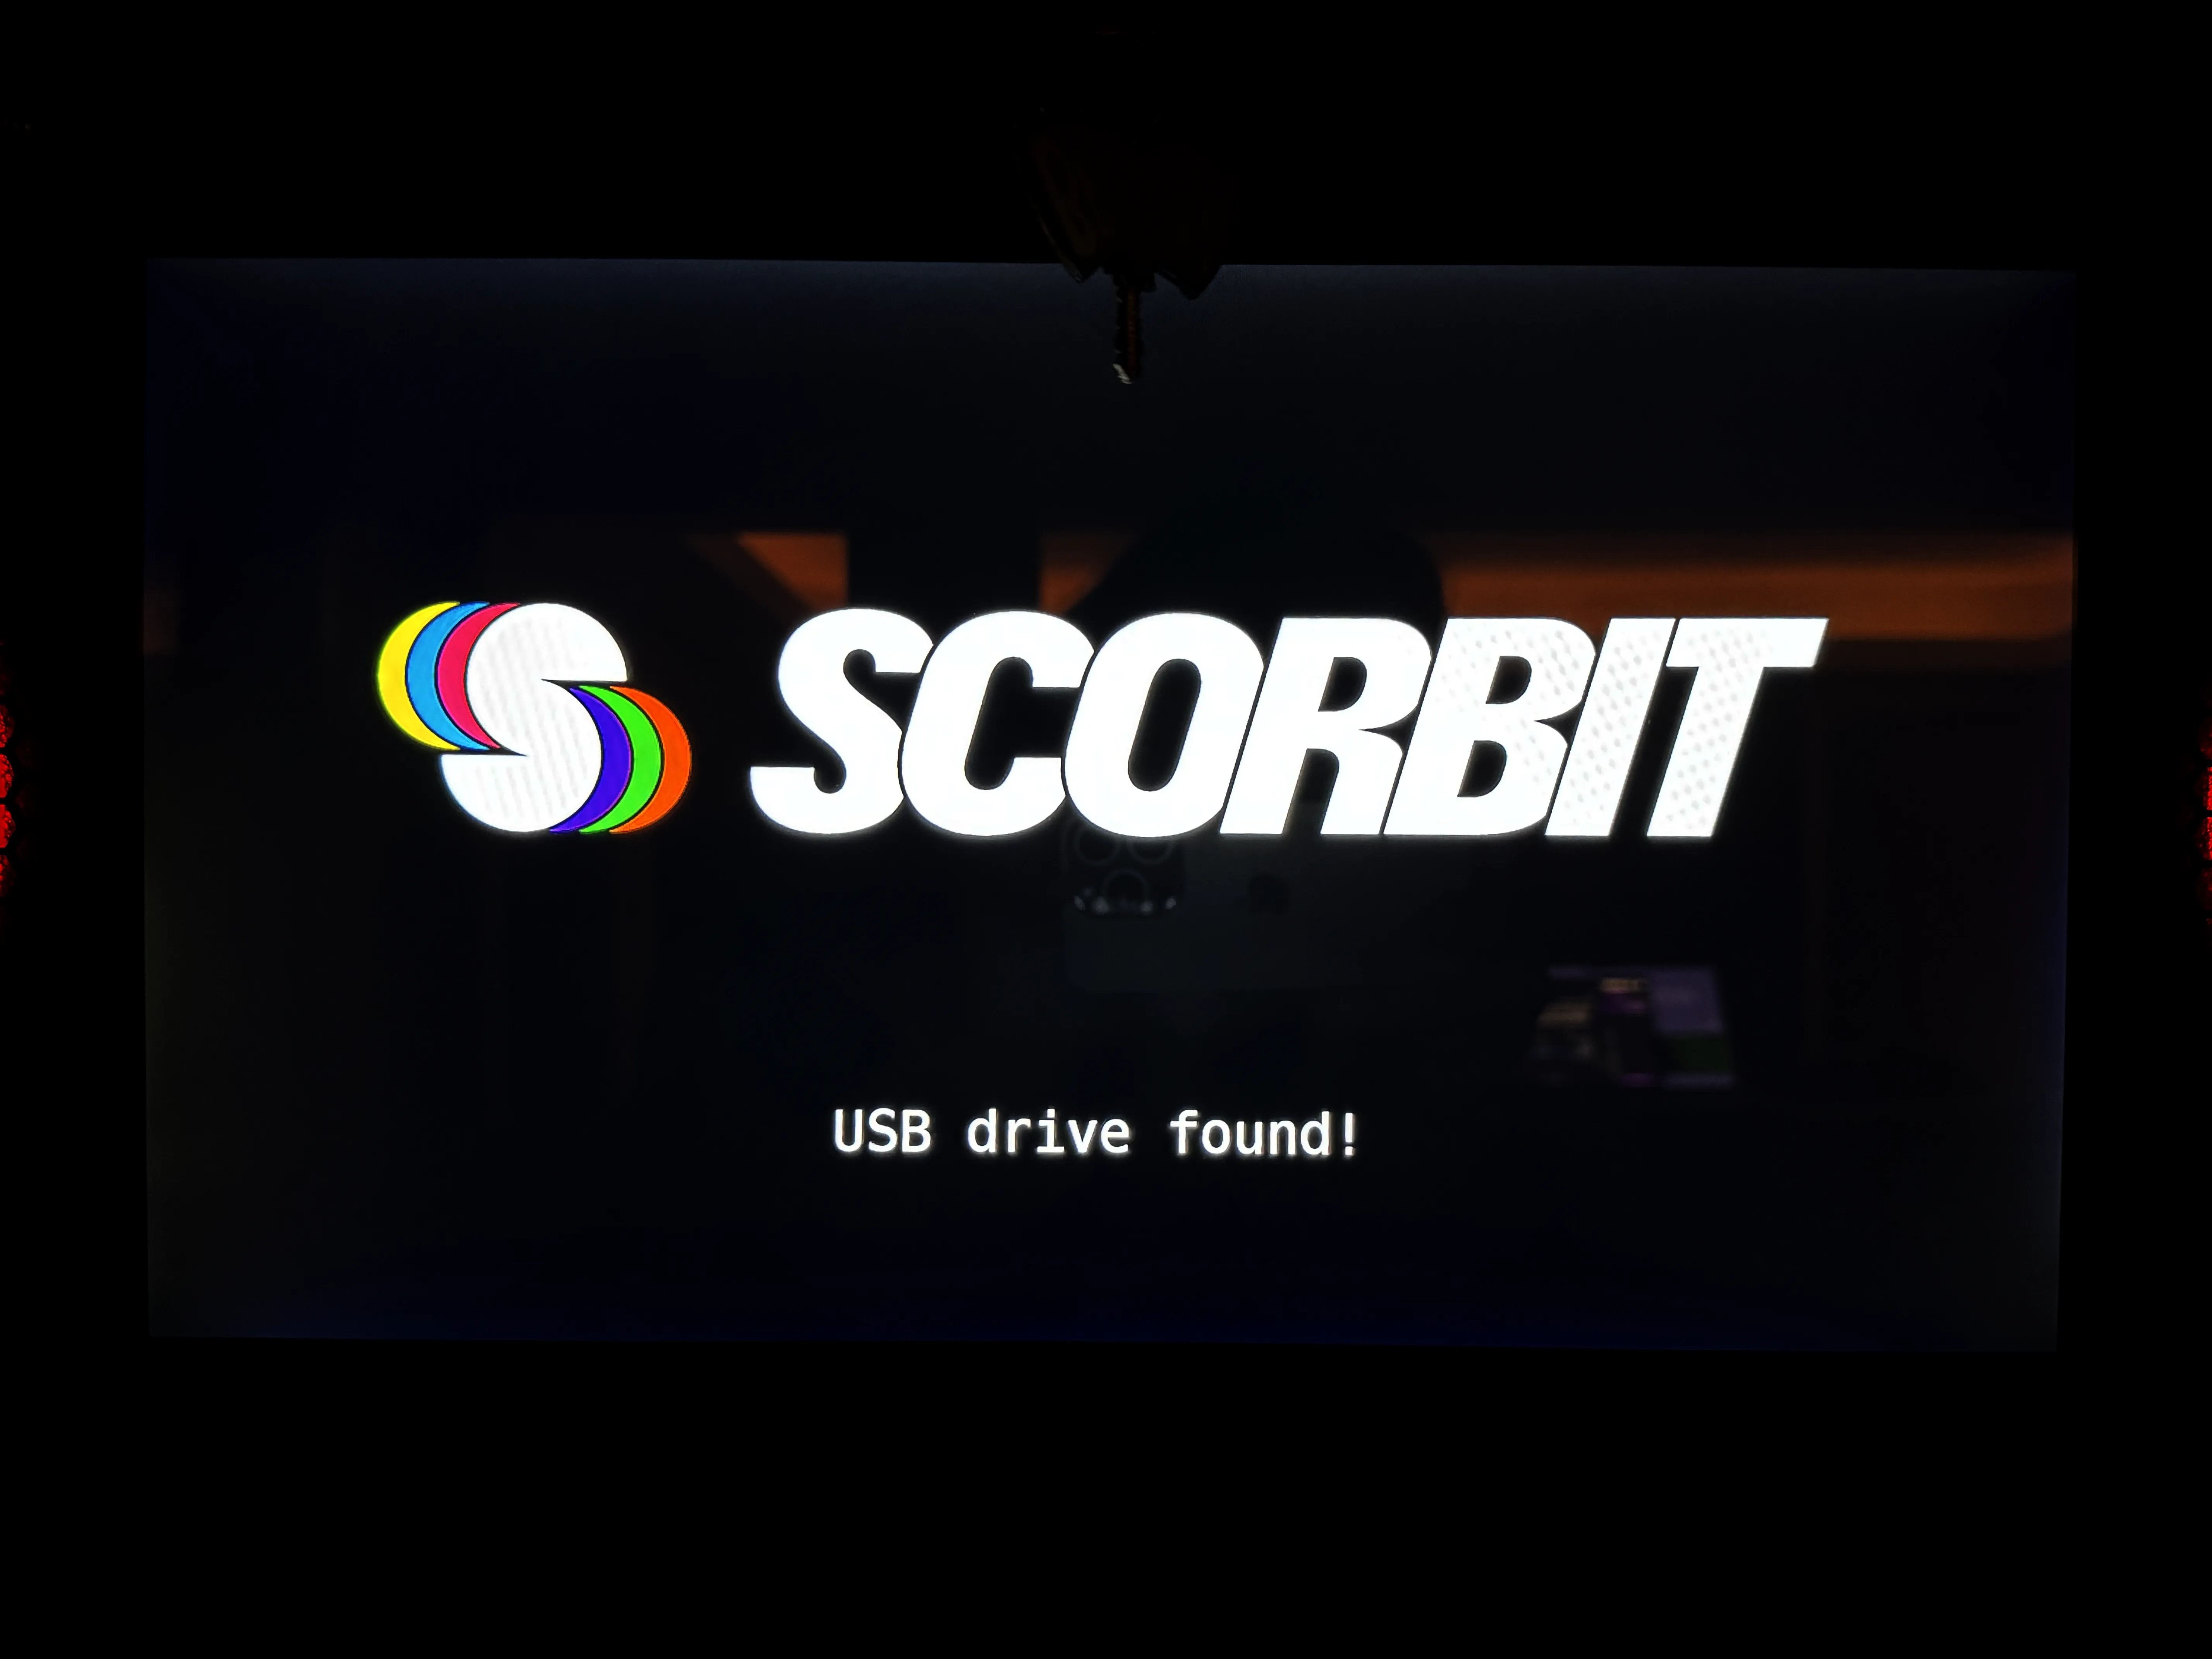
With the USB drive inserted, power up the machine. The screen will tell you to hit select on using the coin door select button. Select the SCORBIT.SPK.
The machine will load the Scorbit files, and ask you to verify. Use the select button again to confirm.
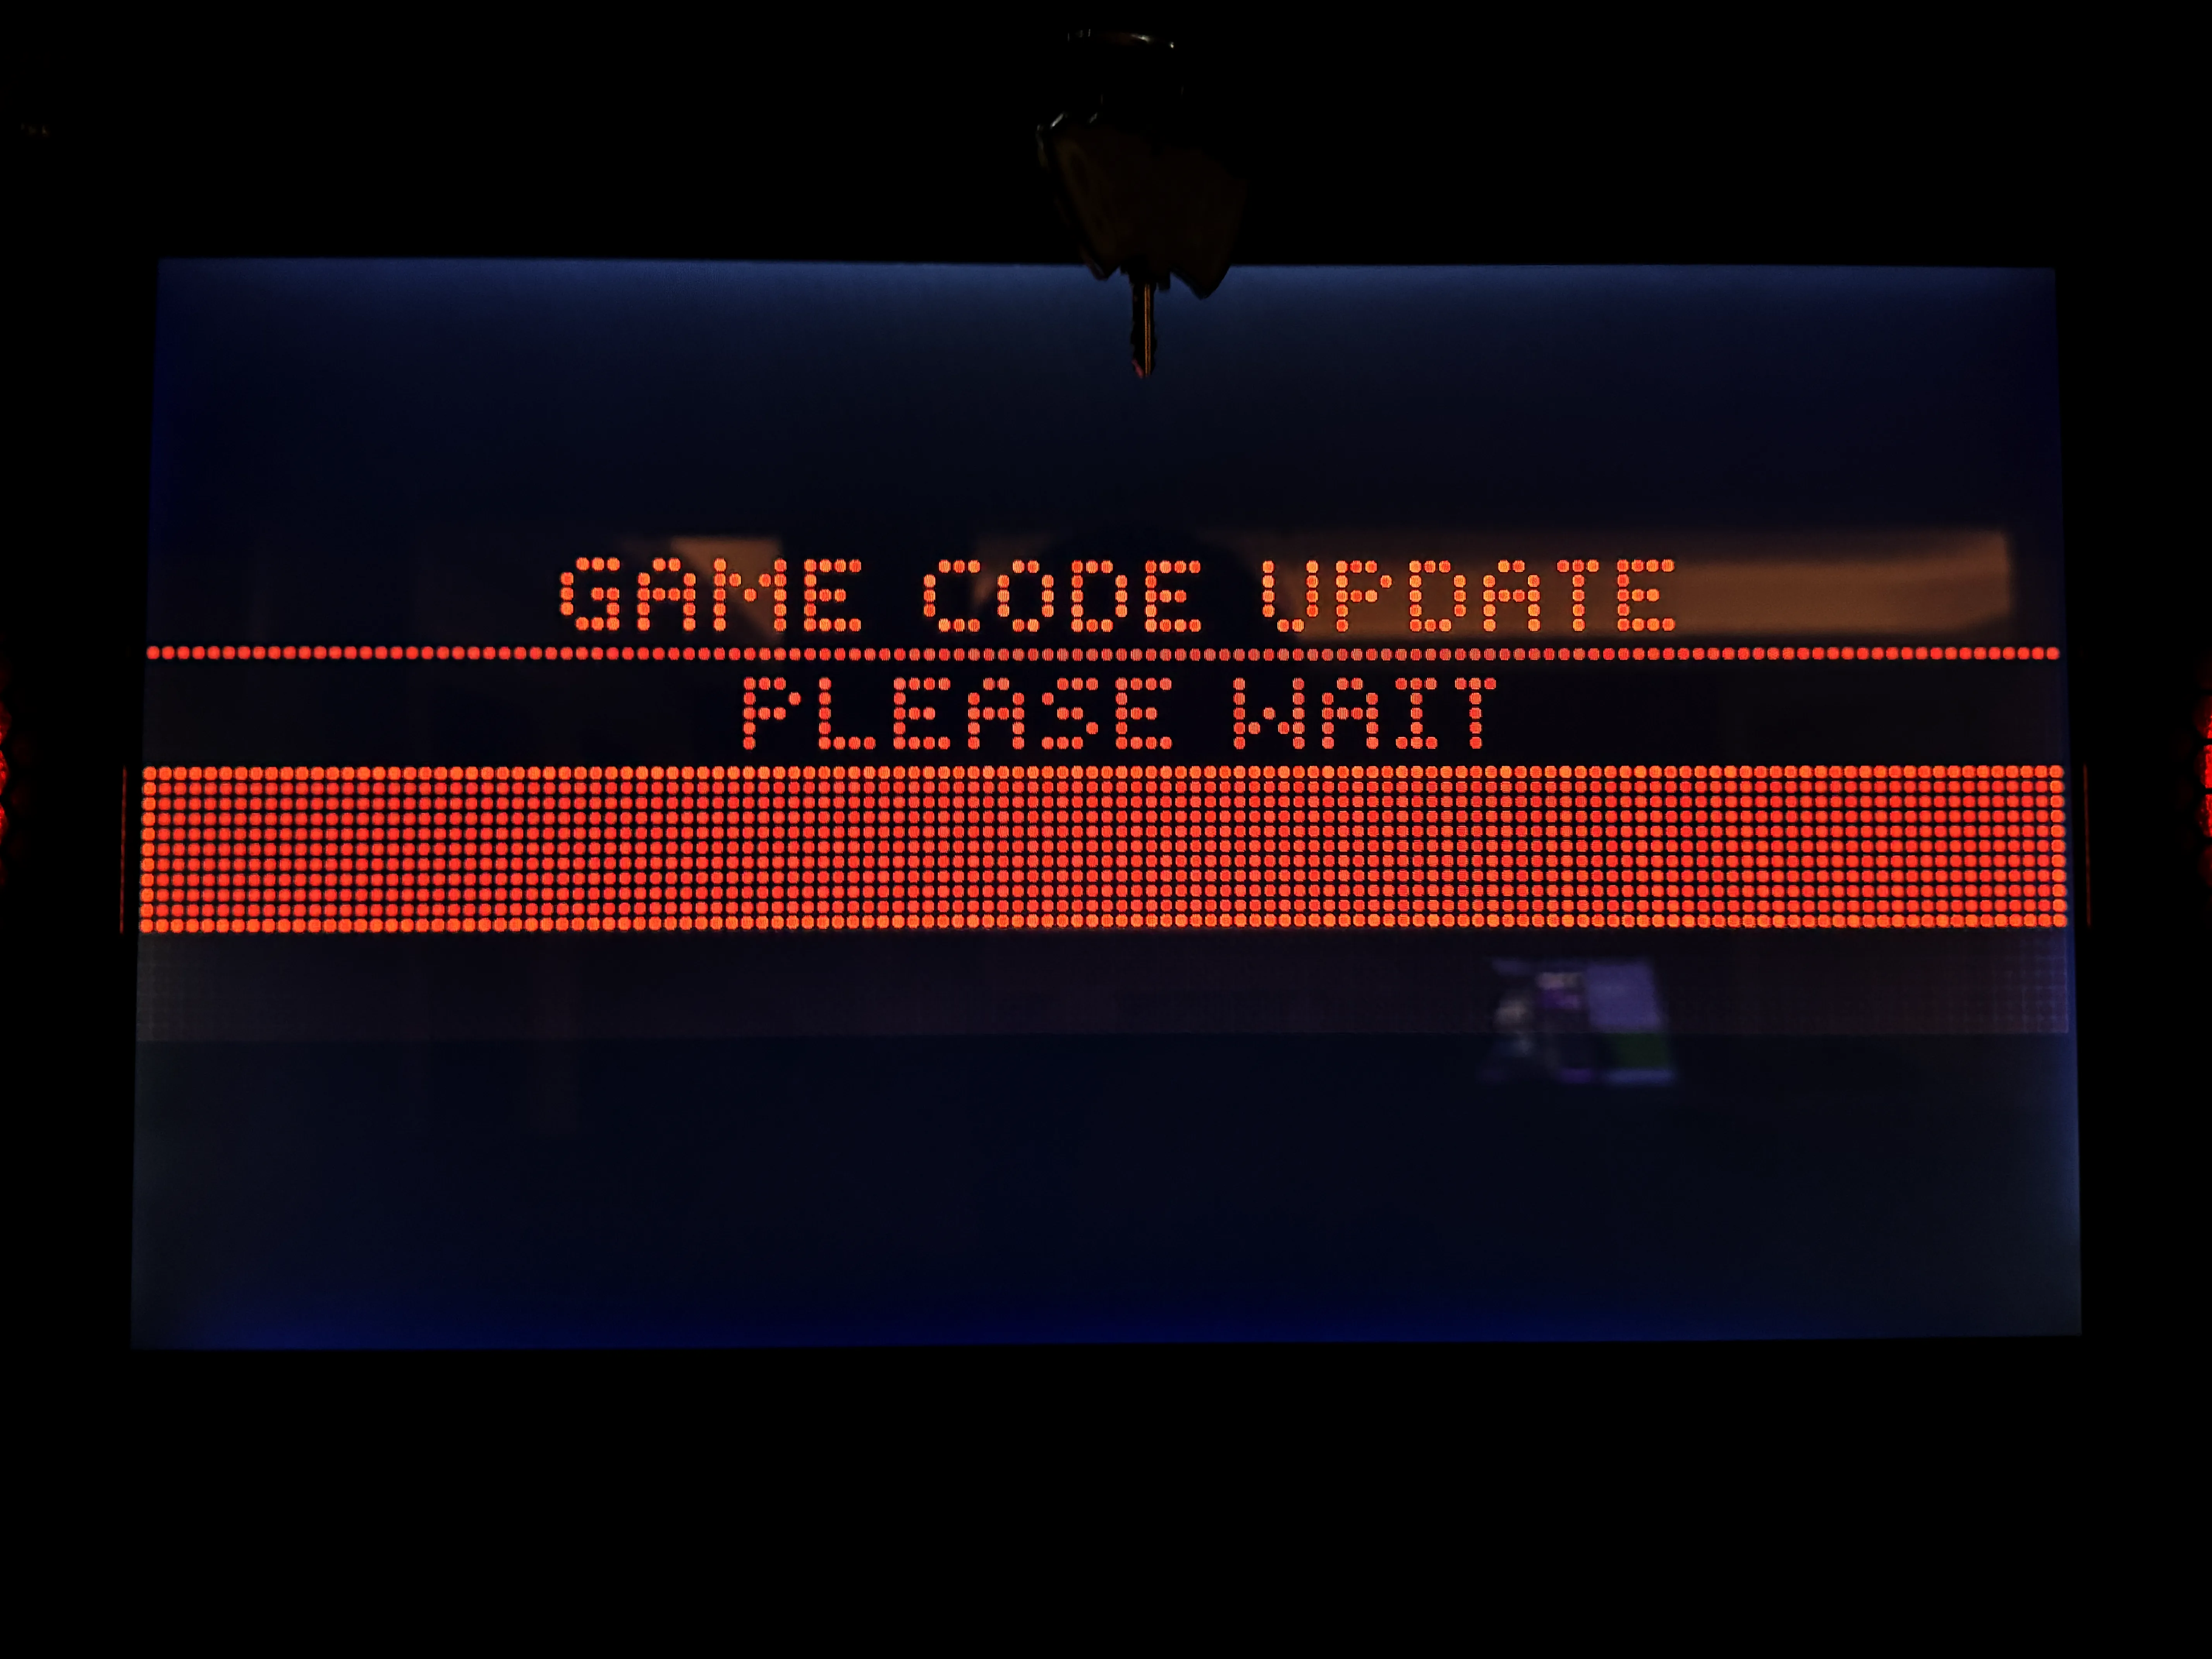

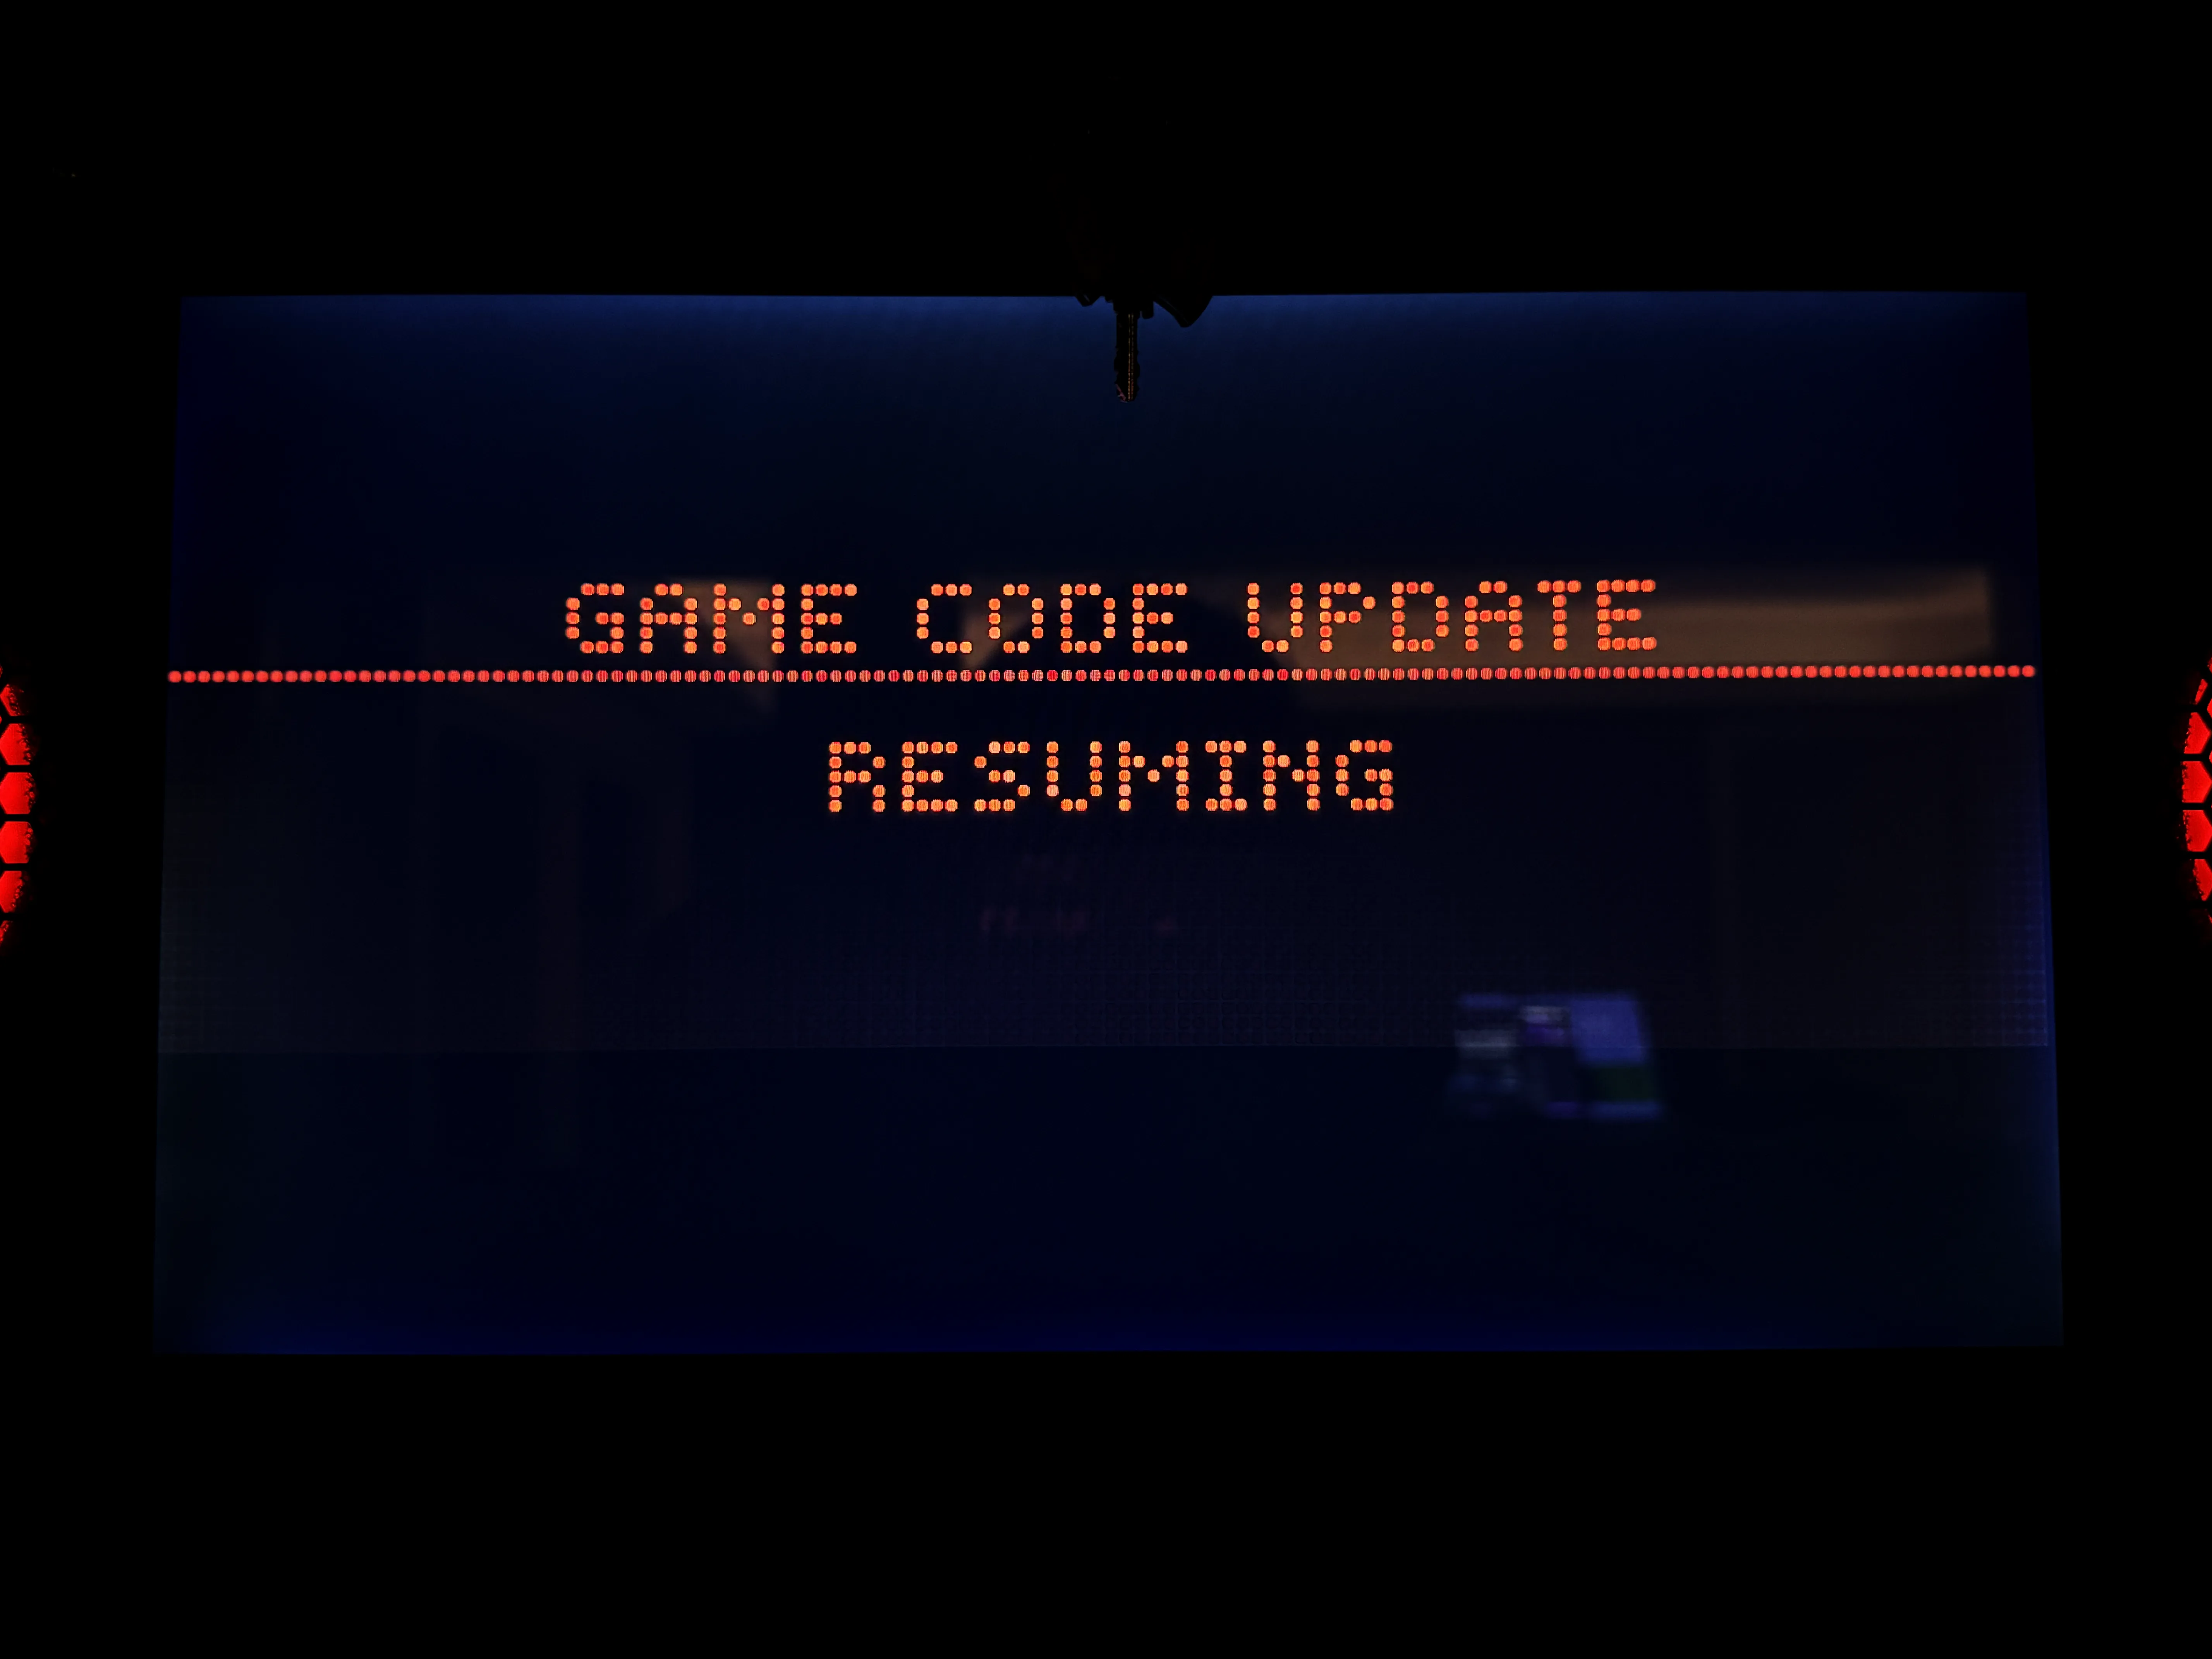
During the file transfer, the machine will restart the file loader, indicate that it is resuming.
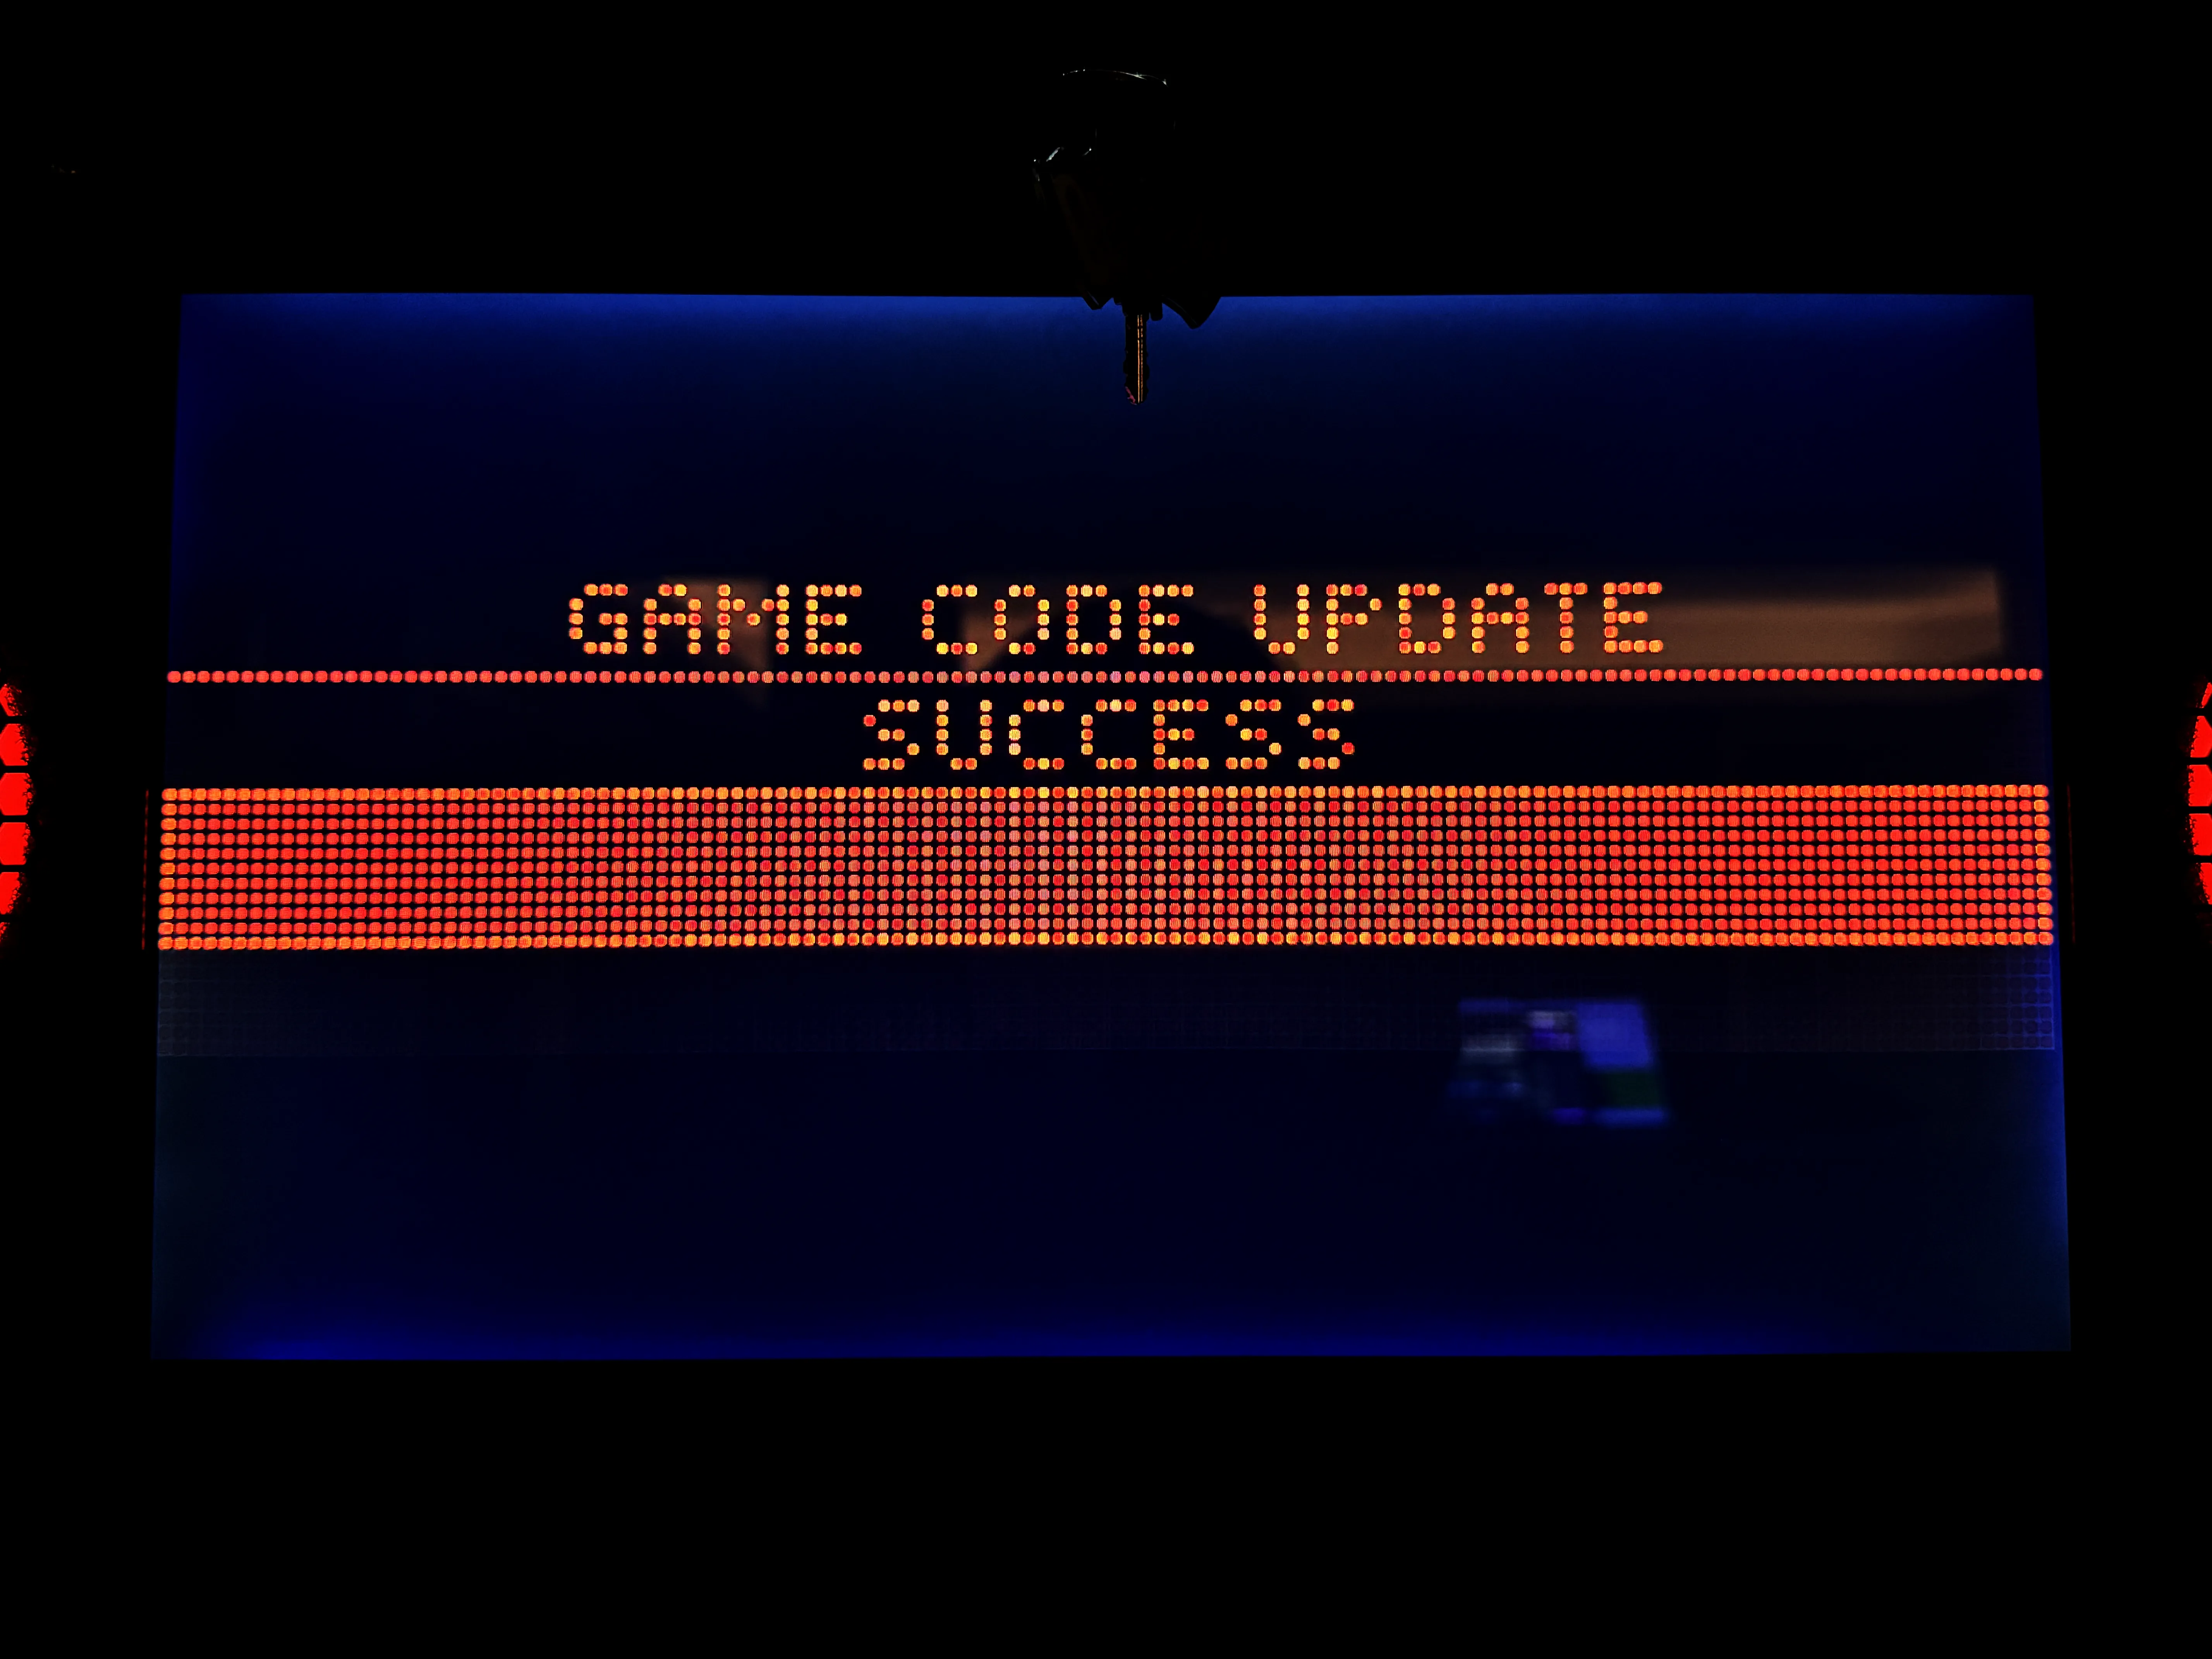
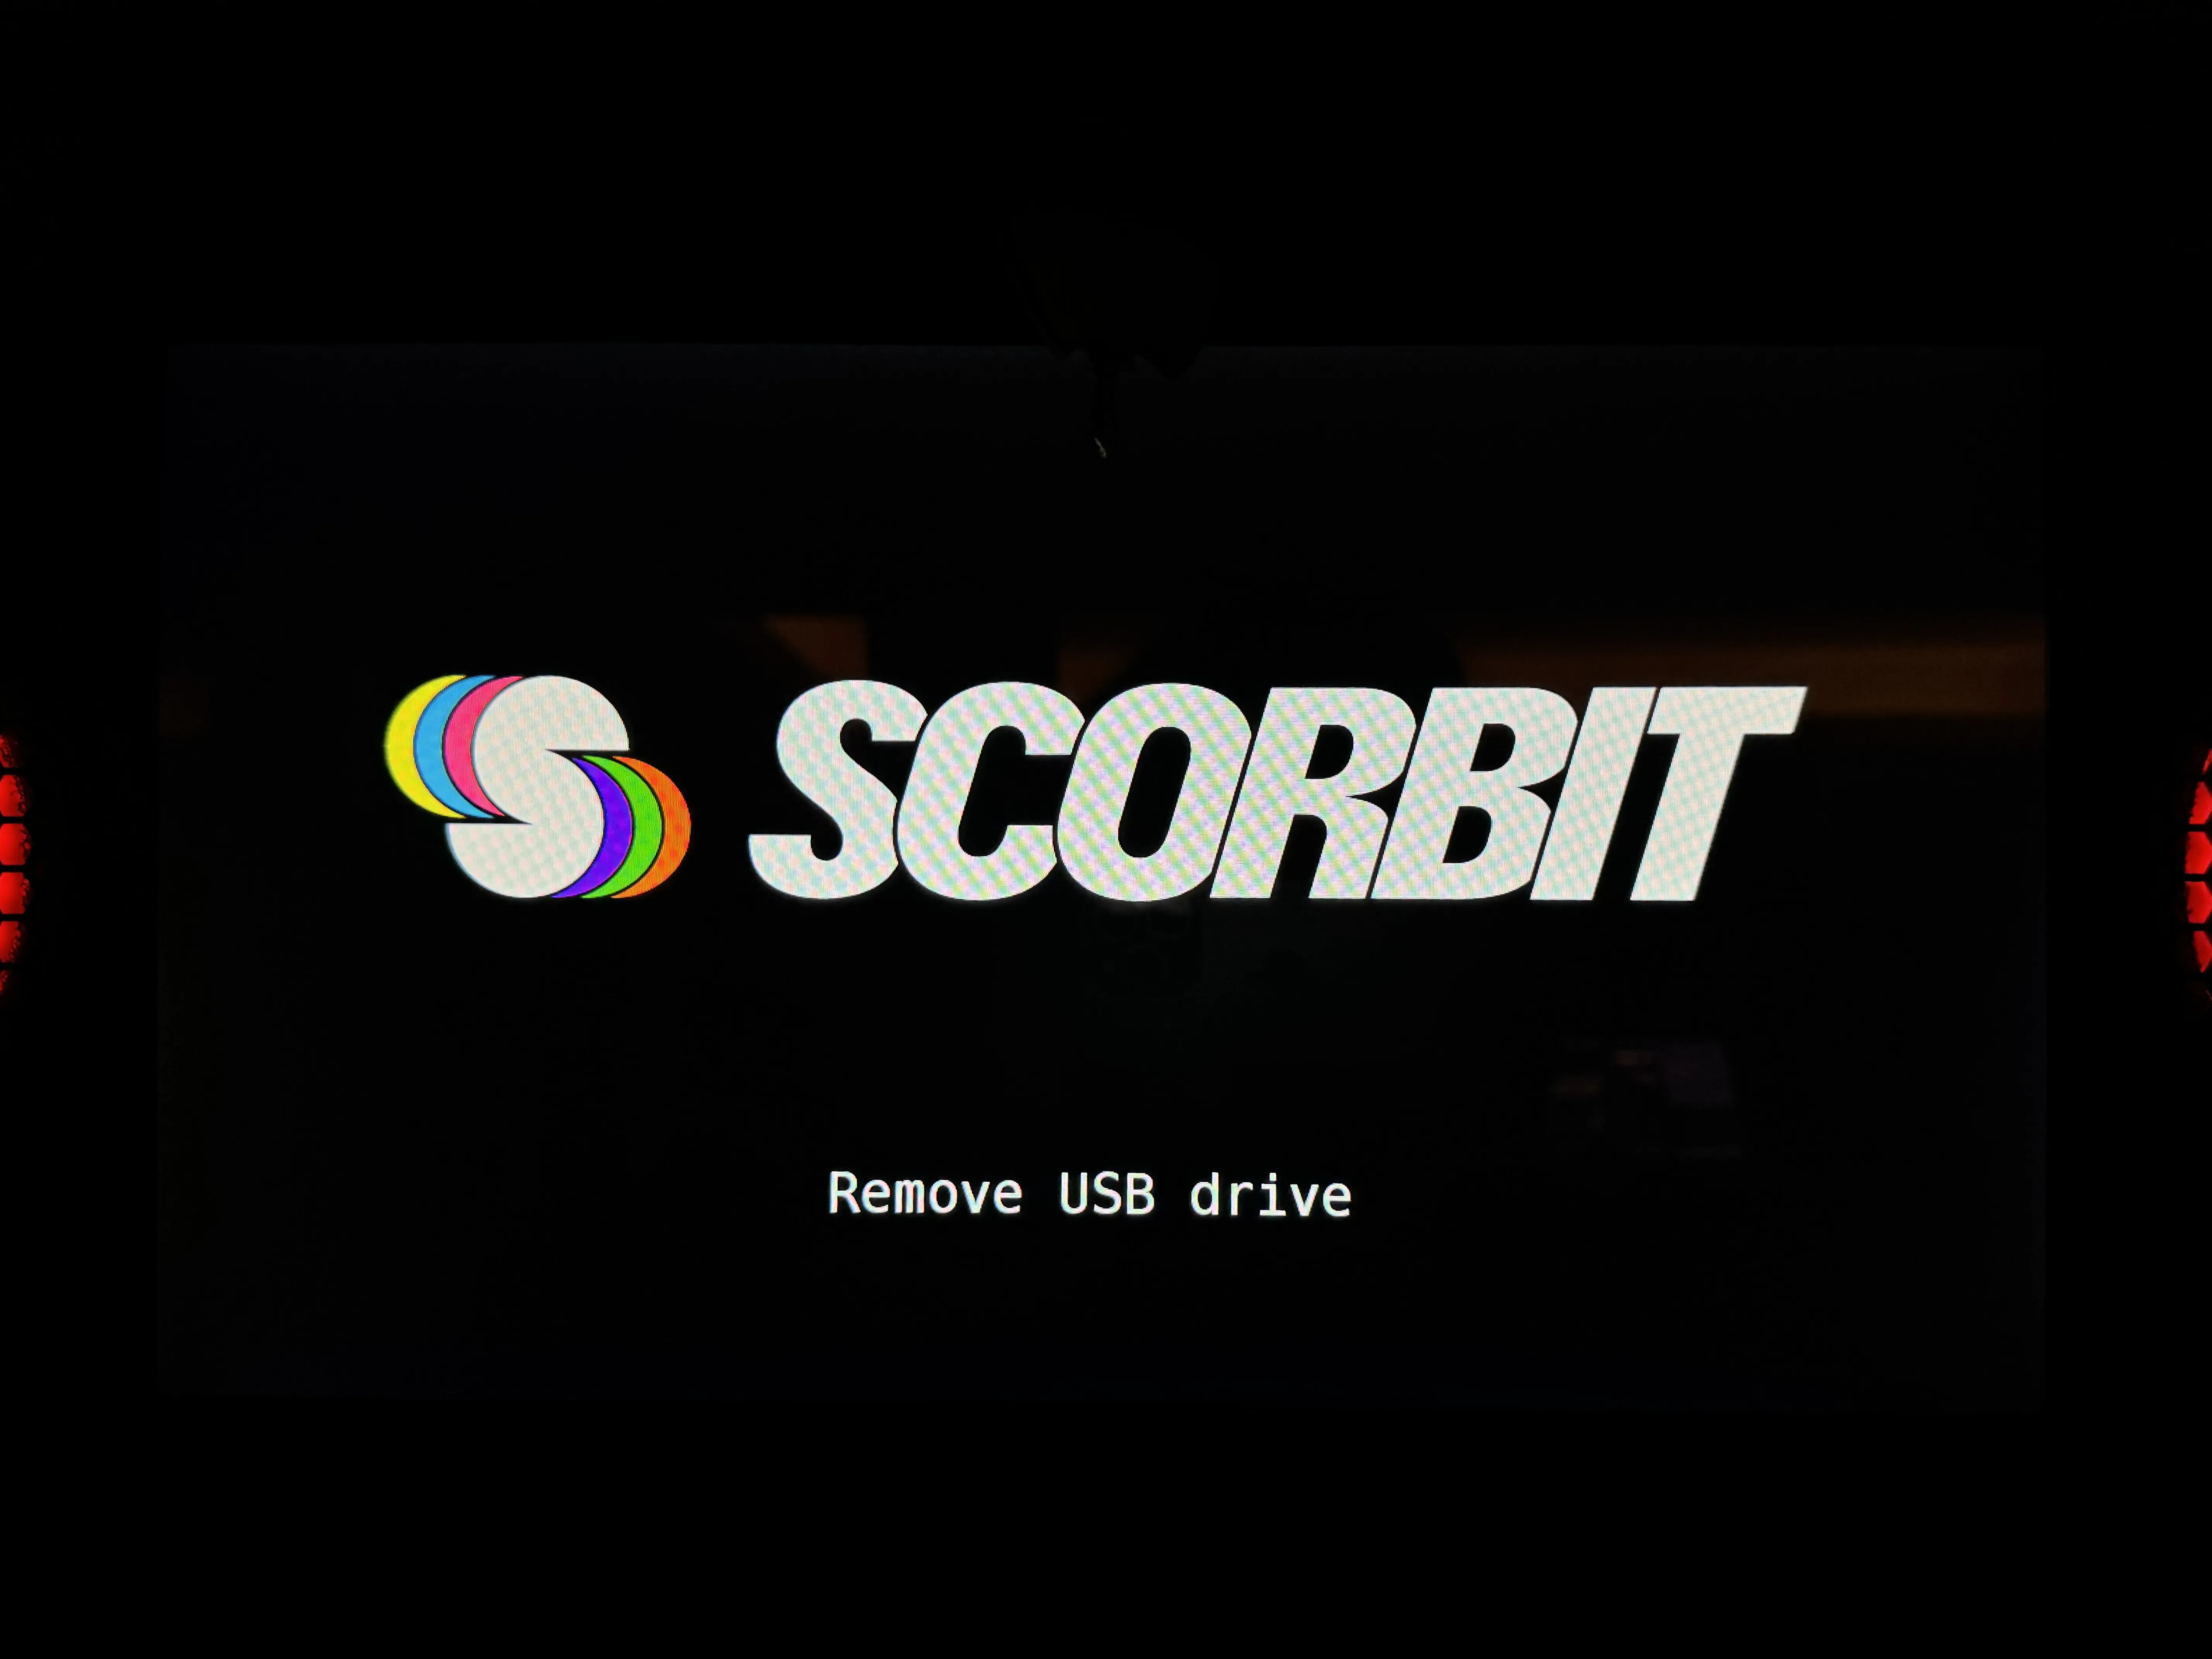
Finally, the machine will report success and ask you to remove the USB drive and power cycle.
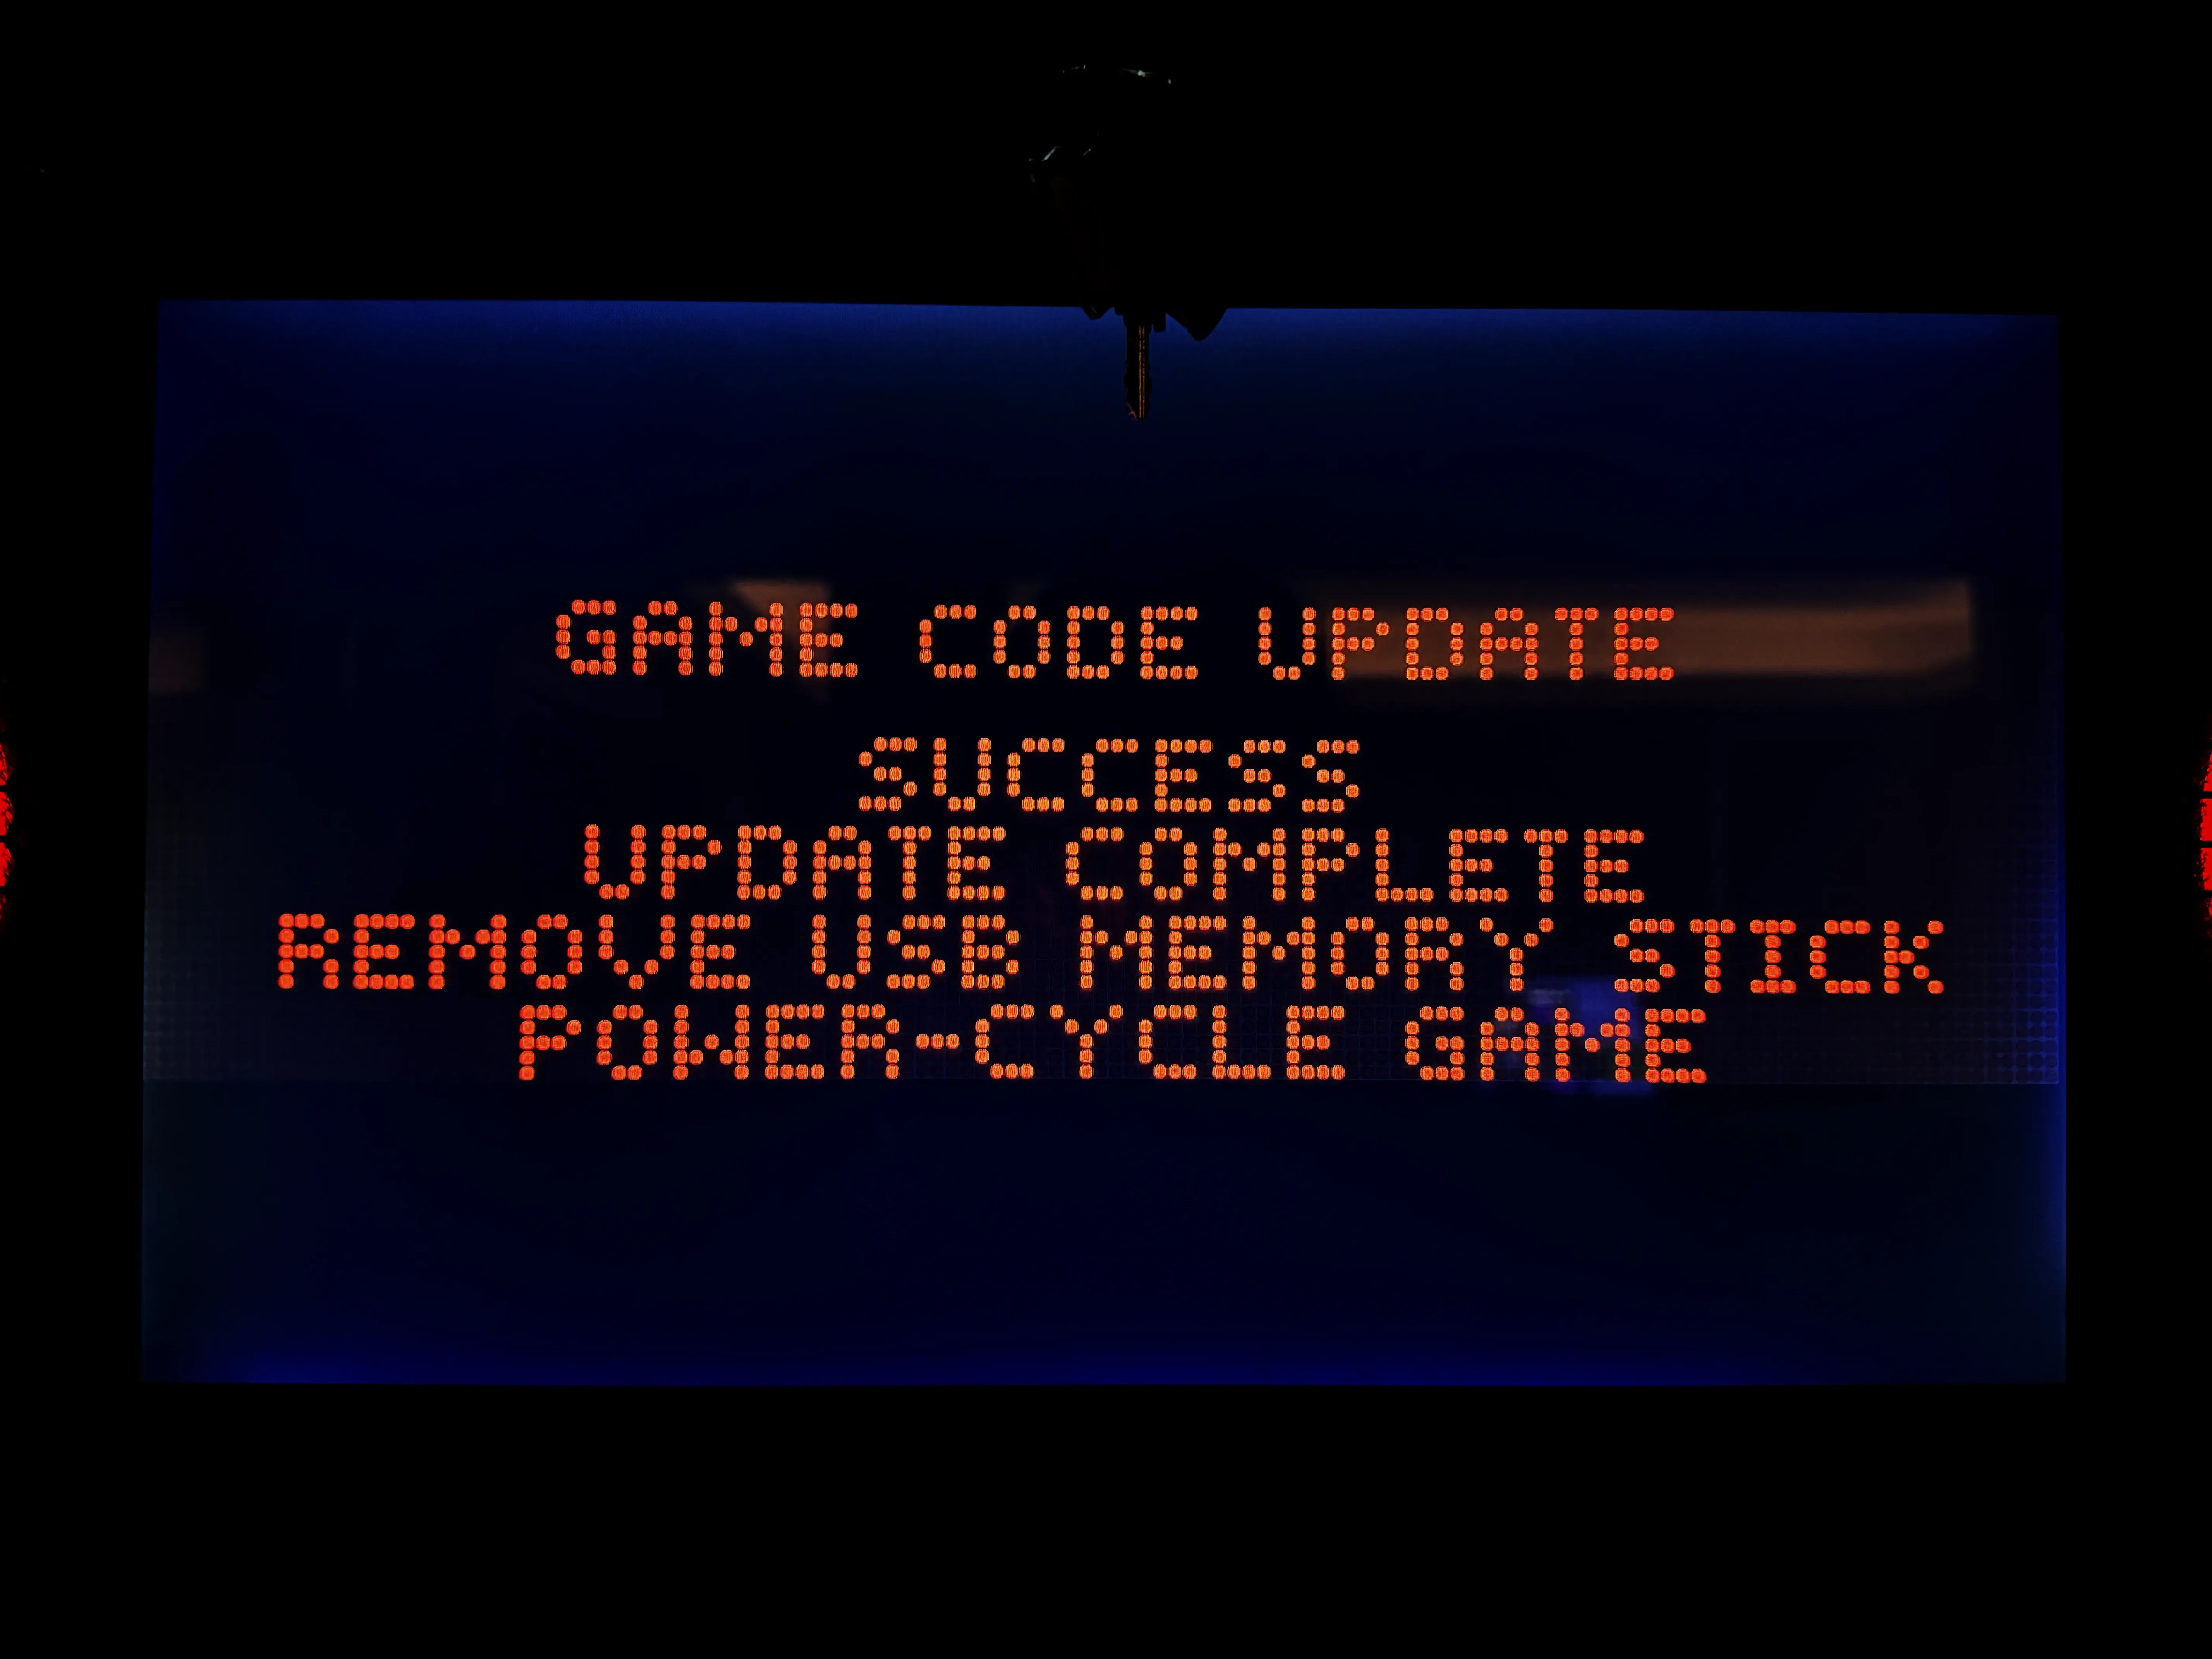
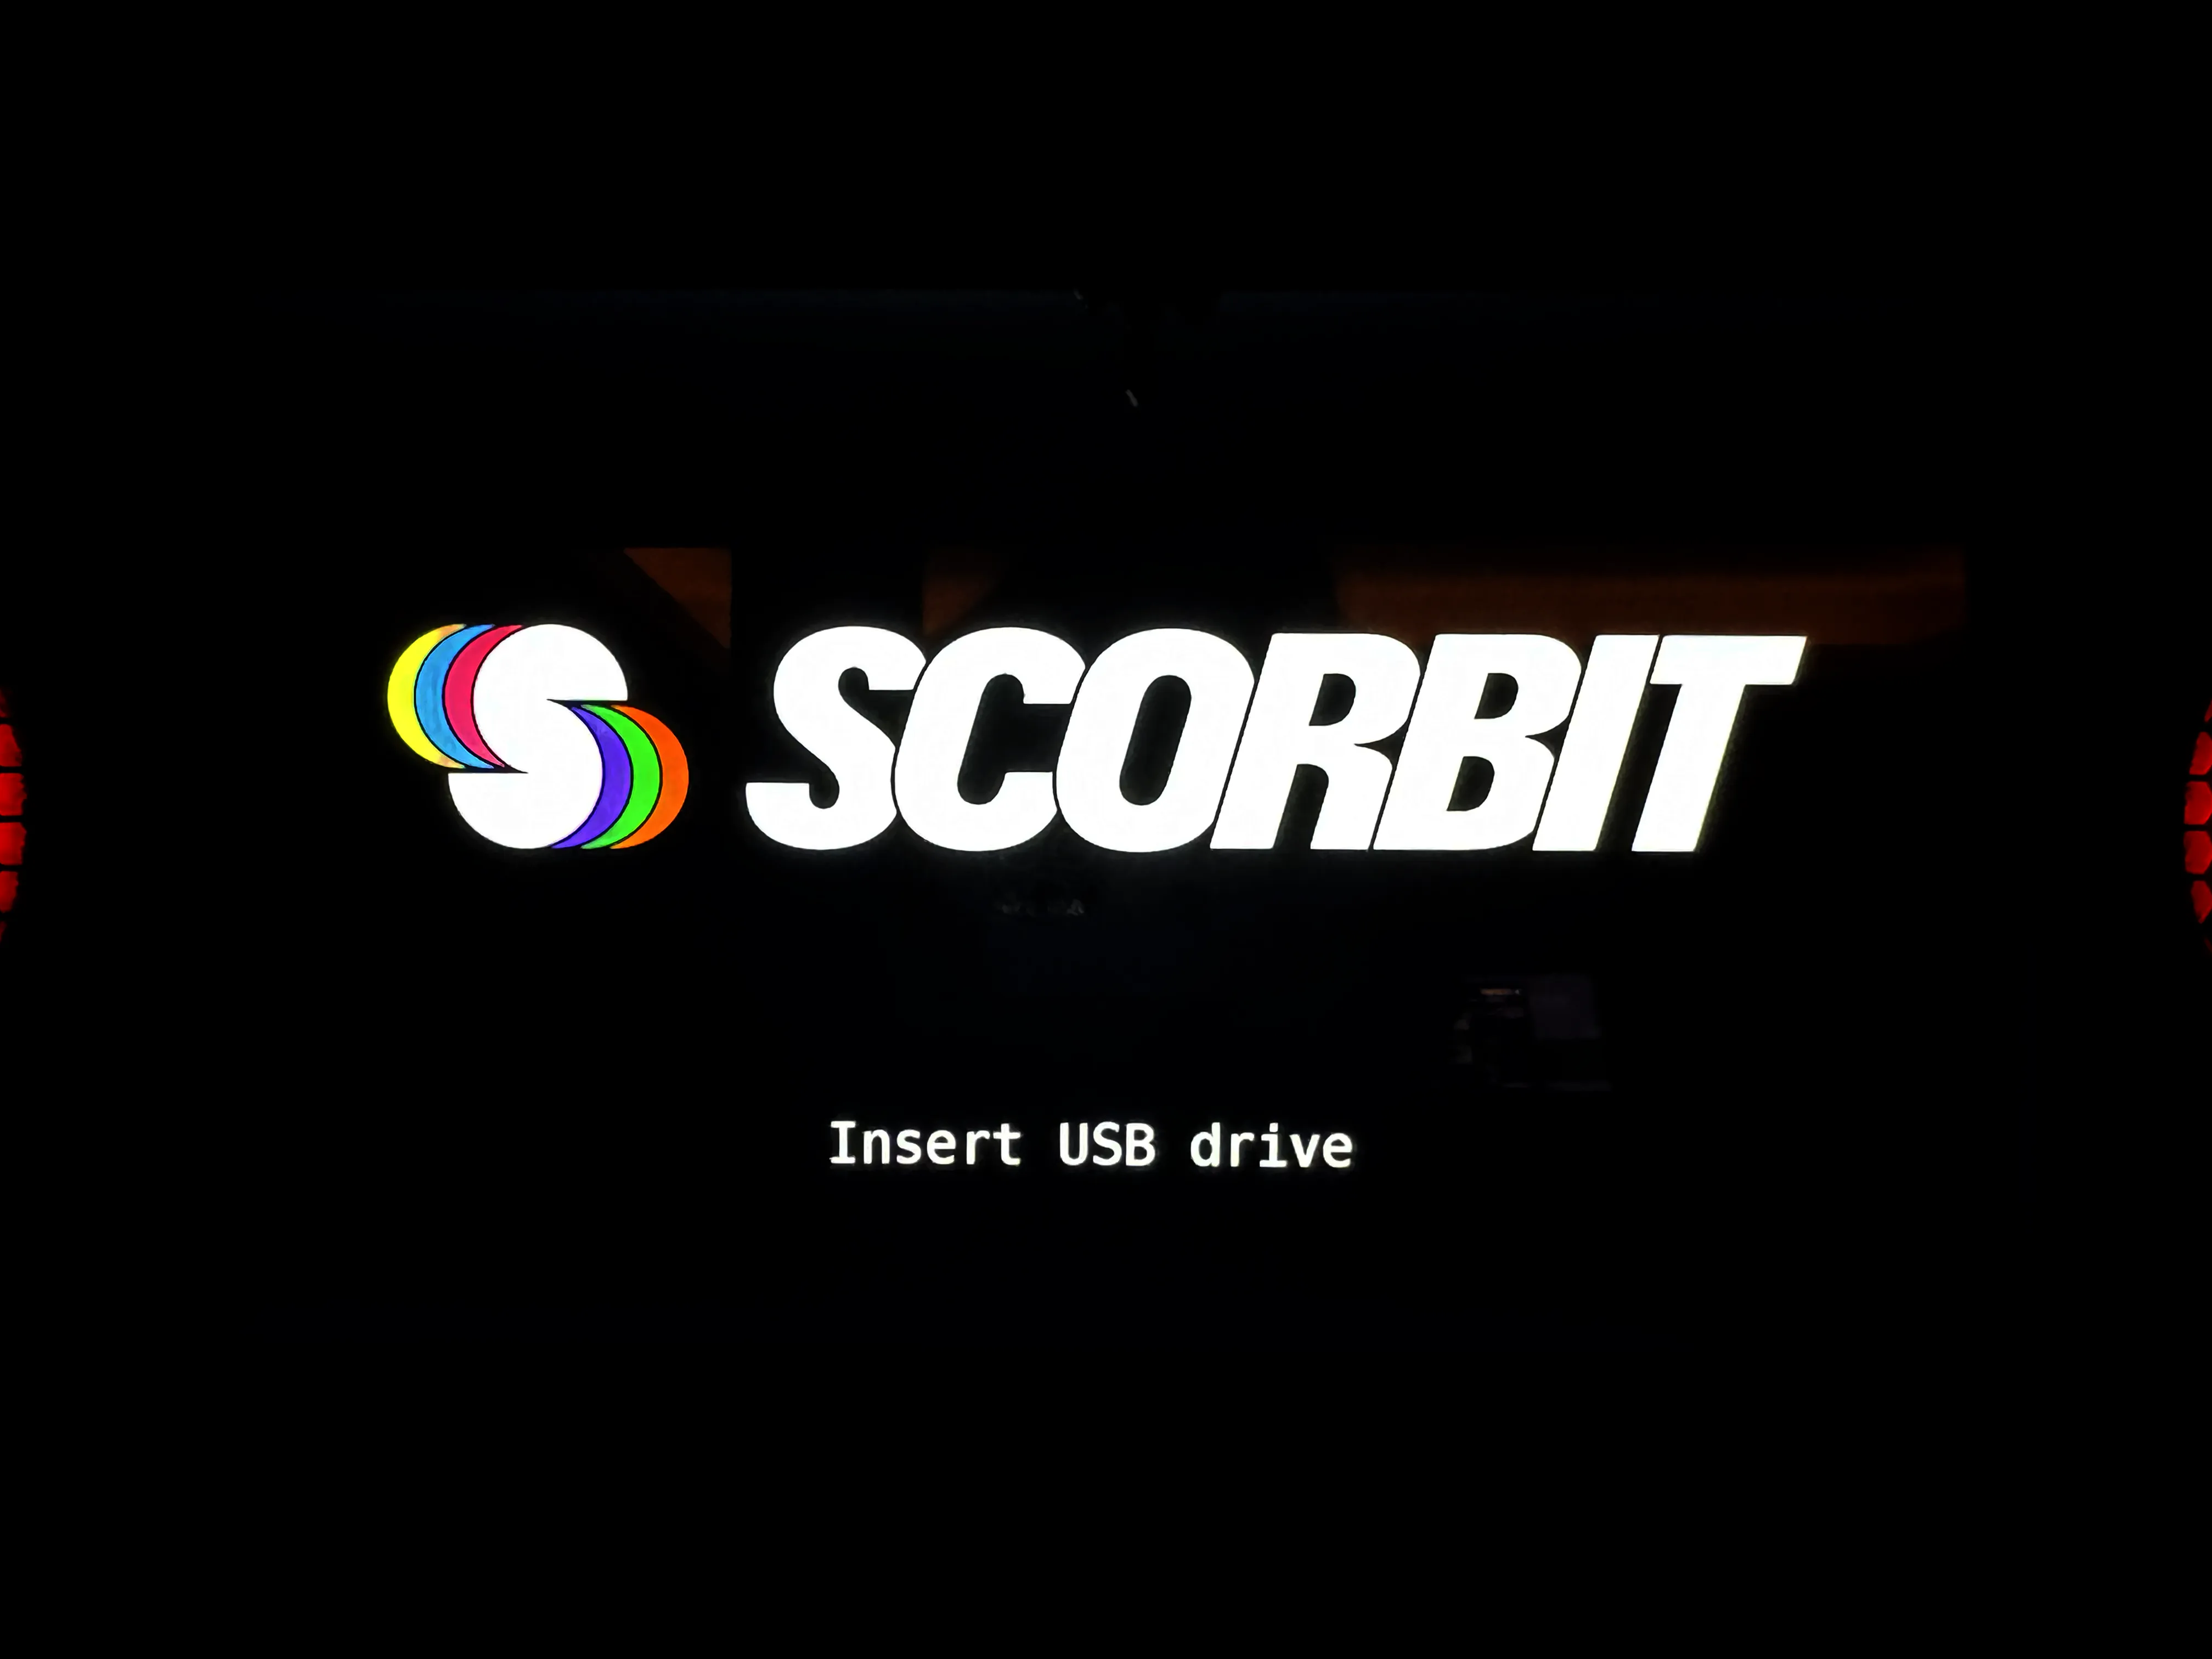
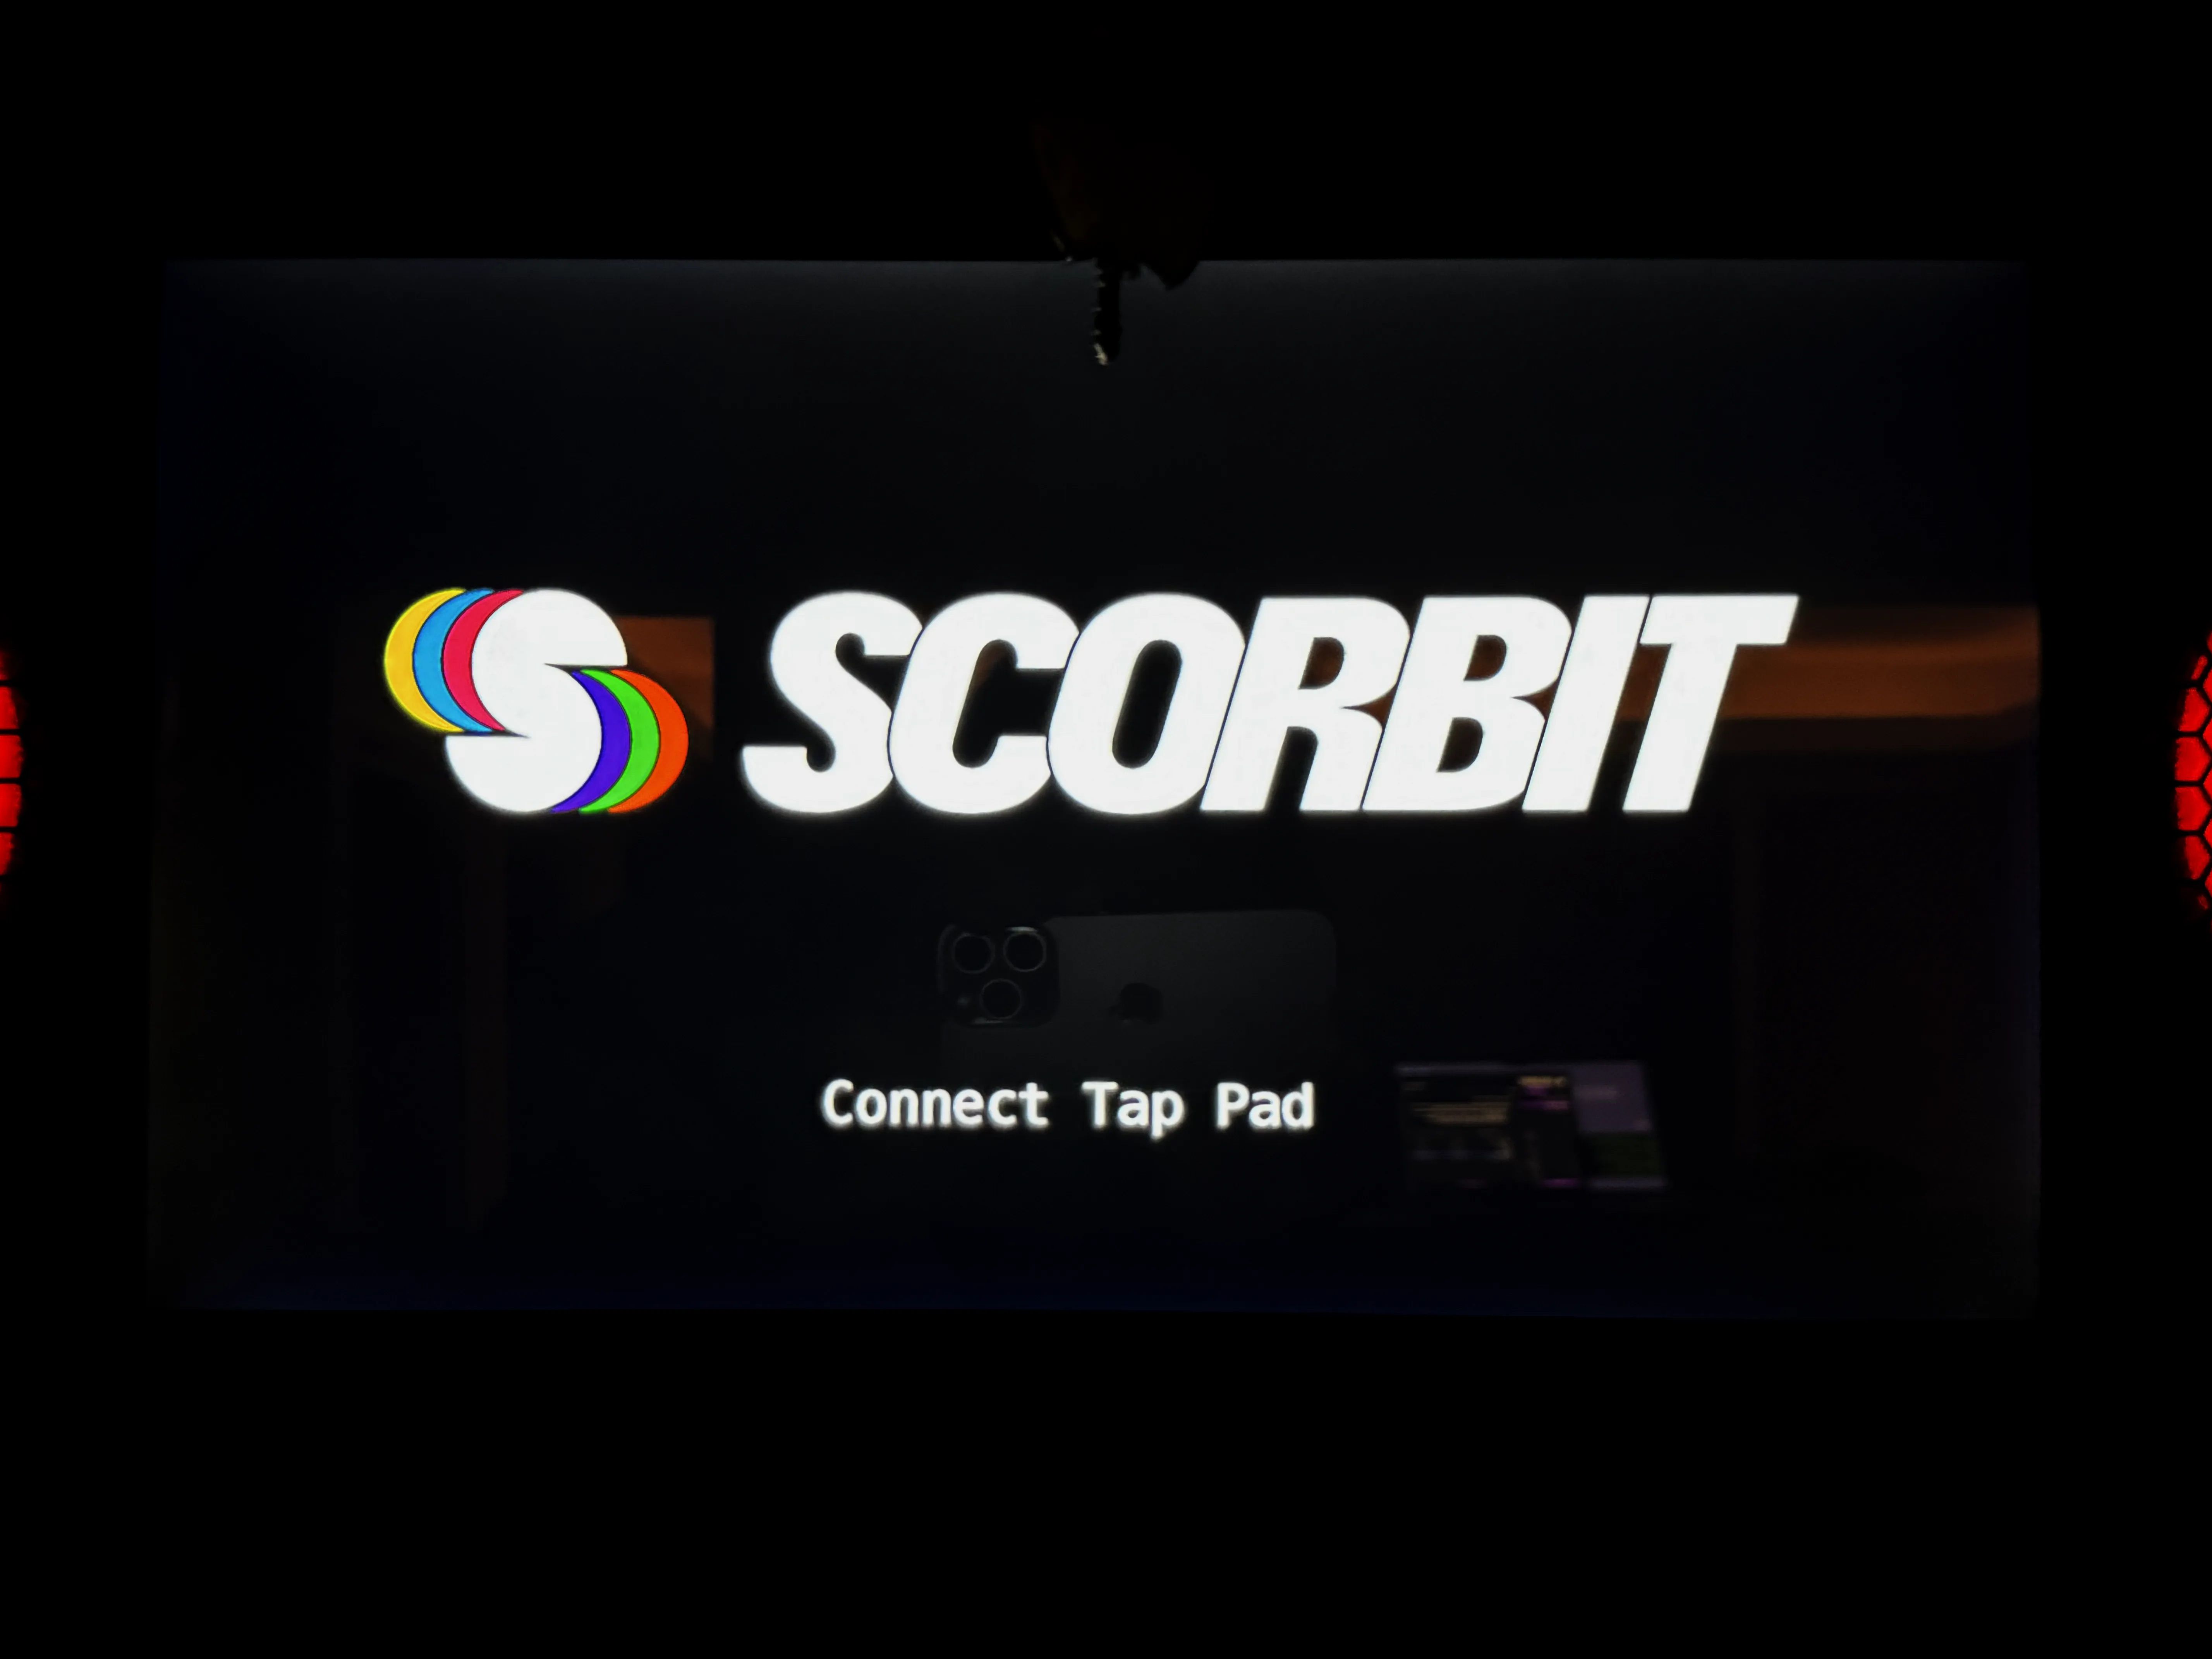
Remove the drive and power down the machine. Wait for ten seconds for the power to completely drain from the machine electronics. Finally, turn the machine back on. The machine will boot up with a Scorbit logo and ask you to reinsert the USB drive.
The machine will detect the USB and copy additional files.
The game will tell you to remove the drive and replace the Scorbit Tap Pad.
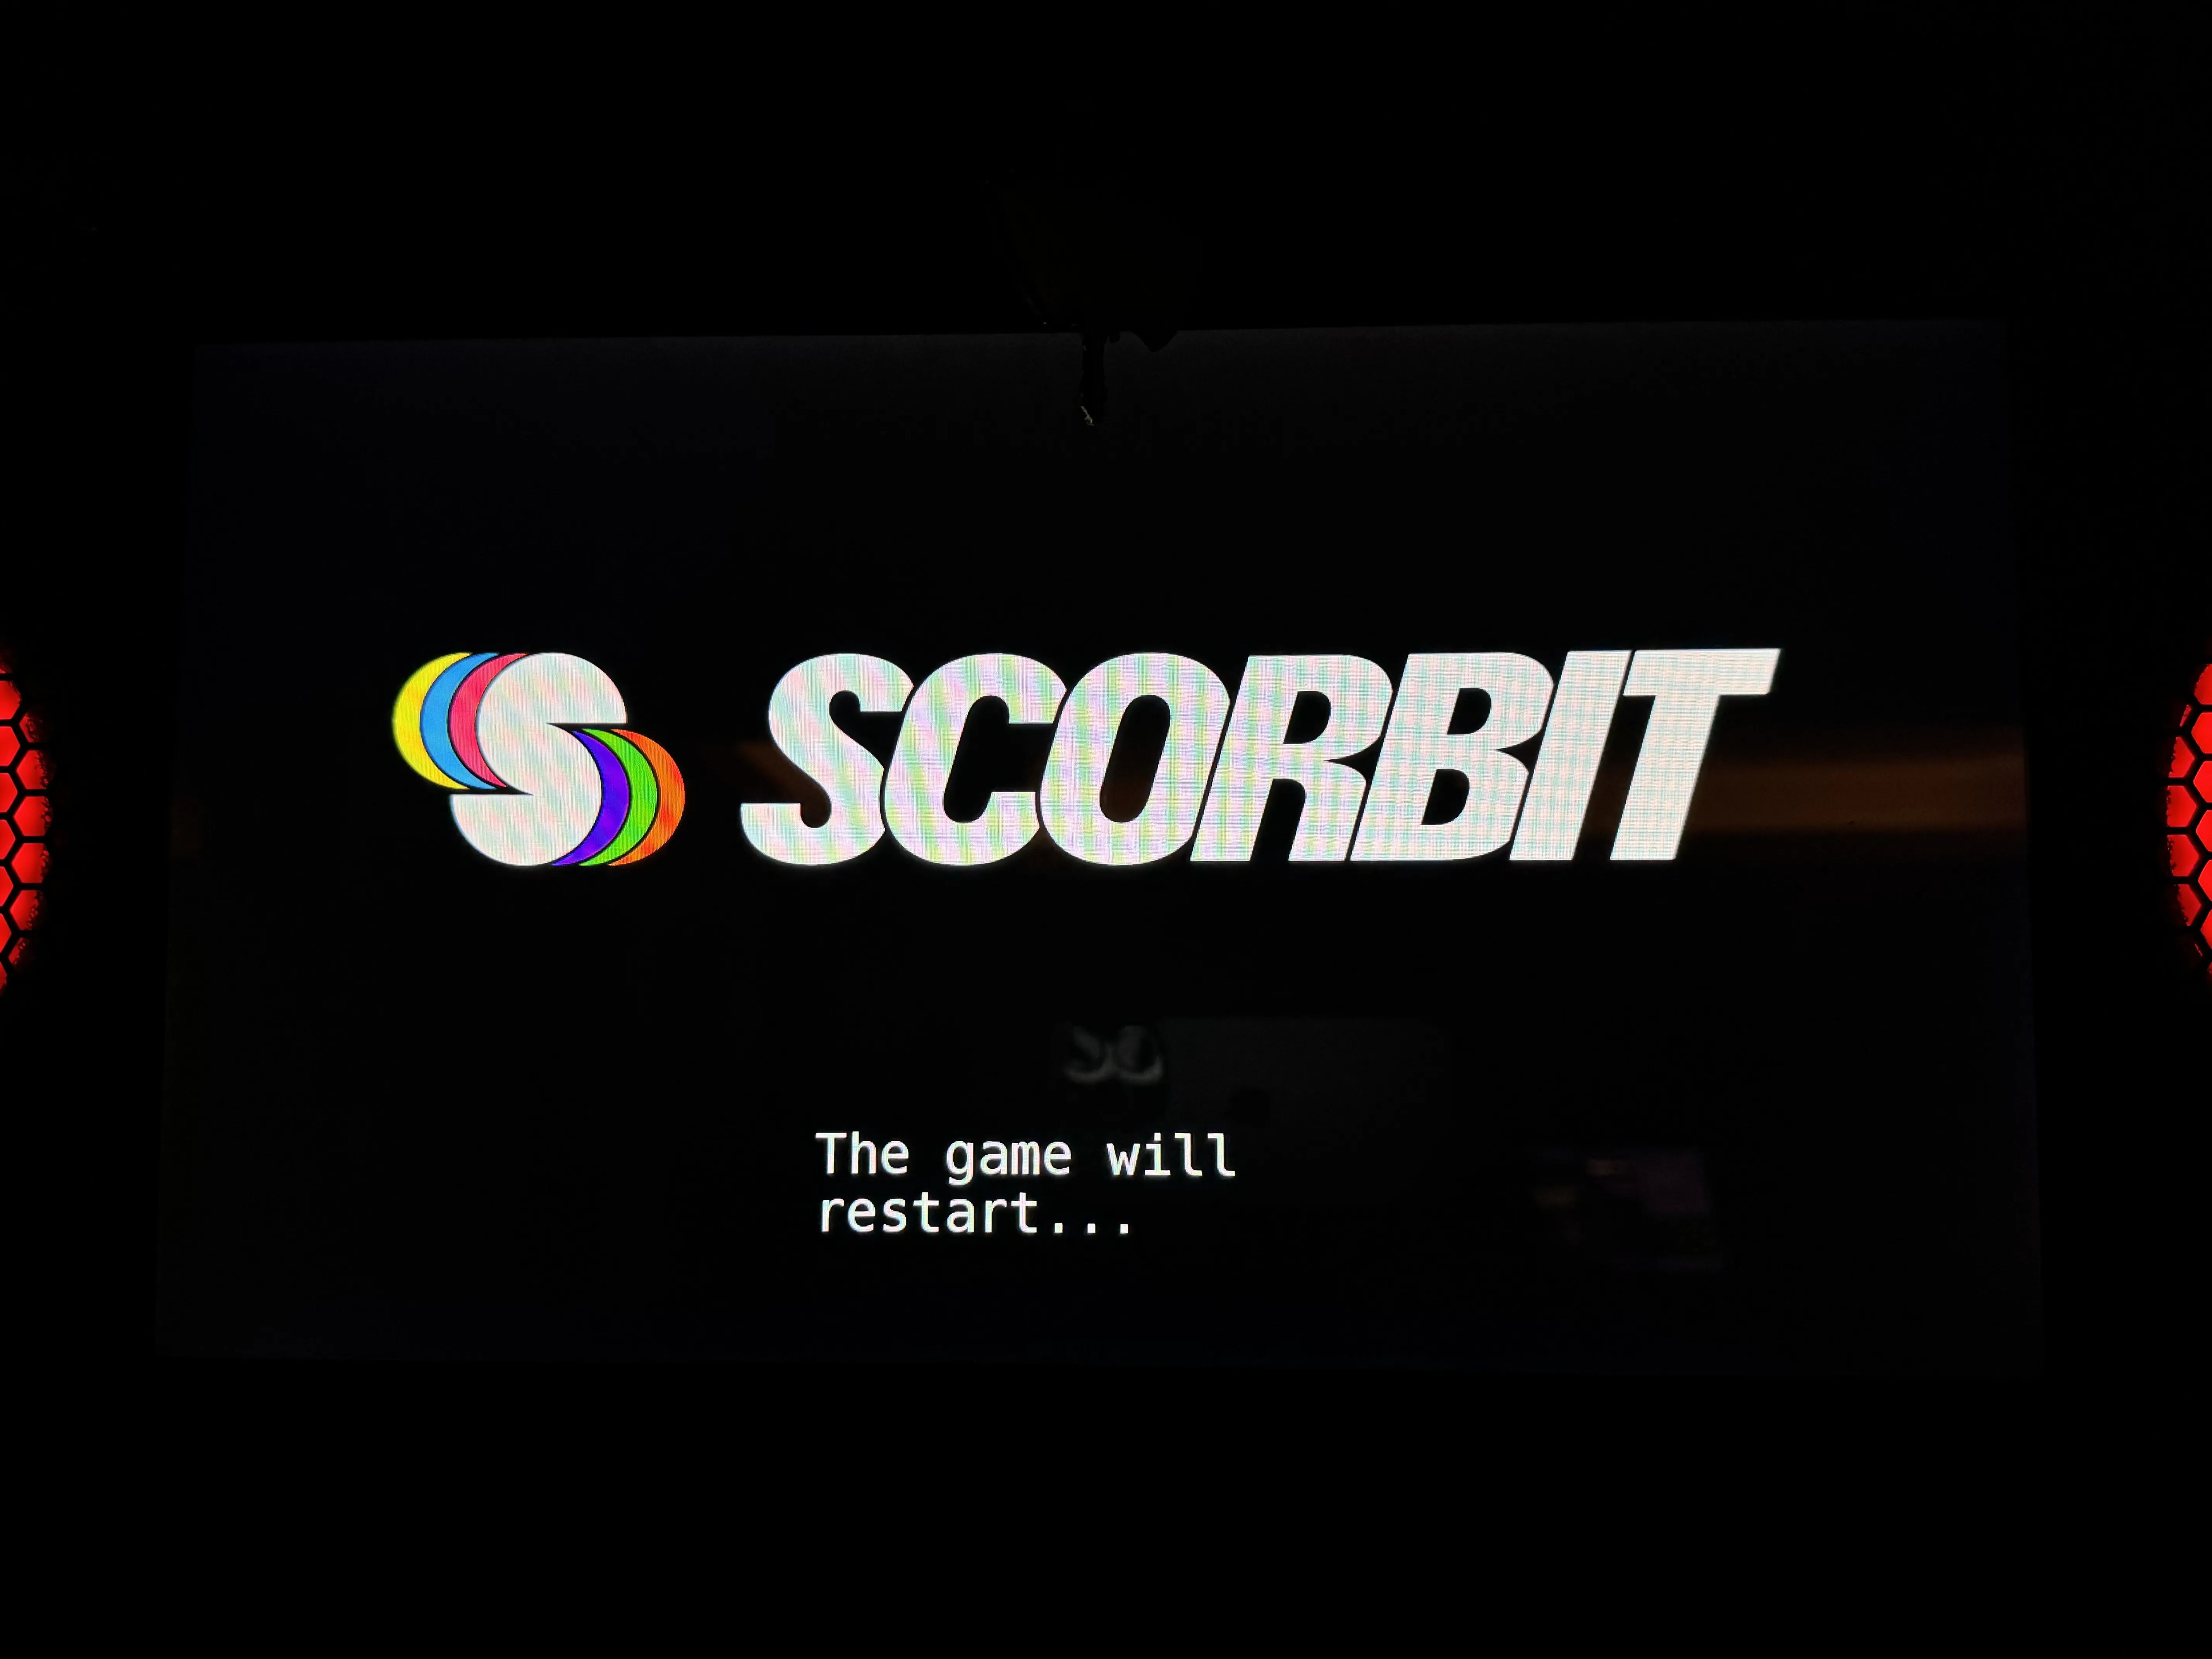
Finally, the game will restart itself.
Final Reboot
Once the game has completed started up, check that the machine is on WiFi. Once confirmed, power down the game, wait ten seconds, and power back up. This last reboot is required for the installation to perform its final self-testing and provisioning.
Select the SAM Tab
The SAM tab will display a screen with a list of Stern SAM machines in the left column. Select the machine you will be updating.
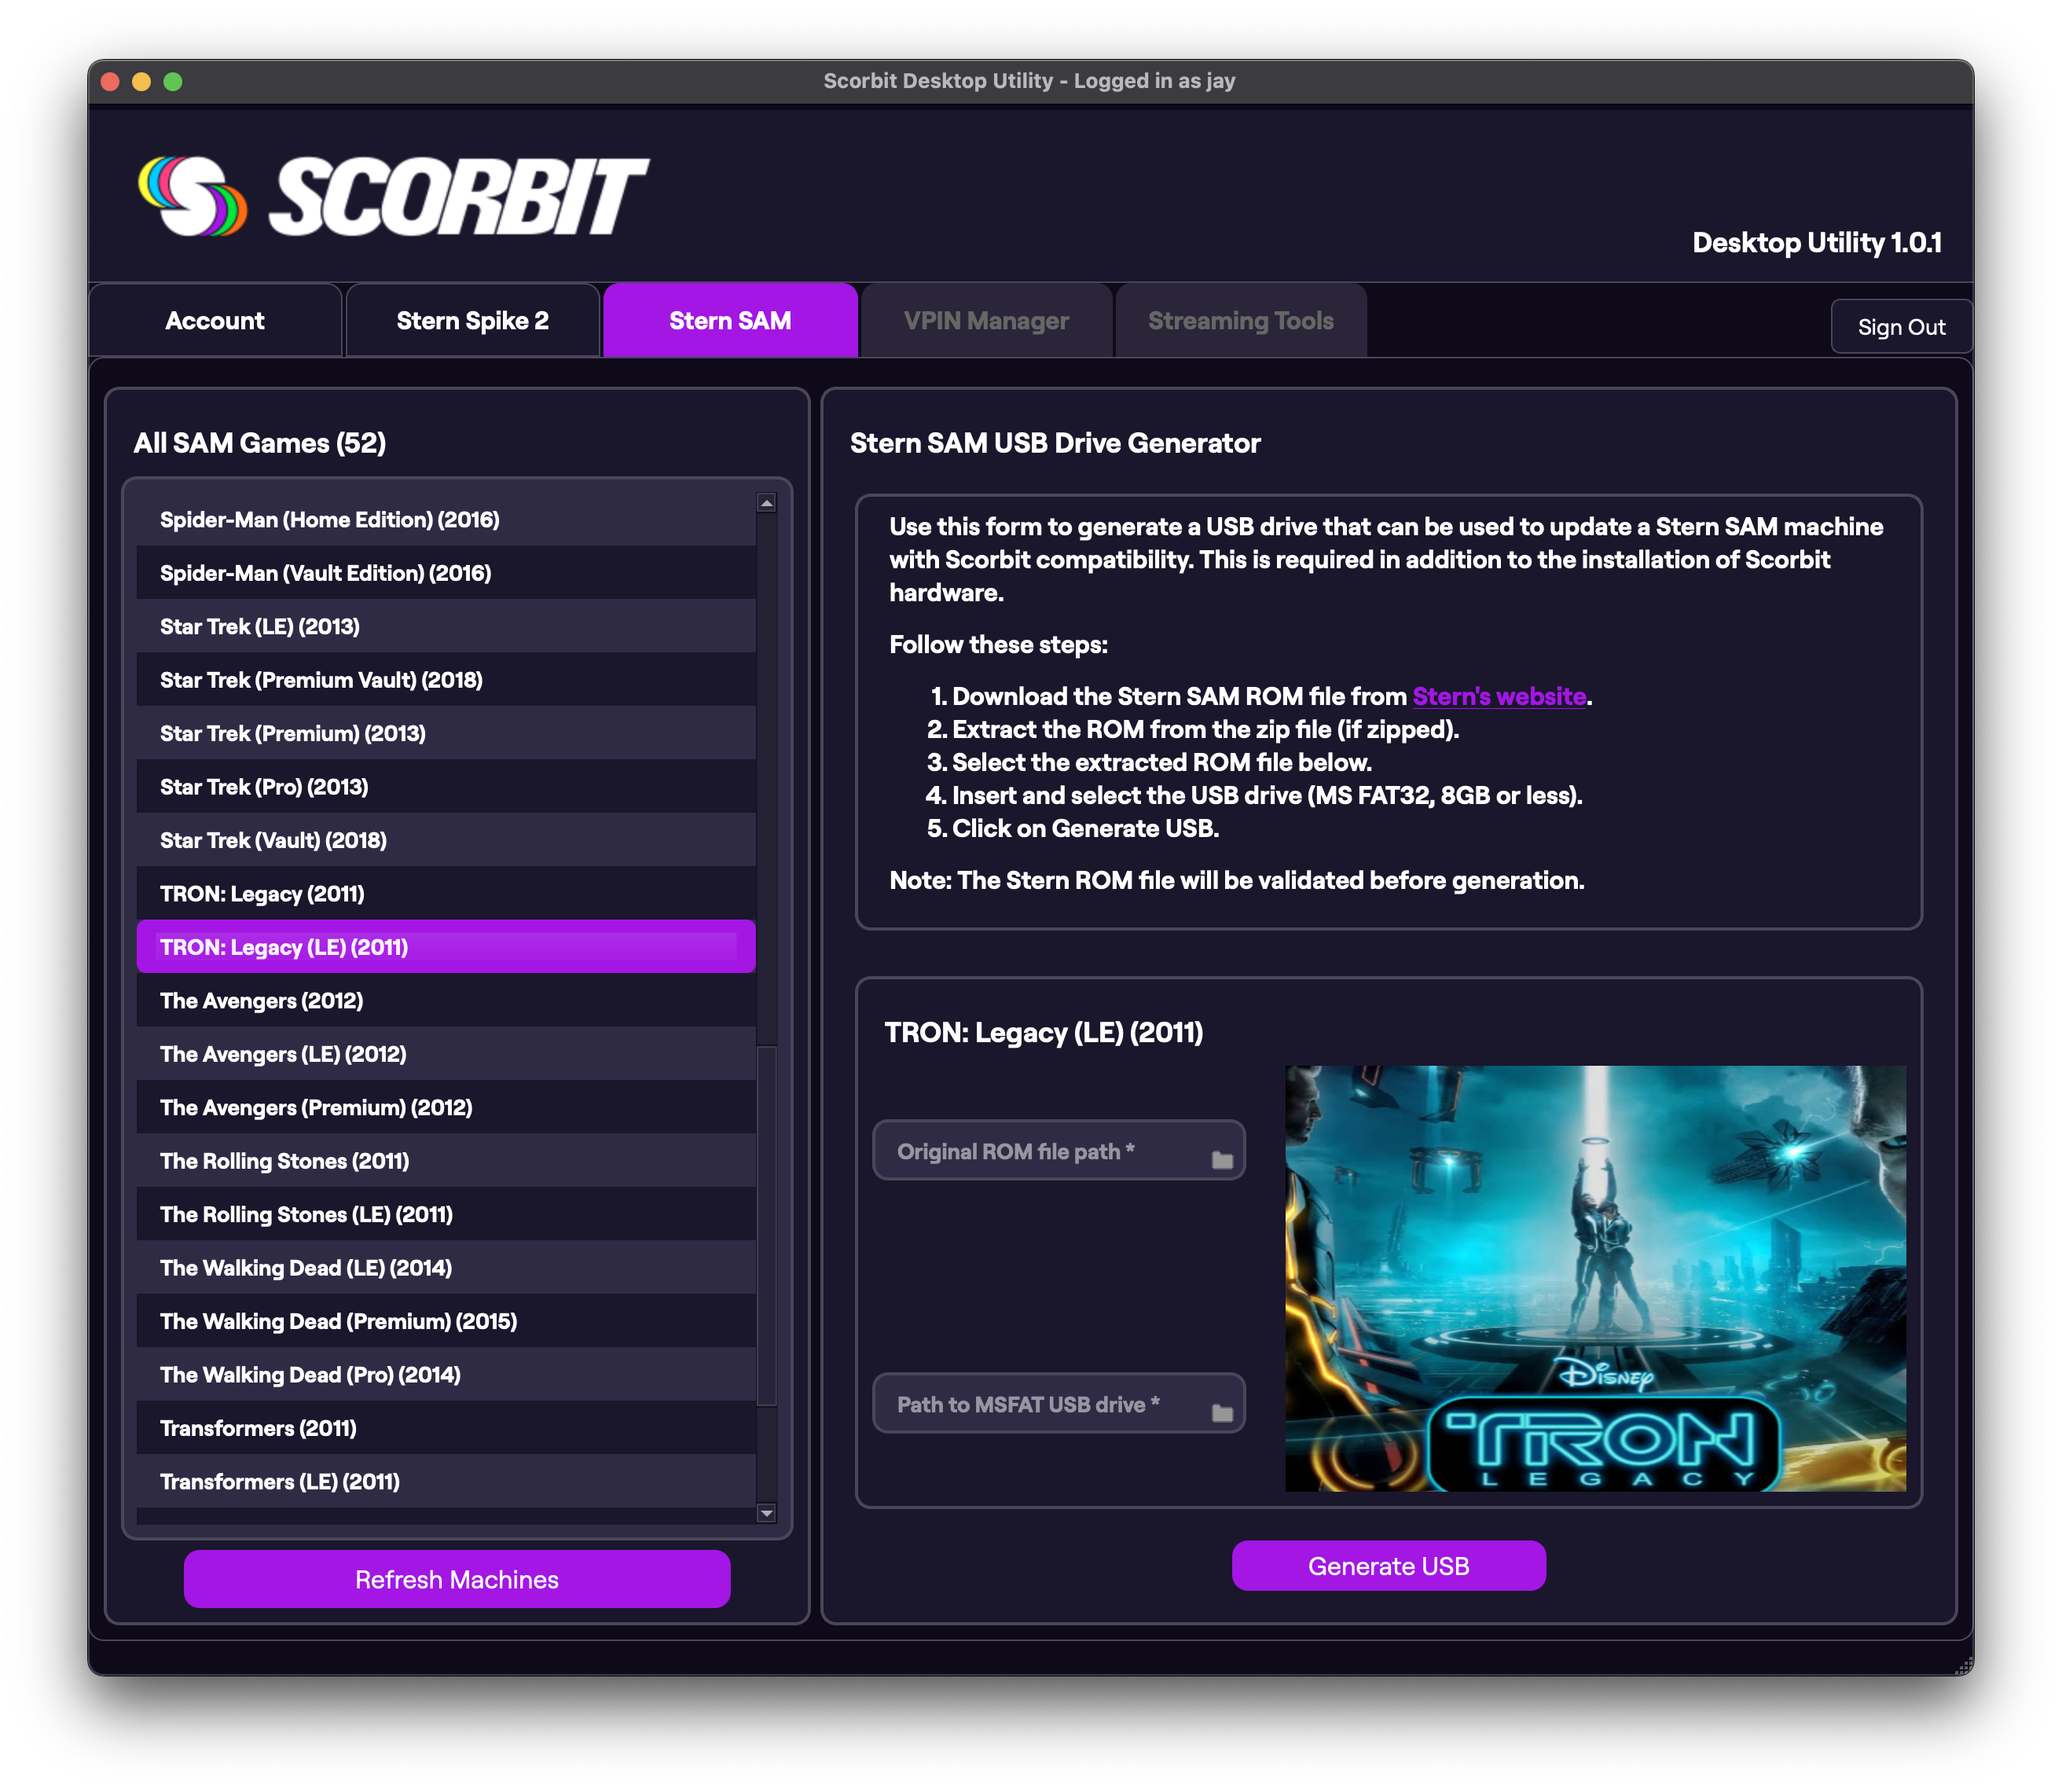
Prepare the USB Drive
The next step requires the preparation of a USB drive to update the game's ROM to add Scorbit compatibility. You must use a USB drive of no greater than 16GB in size.
1: Download the Stern SAM ROM file from Stern's website.
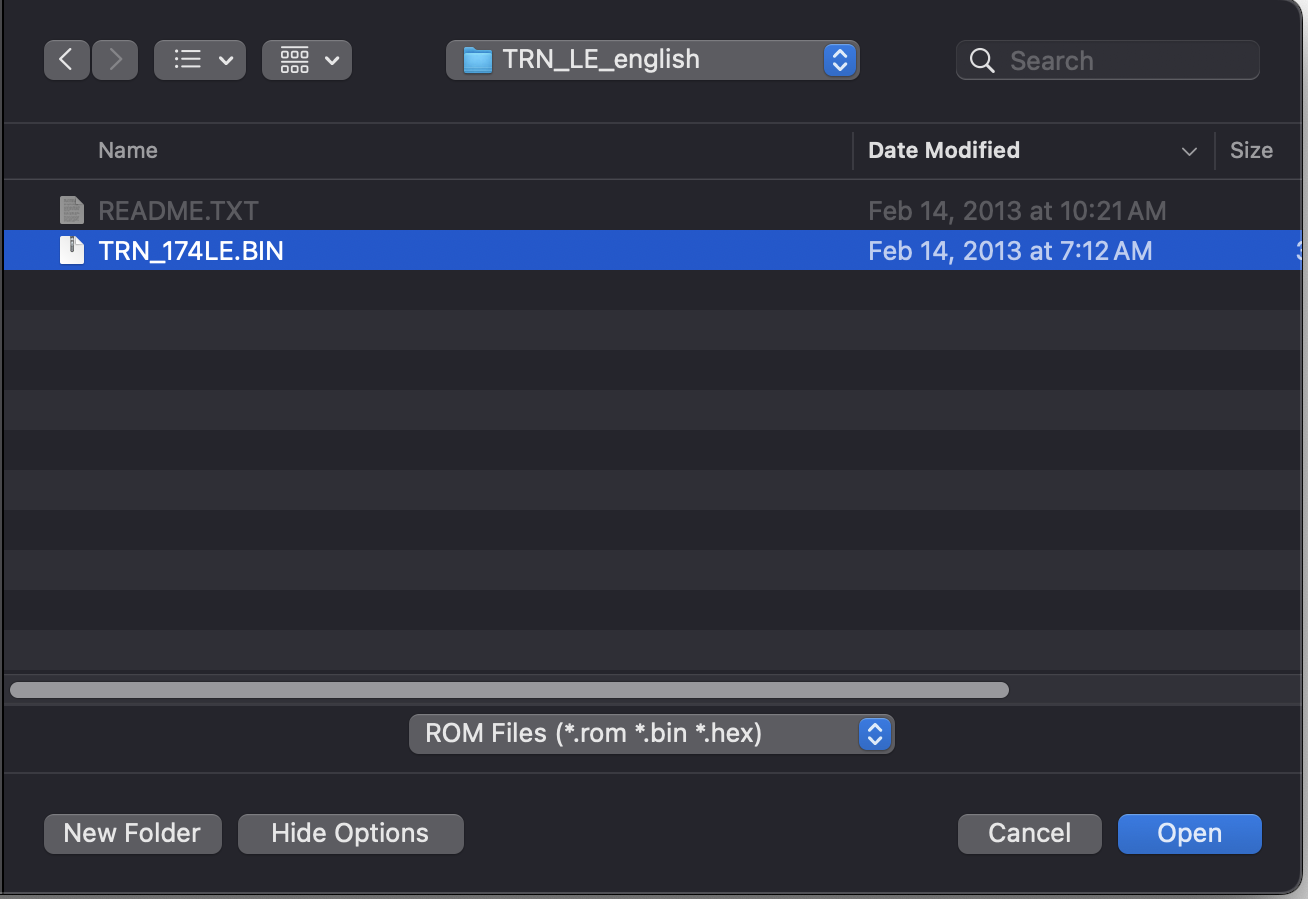
Download the ROM for the game you are updating directly from Stern's website. Extract the ROM from the zip file (if zipped) to a directory on your local computer.
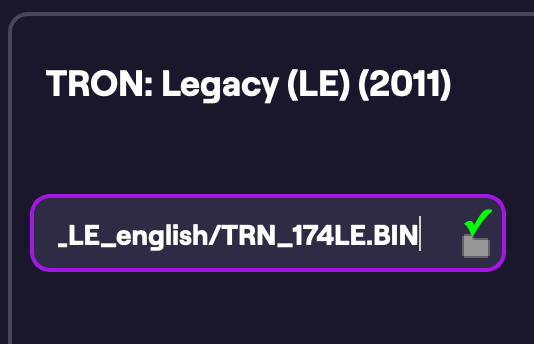
2: Select the ROM File
Using the folder selector, choose and select the ROM file you just downloaded. This ROM file will be validated before it can be processed.
Warning
We recommend using the latest ROM release from Stern. If you are using a special ROM image, such as a tournament ROM, or a ROM that has been modified from the original factory ROM, you should contact Scorbit support first before selecting the ROM file to verify that it is supported. If it is not, many customized ROMs can be added to Scorbit support easily if you have the original files and can provide them to Scorbit.
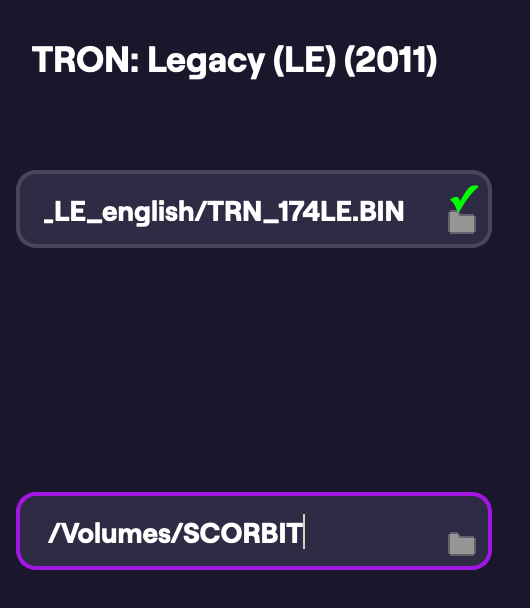
3: Insert and Select the USB Drive
Insert your USB drive into your computer and select its location with the folder icon. Note that his USB drive MUST be 16GB or less and formatted for MS FAT-32. If the drive has any contents on it, or is not formatted correctly, the utility will ask you to reformat and wipe the drive.
Warning
We have reports of incompatible USB drives that are not recognized by the Stern SAM MPU. There are many inconclusive debates around what USB drives can work. What we have found is that the Stern SAM MPU is old enough that it may not be compatible with modern USB protocols, such as USB 3.0, so it is best to use an older USB drive. We have had some success using USB drives no greater than 16GB in size, formatted for MS FAT-32, and containing no special characters or spaces in the volume name. We have provided a USB drive with your device that we have tested successfully on SAM machines, but depending on the age of the machine, we can't guarantee our drive is always compatible.
Generate USB
When ready, select the Generate USB function. The application will now check the drive for compatibility. If the drive needs to be reformatted for FAT-32, it will ask you to perform this action, and will wipe the USB drive of all data.
The utility will then patch the ROM file to be used when updating the machine.


Once complete, eject the USB drive and move on to the next step.
Install Software on Machine
Power down your [machine_type_short] and remove the backglass. Insert the USB drive into the USB port on the game's MPU board.
Adjust MPU's Dip Switch for Update
On the game's MPU board, set the top dip switch to the ON position.
Power Up Machine and Update ROM
With the USB drive inserted, power up the machine and follow the instructions. The screen will tell you to hit select on the game menu. Select the update to proceed.
The game will now proceed to update the game ROM. This process can take up to 45 minutes.
When complete, select the option to complete and power down the machine.
Restore Original Dip Switch Setting
With the machine powered down, return the dip switch to the original position.
Remove USB Drive and Power Up
Remove the USB from the MPU board. Turn the machine back on.
Connect Your Machine
Now tapping setup next to the game title on the Scorbit mobile app takes you to the Machine Settings. You will see your machine's details listed. Tap Activate Scorbit to begin the connection process.
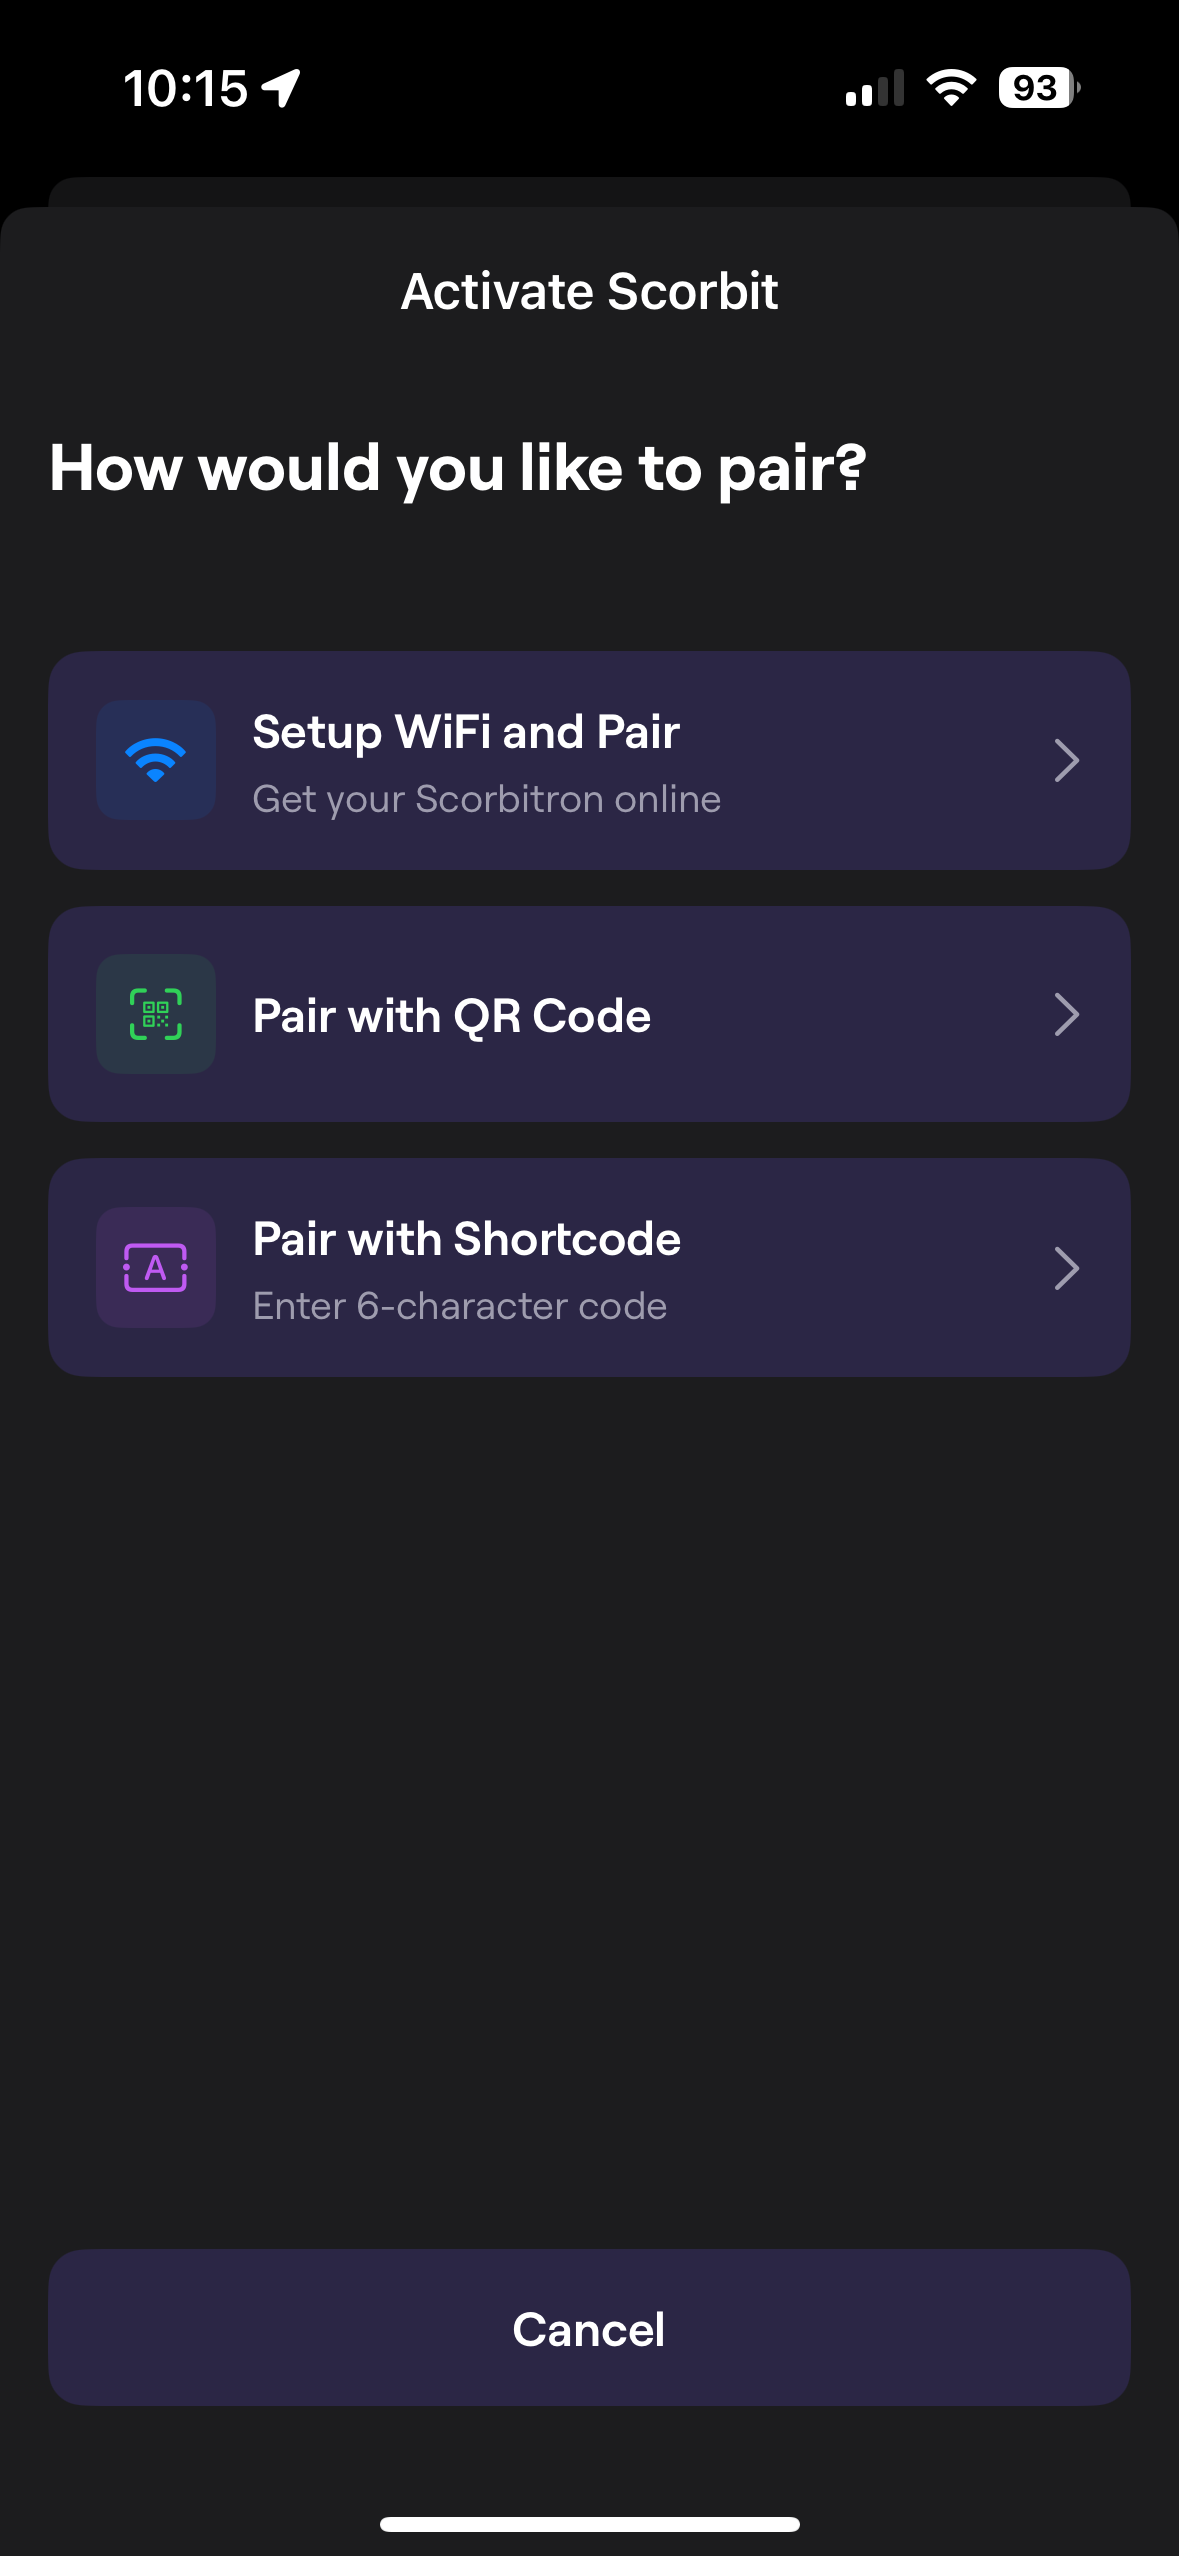
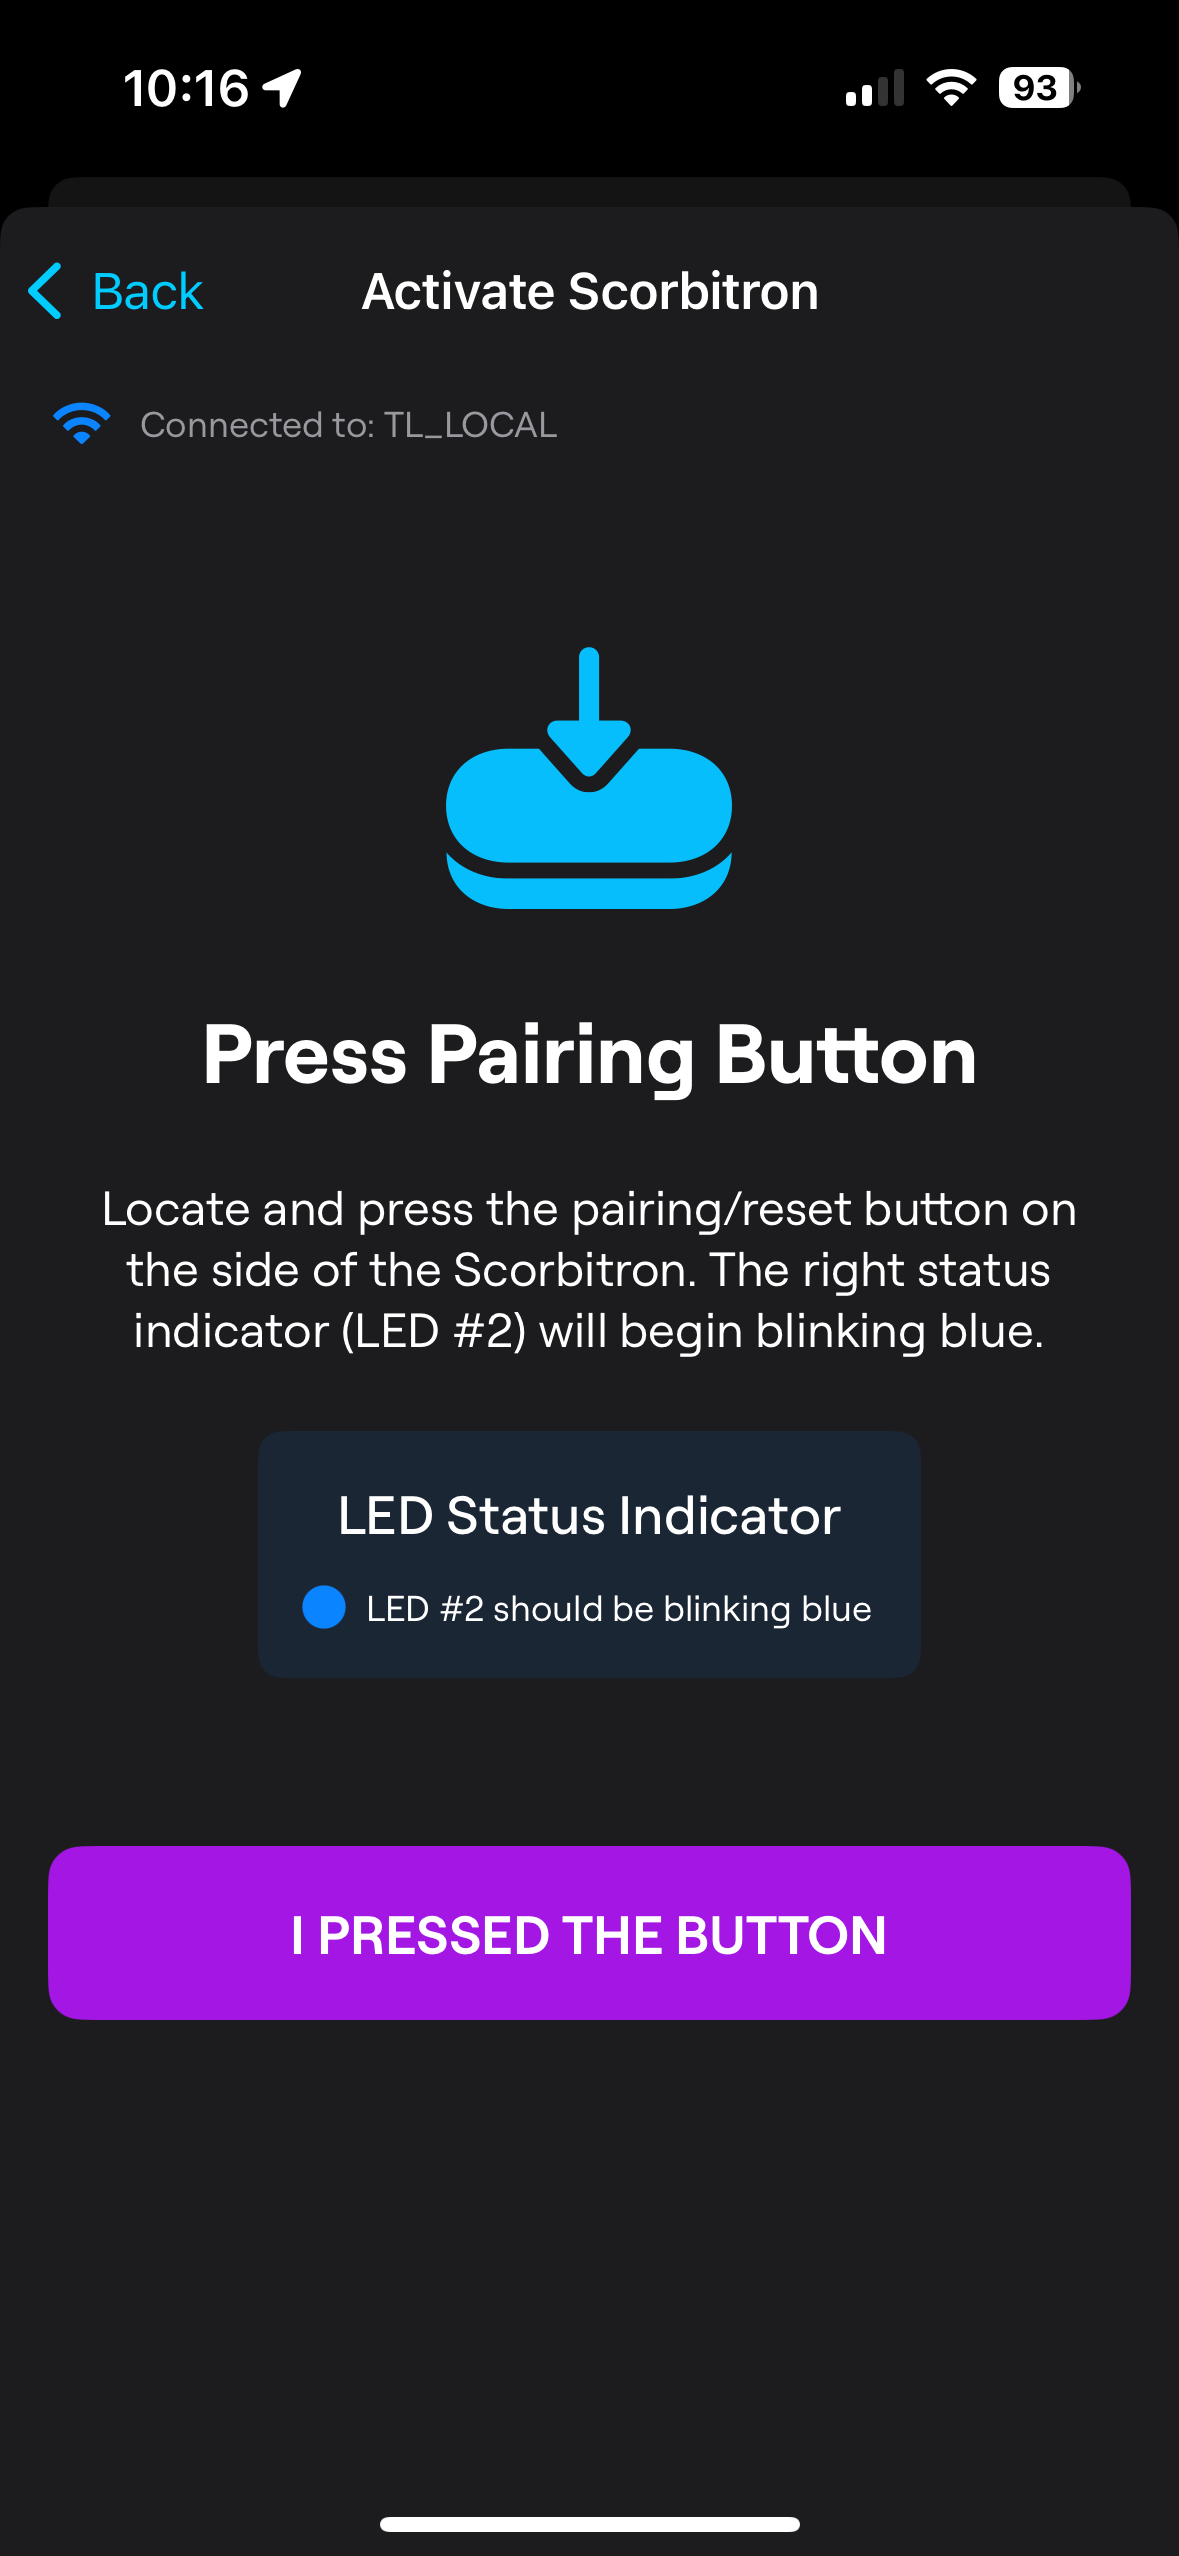
Tapping Activate Scorbit will bring you to the screen that allows you to choose how you want to beging the process. For a Scorbitron, you should select Setup WiFi and Pair.
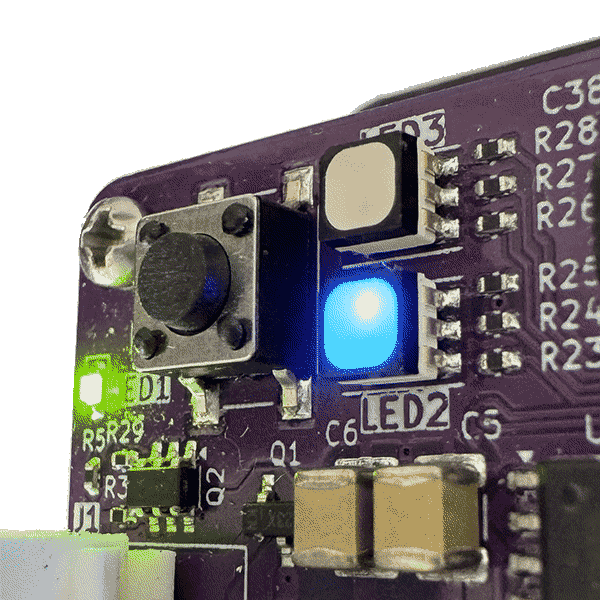
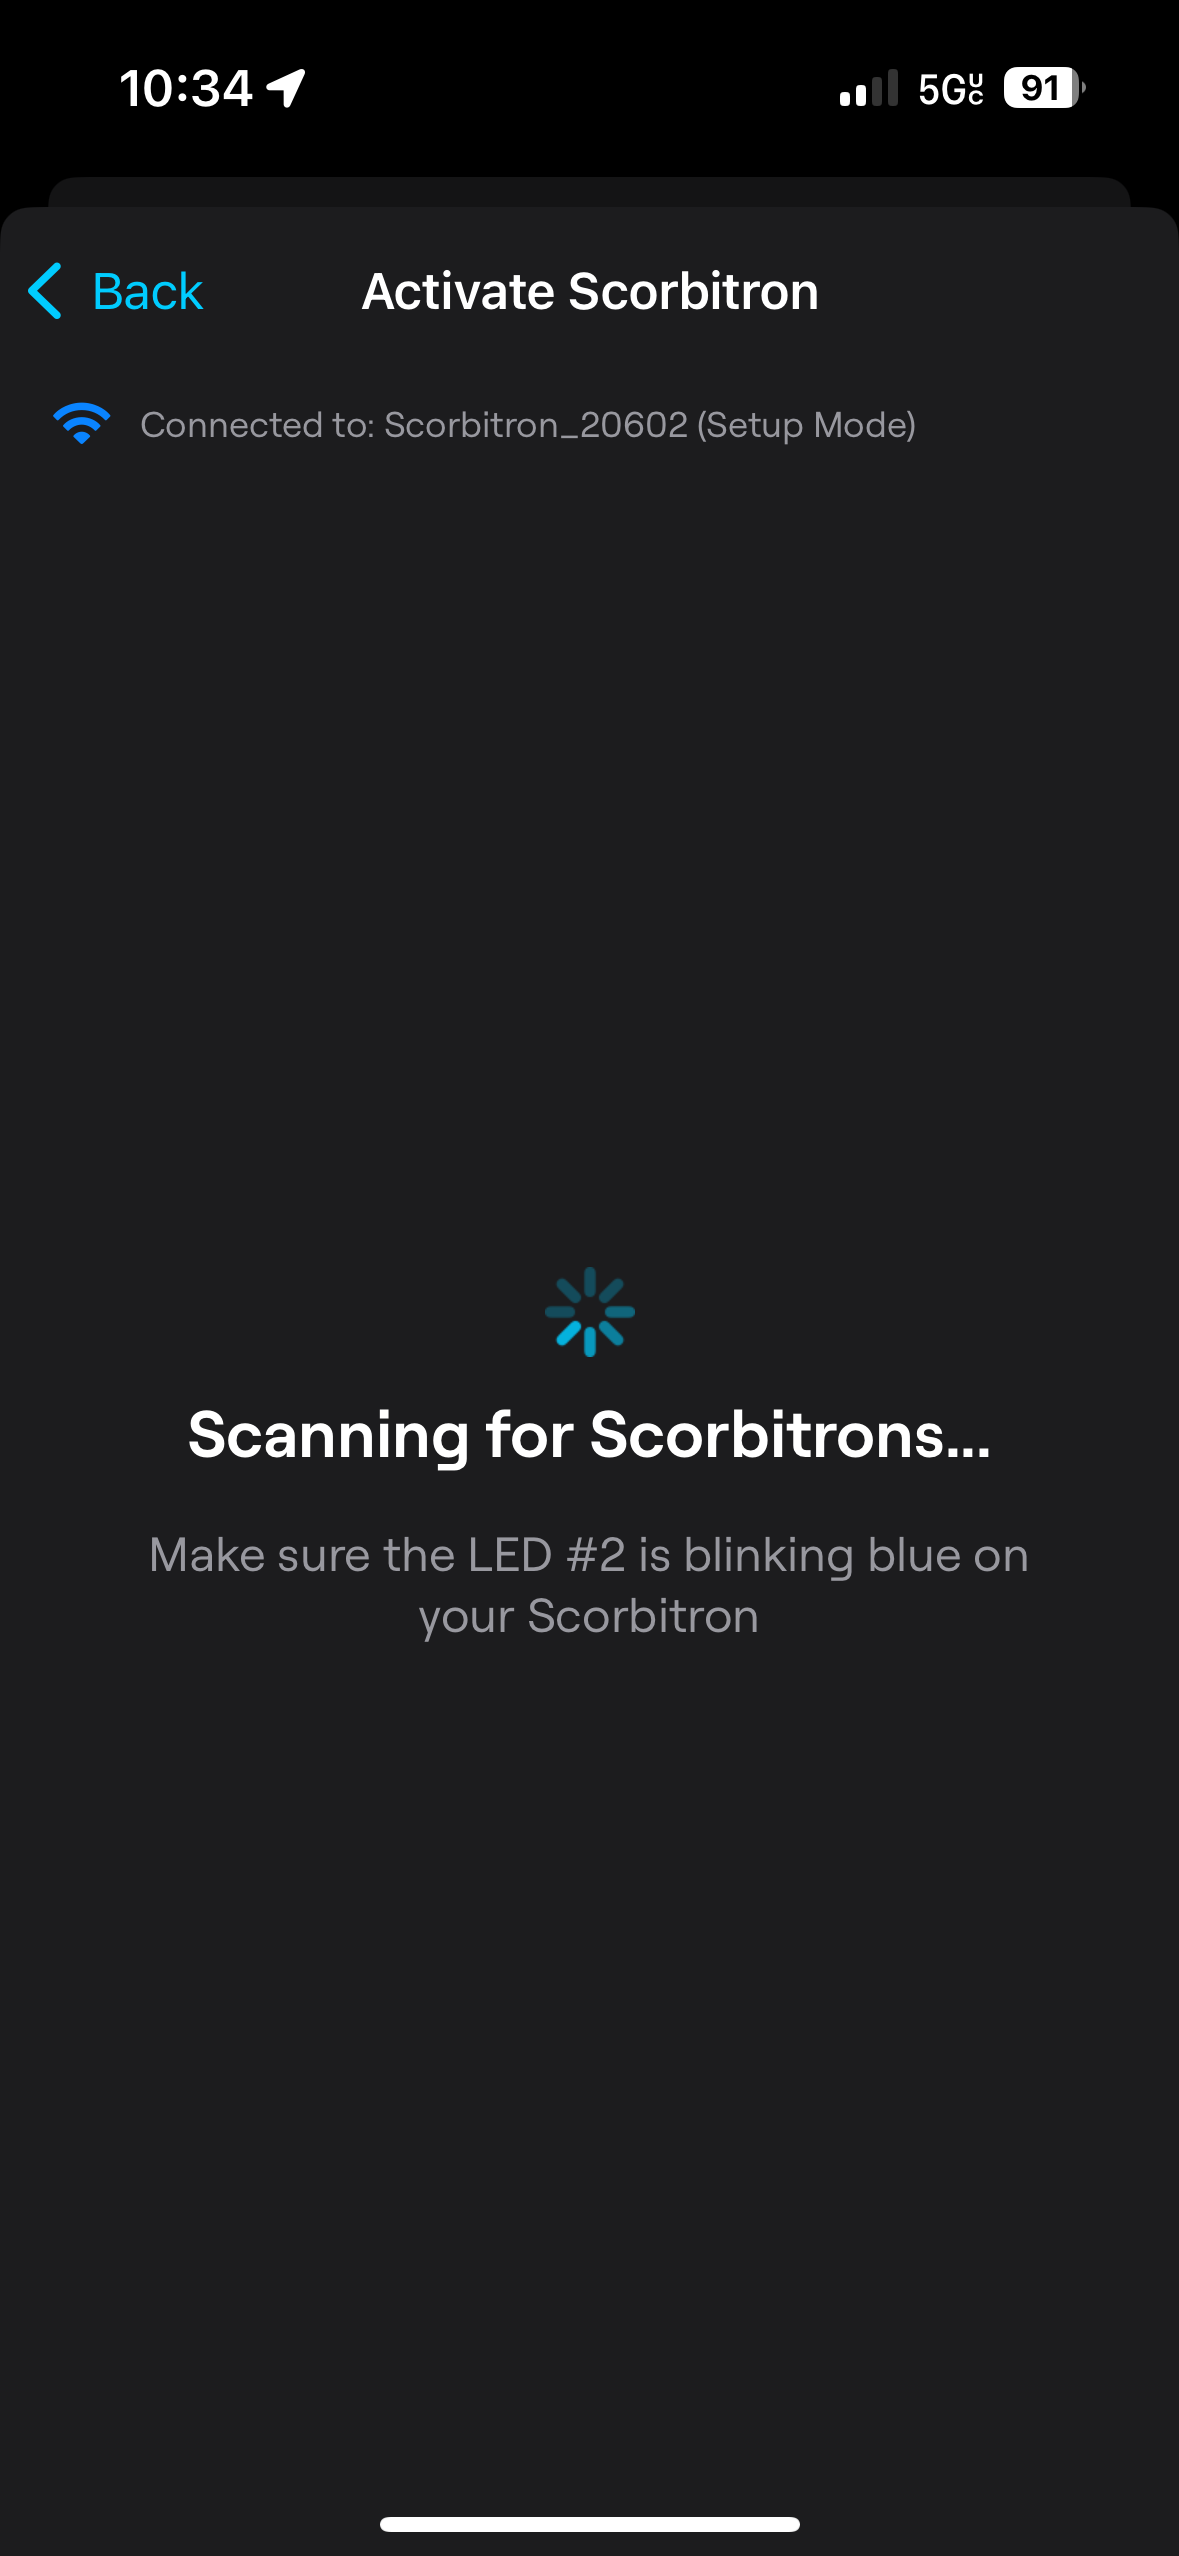
You will now be asked to locate your pairing button on the Scorbitron. Pressing the button on the upper left of the Scorbitron device will begin the pairing process with a flashing blue LED. Once you have pressed the button and confirm it is flashing blue, you can tap "I Pressed the Button."
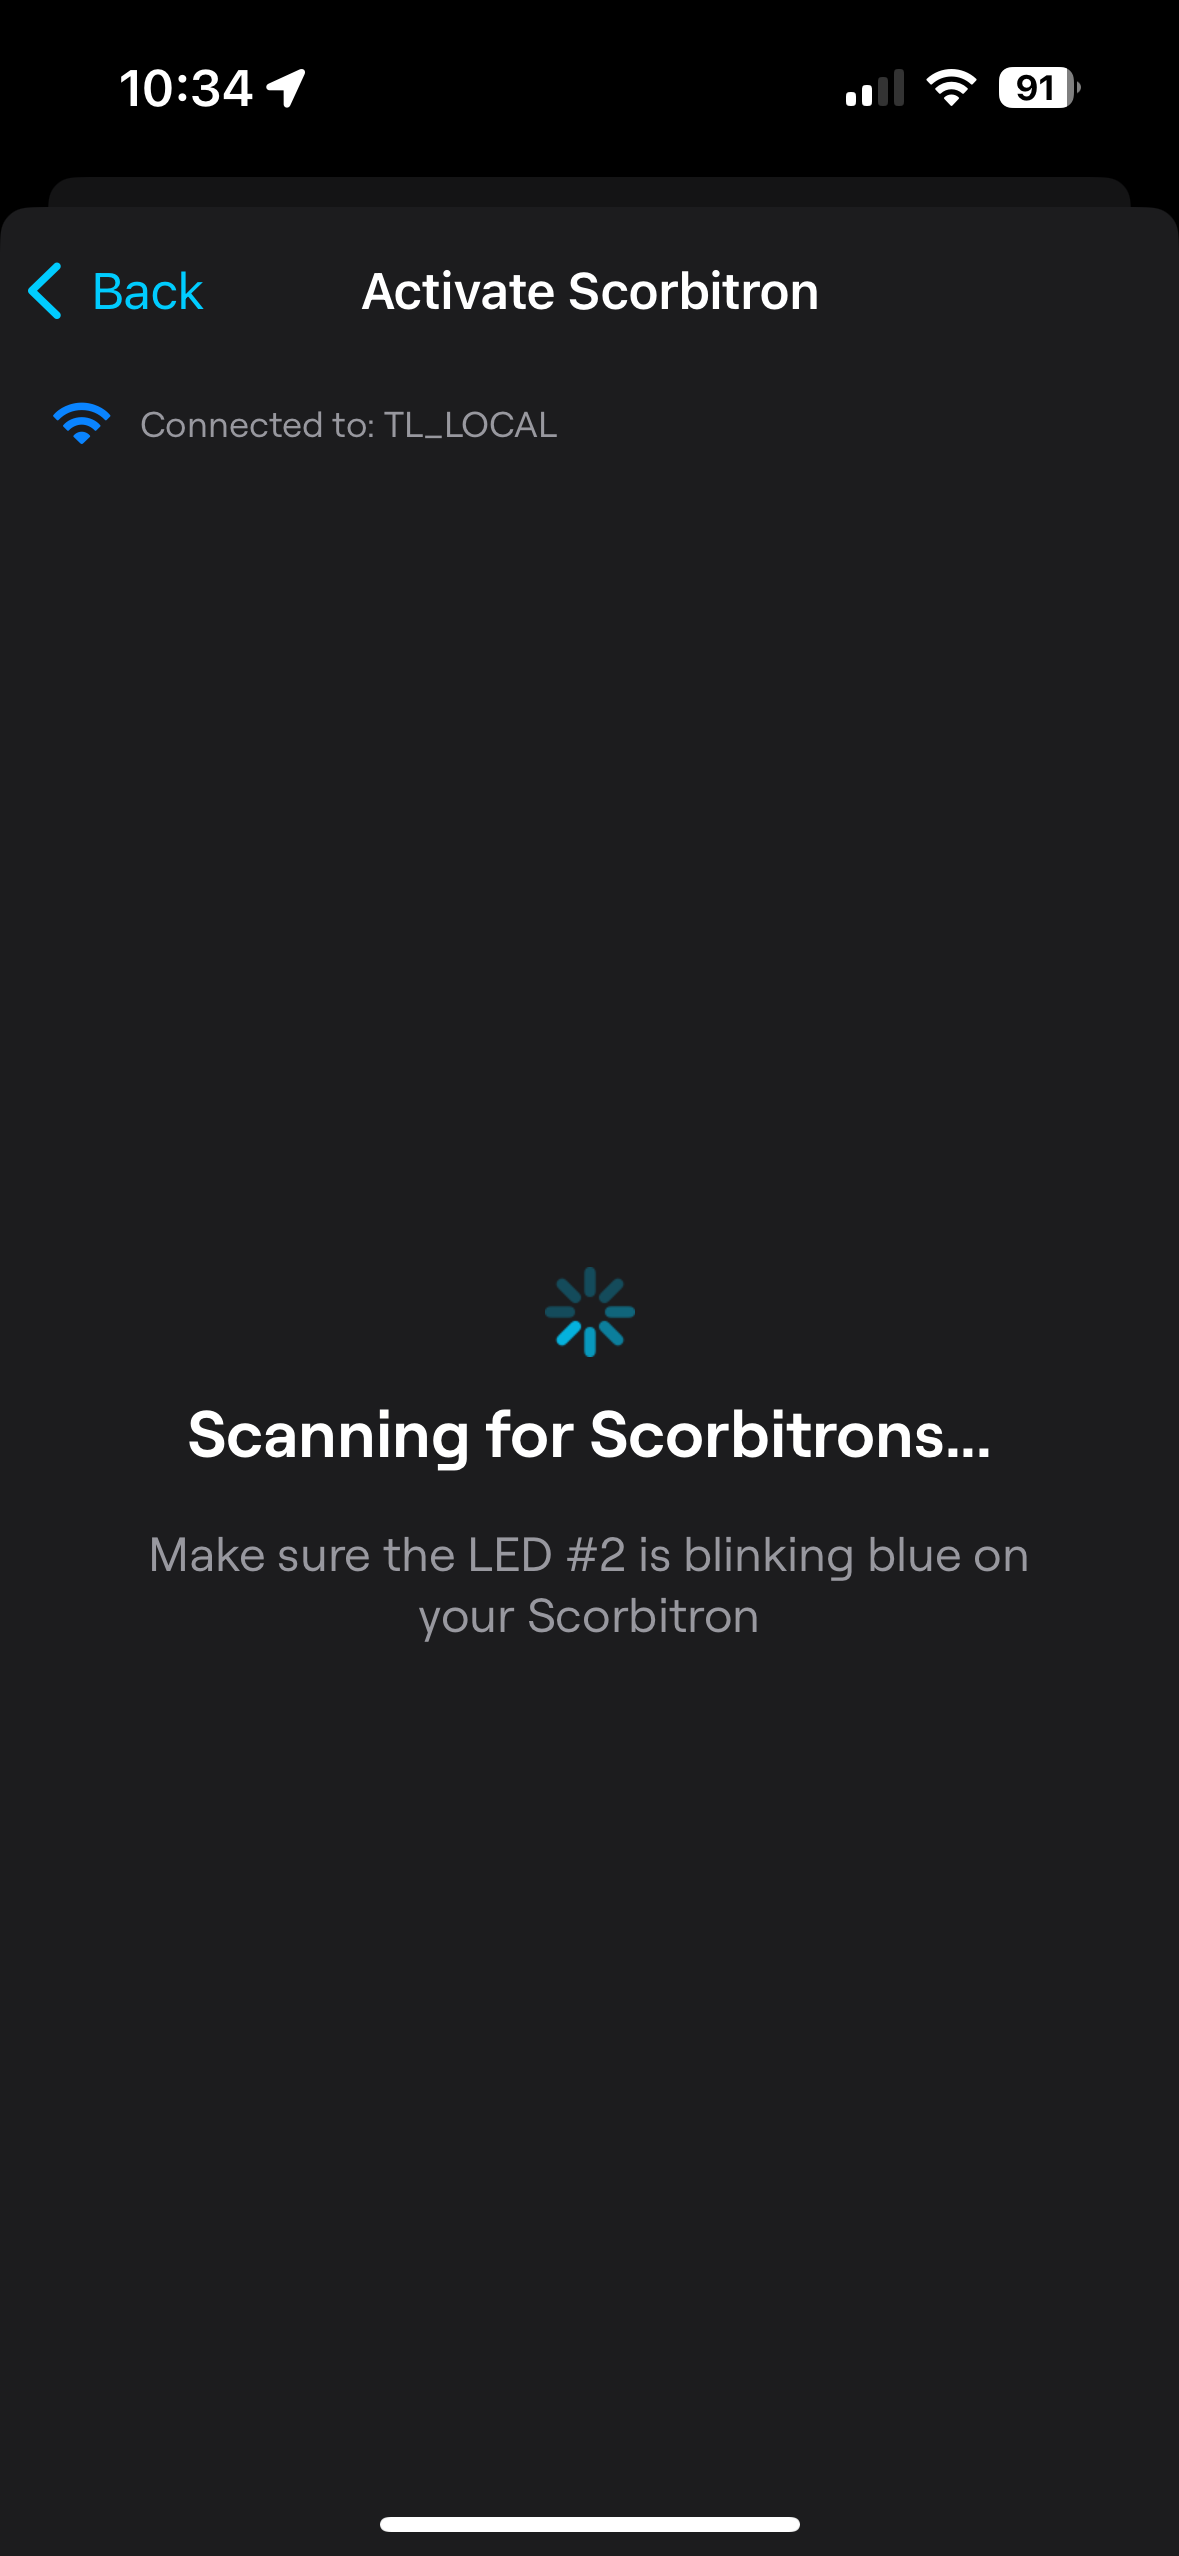
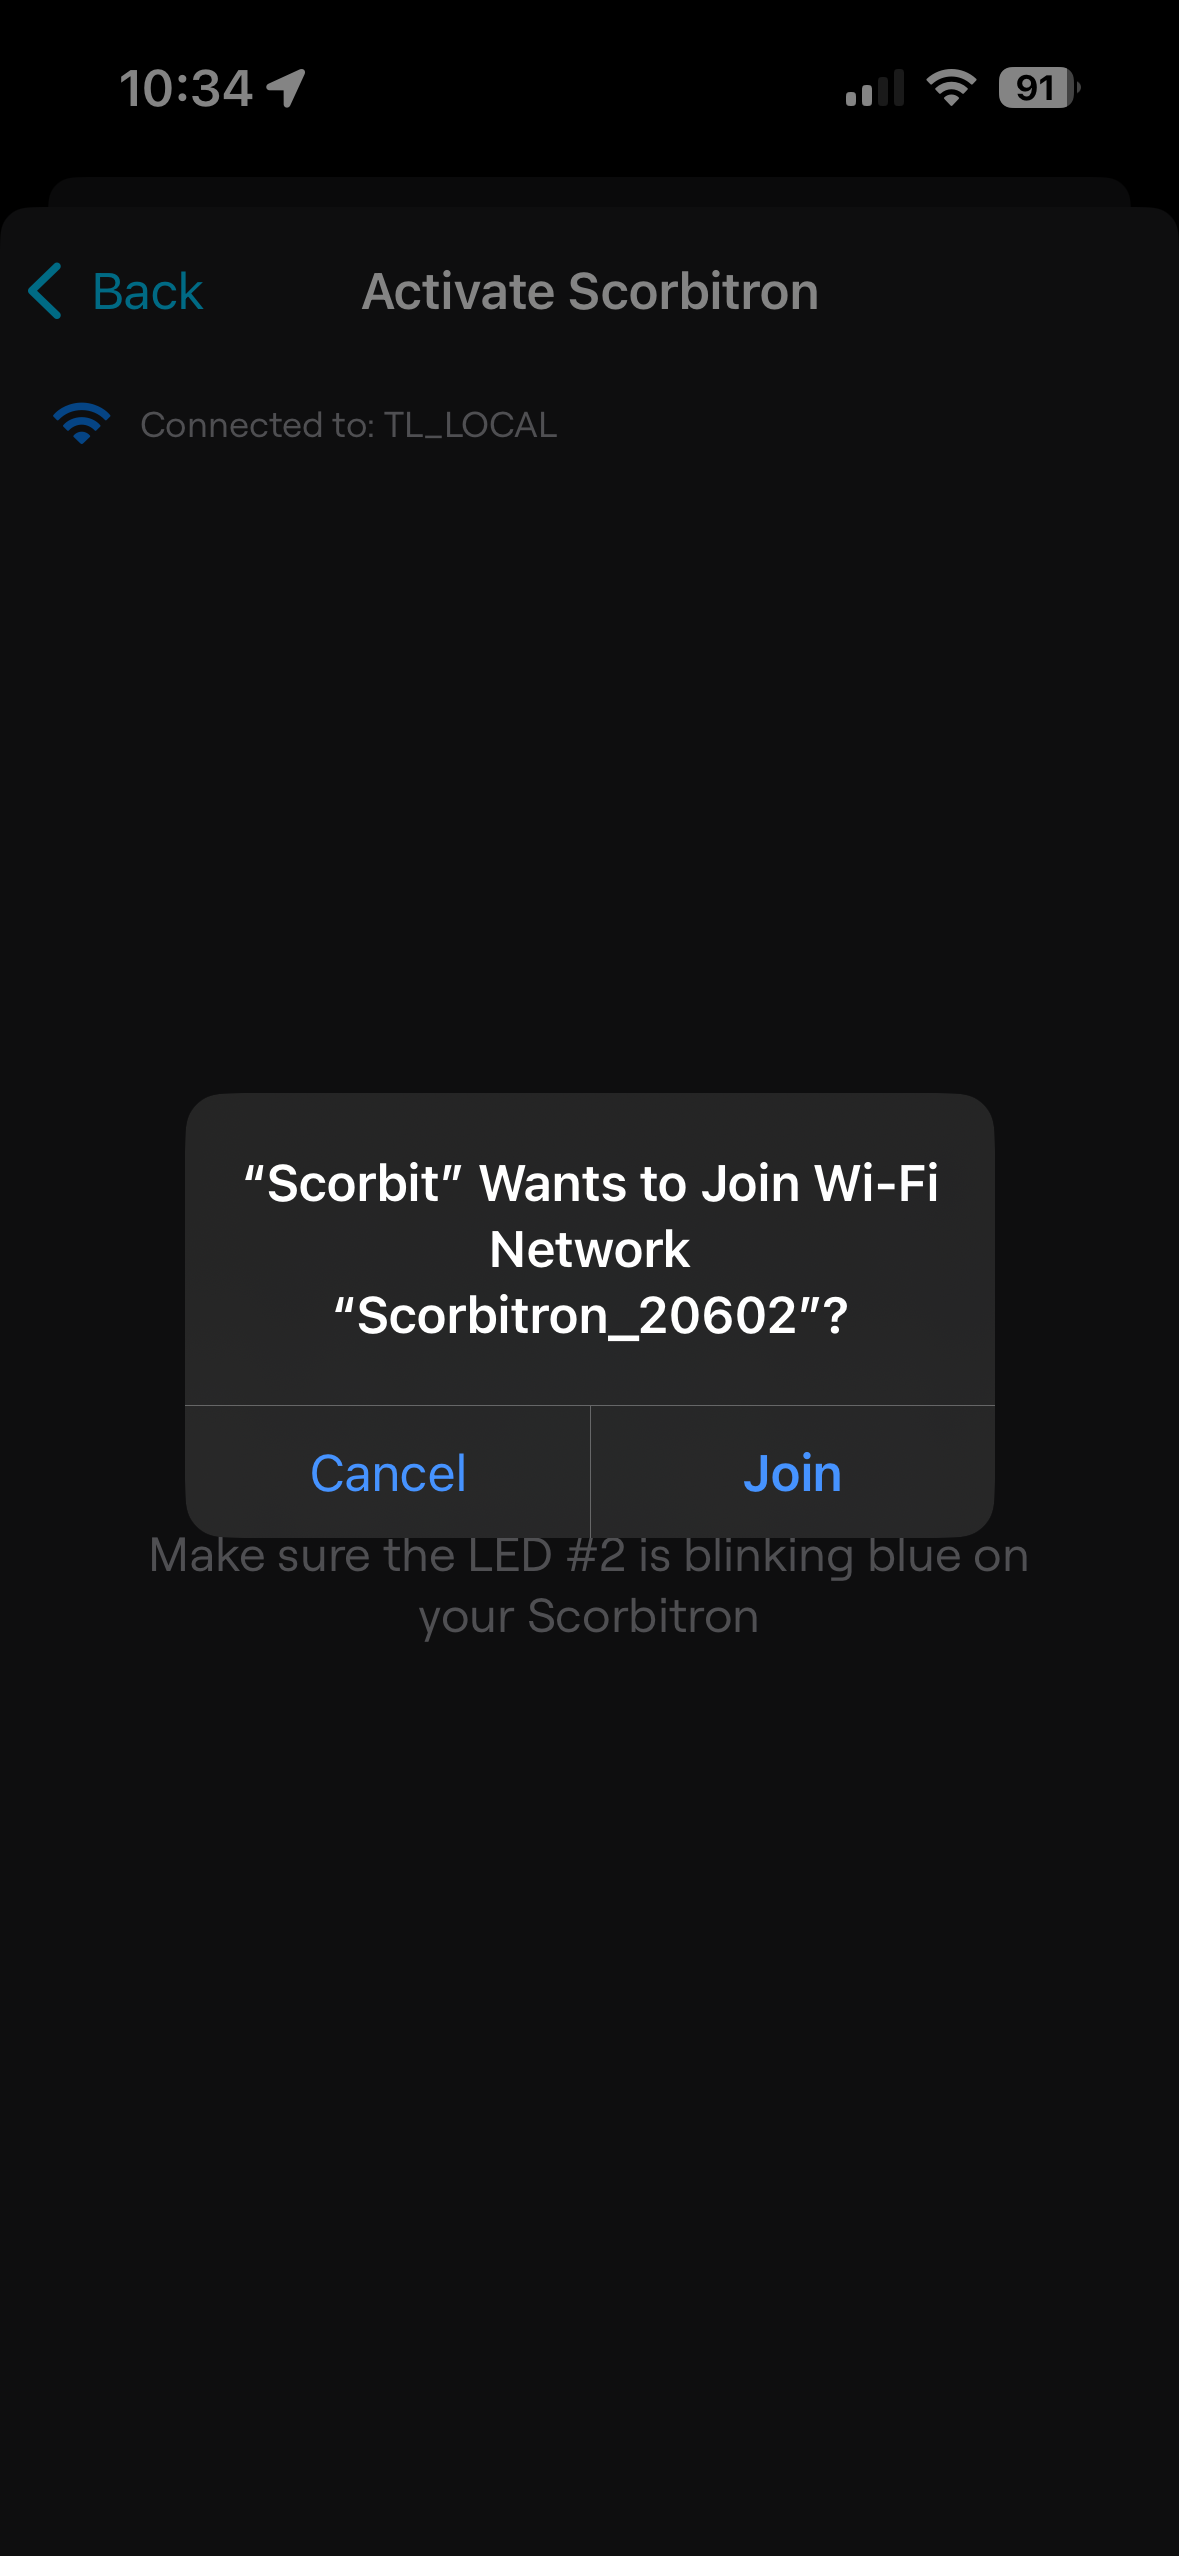
The app begins to look for the Scorbitron over WiFi. In a few moments, it should find it and give you the opportunity to join the temporary access point. Click Join.
You must now pass the Scorbitron your WiFi credentials for the local network. As you pass these credentials, pay close attention to the top of the screen. It should say "Connected to Scorbitron..." on the top. If it says your local WiFi there, it means the last step did not connect properly. If this is the case, go back to the previous screen and tap "I Pressed the Button" again and join the Scorbitron.
Enter your WiFi credentials and click on "DONE" to continue.
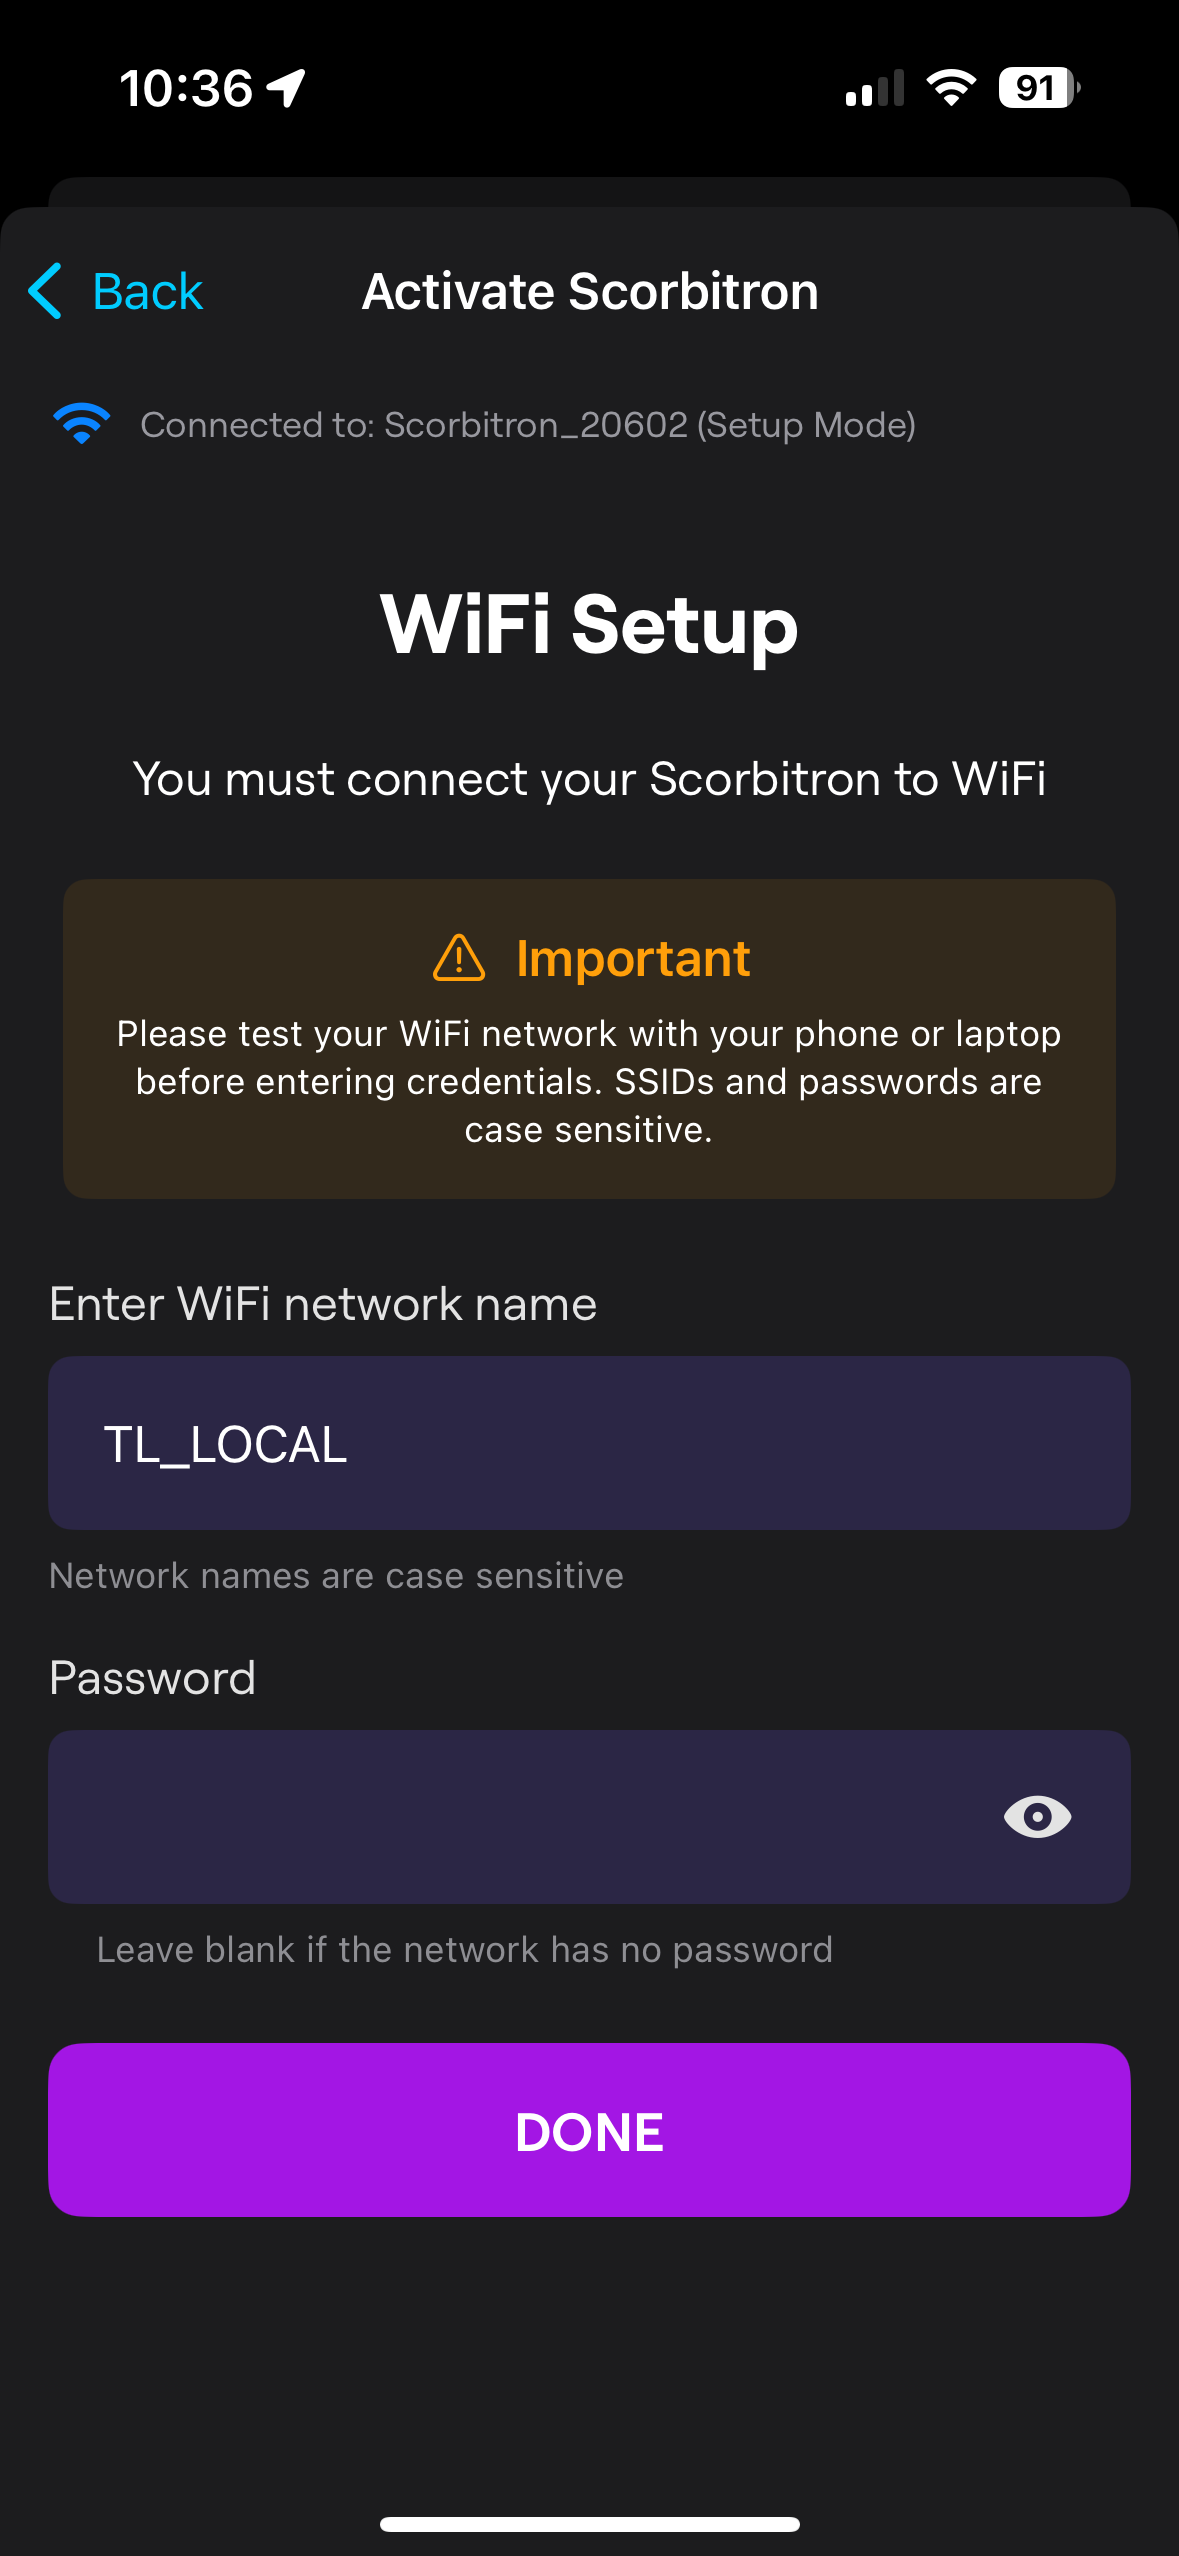
The Scorbitron will now attempt to connect to your WiFi access point using the credentials provided. Note that the Scorbitron uses a 2.4Ghz 802.11/b/g/n protocol. If your WiFi network is 5Ghz or 6Ghz only, the connection will fail. We recommend a dedicated 2.4Ghz SSID for Scorbitrons to avoid contention with other WiFi users. Please see the Network Configuration section for tips and tricks to make your network installation as smooth as possible.
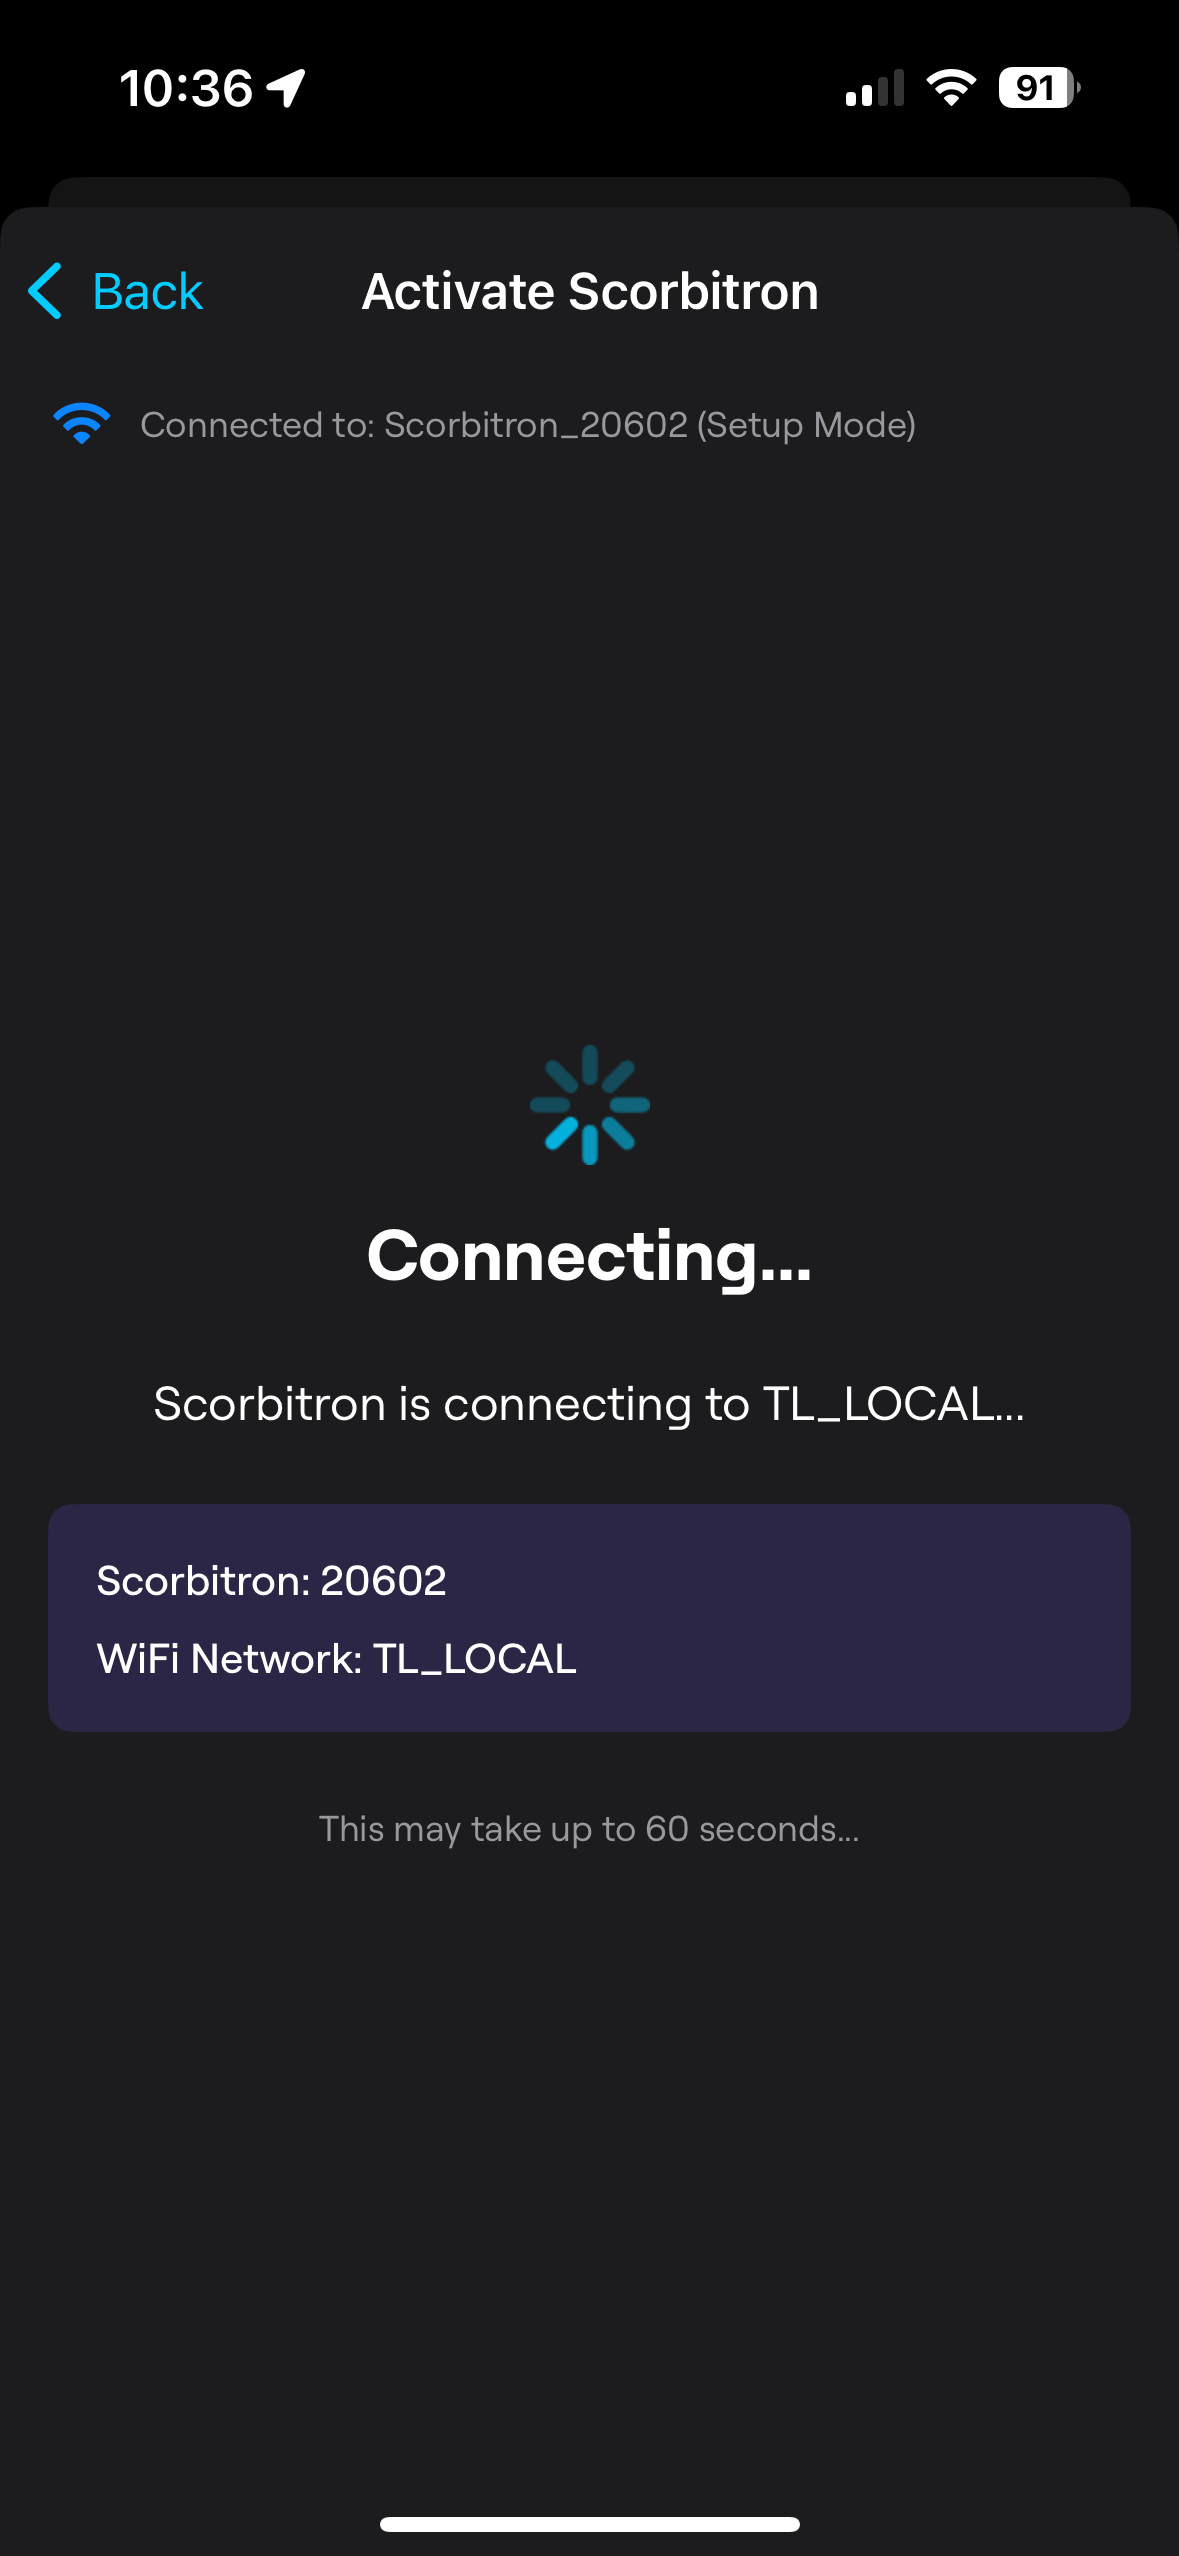
As the Scorbitron goes through the processe of connecting to WiFi, you will see the status LED on the Scorbitron change from flashing blue to flashing amber. Once the connection is complete, the LED will change to green and the app will give you a success message.
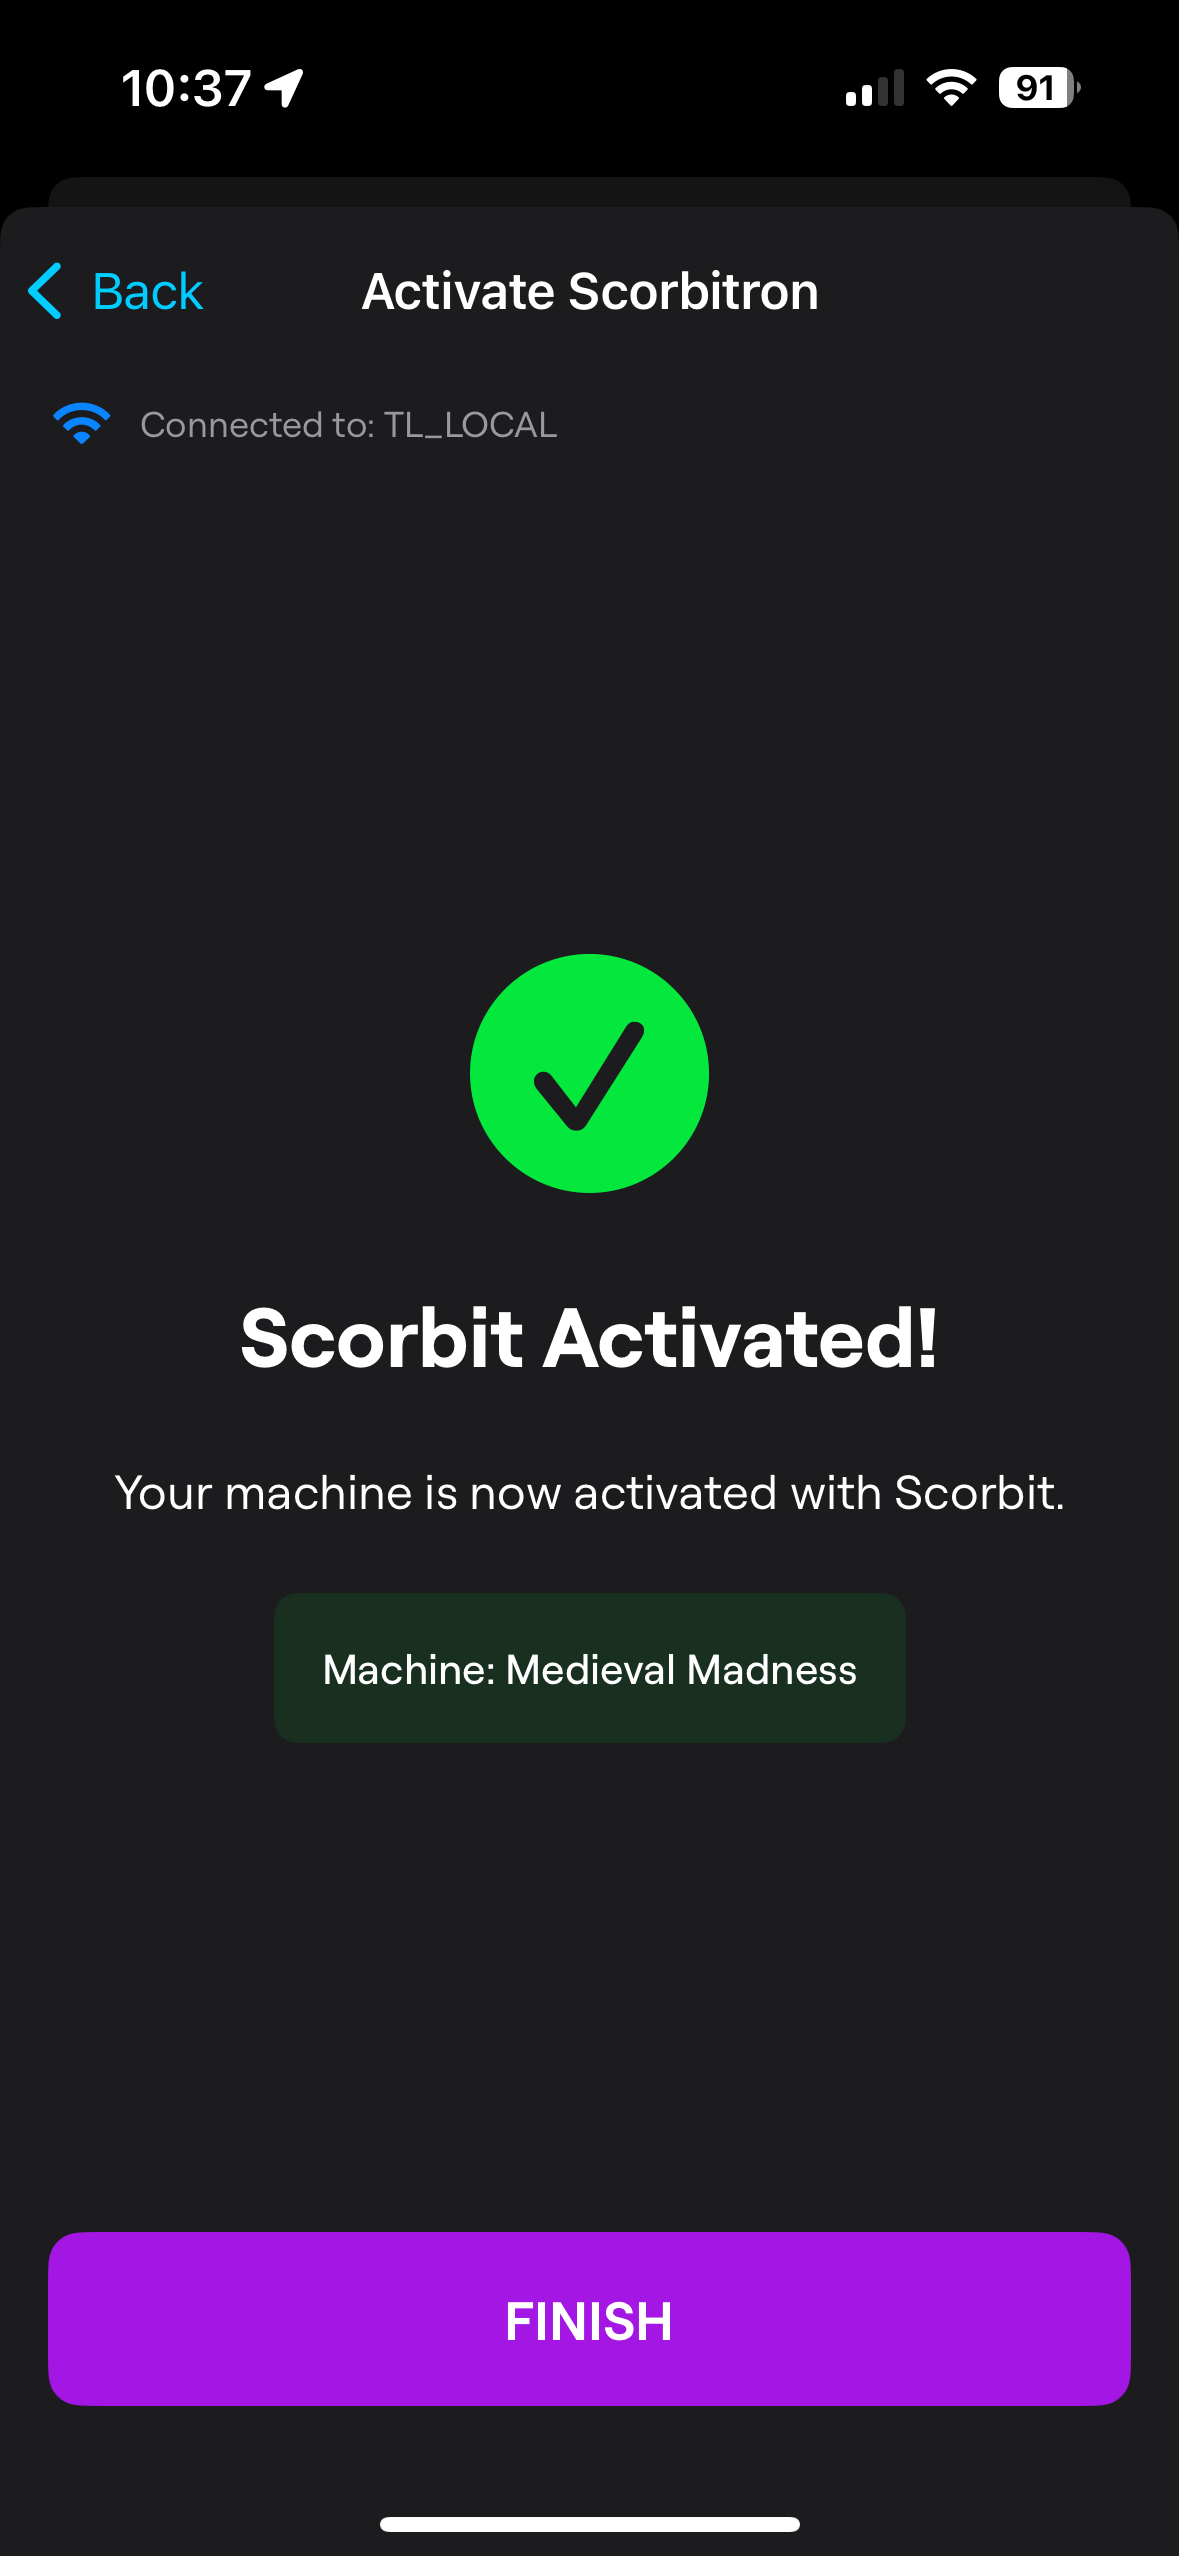
Clicking on the FINISH button will take you back to your machine list. You should now see your machine with the Active indicator. You are now ready to start using Scorbit!