
Pulp Fiction Installation
Play Mechanix's Pulp Fiction pinball supports Scorbit natively, so it doesn't need a Scorbitron, CPU Probe or DMD Probe. You only install the Scorbit Tap Pad and its cable, connect the game to your network with an Ethernet cable (or WiFi to Ethernet Bridge), and turn on Scorbit in the game's software.
This guide is separate from the numbered installation steps. If you are installing Scorbit in a Pulp Fiction, use this page instead of Steps 1 to 7.
What You Will Need
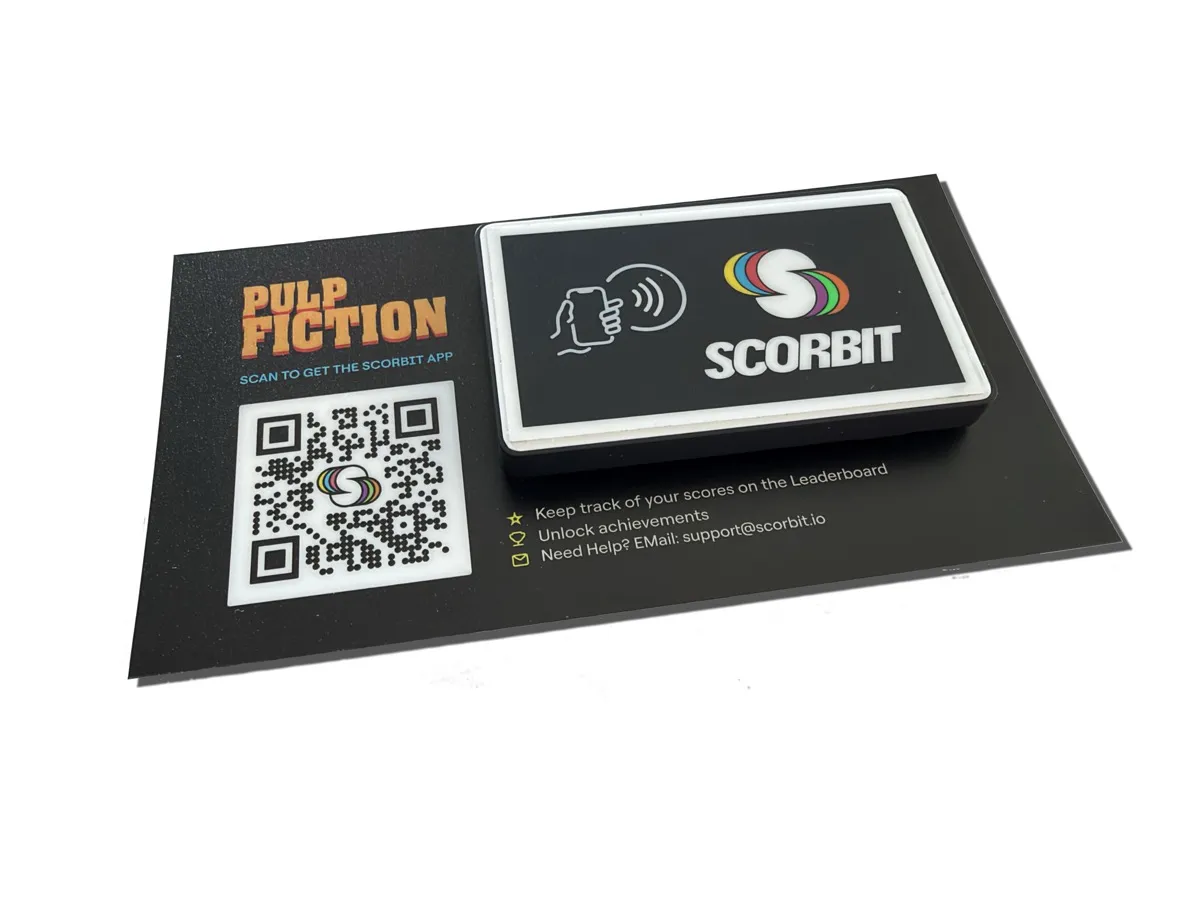
- The Scorbit Tap Pad kit for Pulp Fiction: the Tap Pad, already mounted on its cradle and pedestal on the Pulp Fiction apron card with the flex cable connected, plus the flex connector, and the 3 meter USB cable.
- An Ethernet cable long enough to reach from the back of the game to your router, switch or wall jack. Pulp Fiction has no embedded WiFi capability, but a suitable WiFi to Ethernet device can be used.
- A Class 10 microSD card of 16GB or larger, and a microSD adapter for your computer if it needs one. Everything on this card will be erased.
- A Windows or Mac computer with at least 16GB of free disk space, to prepare the microSD card.
- The Scorbit mobile app on your iOS or Android phone.
Warning
Always turn the game off before you connect or disconnect cables, or insert or remove the microSD card. When the coin door is open and you lift the playfield, watch out for the high-power coil lugs, which are a shock hazard.
About the Tap Pad Kit
Unlike other Scorbit installations, the Pulp Fiction Tap Pad comes as a single kit. The Tap Pad is already mounted on a custom Pulp Fiction apron card. The card replaces the game's original instruction card and includes a QR code for downloading the Scorbit app. You will be installing the whole kit at once in the apron's original instruction card slot. You will not have to position, mount or adjust the height of the Tap Pad yourself.
Part 1: Install the Tap Pad Hardware
Locate the Game's Controller Board
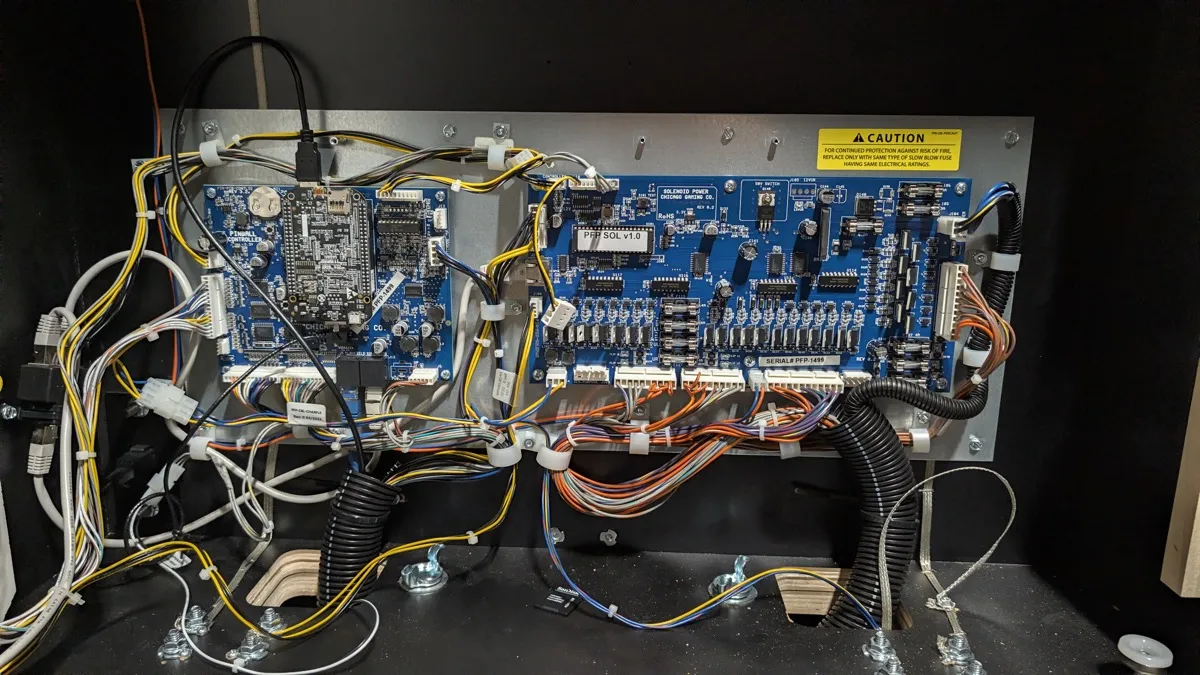
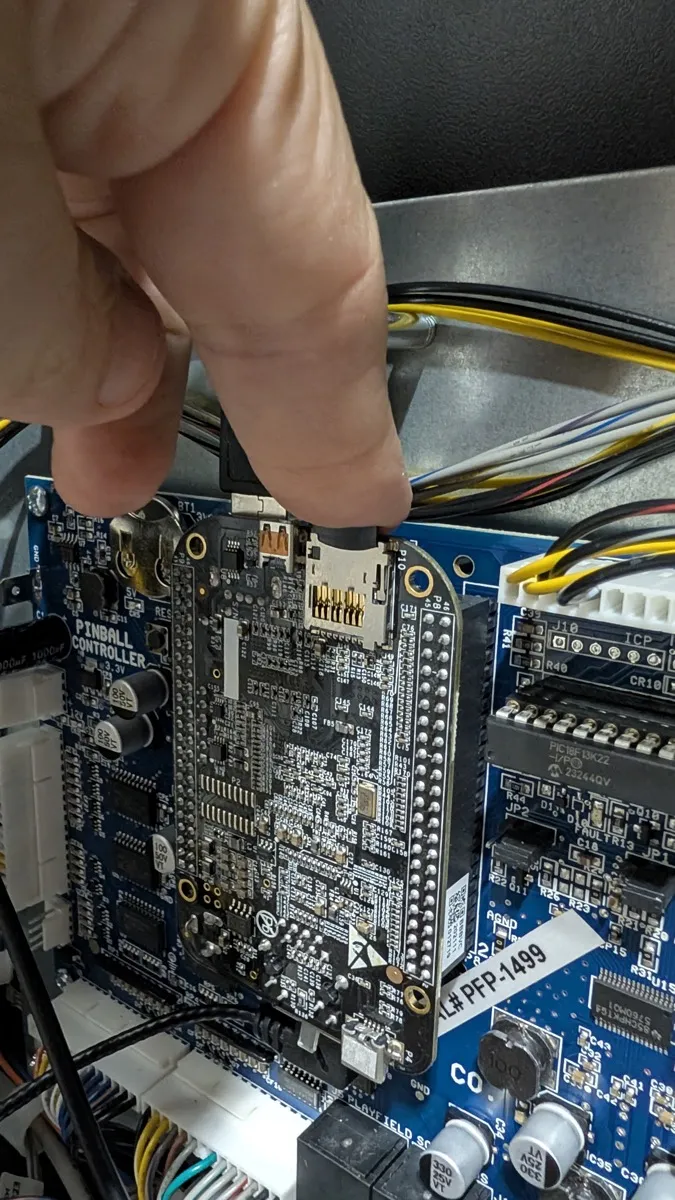
Turn the game off. Remove the backglass and open the backbox insert door. The game's main controller board is mounted on the back wall of the backbox. The small black board attached to it is the BeagleBone board, which runs the game's software.
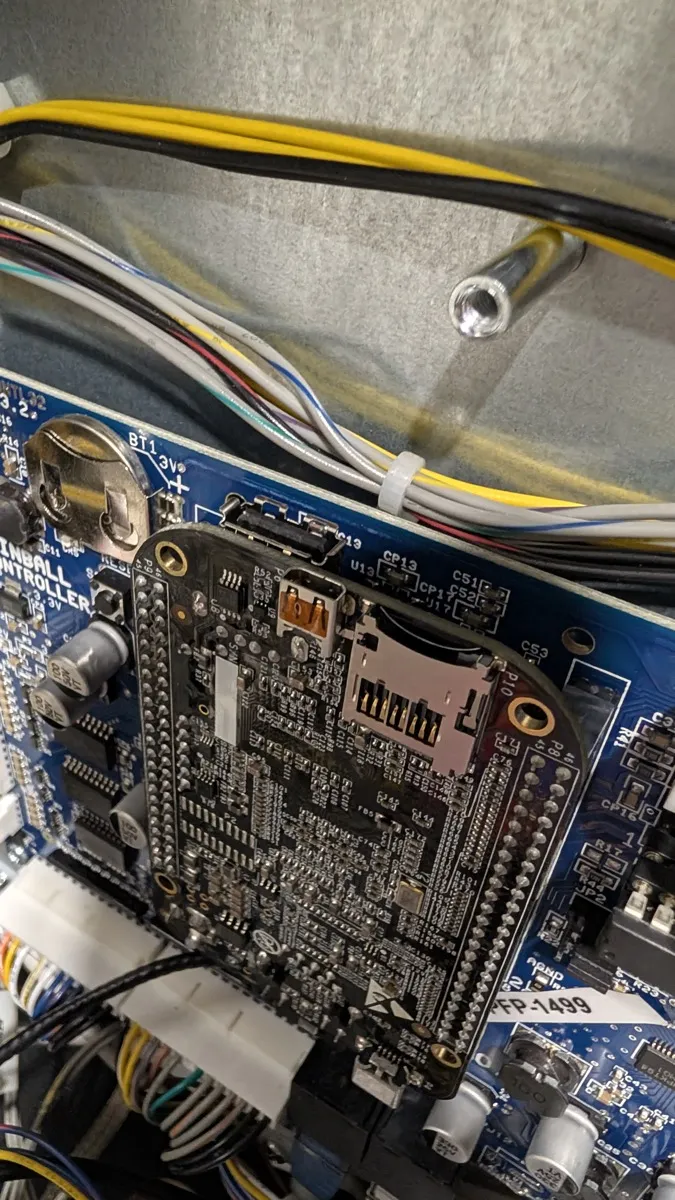
At the top of the BeagleBone are a USB-A port and a microSD card slot. You will use the USB port for the Tap Pad now and the microSD slot later in Part 3.
Run Tap Pad USB Cable
Plug the USB-A end of the 3 meter USB cable into the USB-A port at the top of the BeagleBone board.
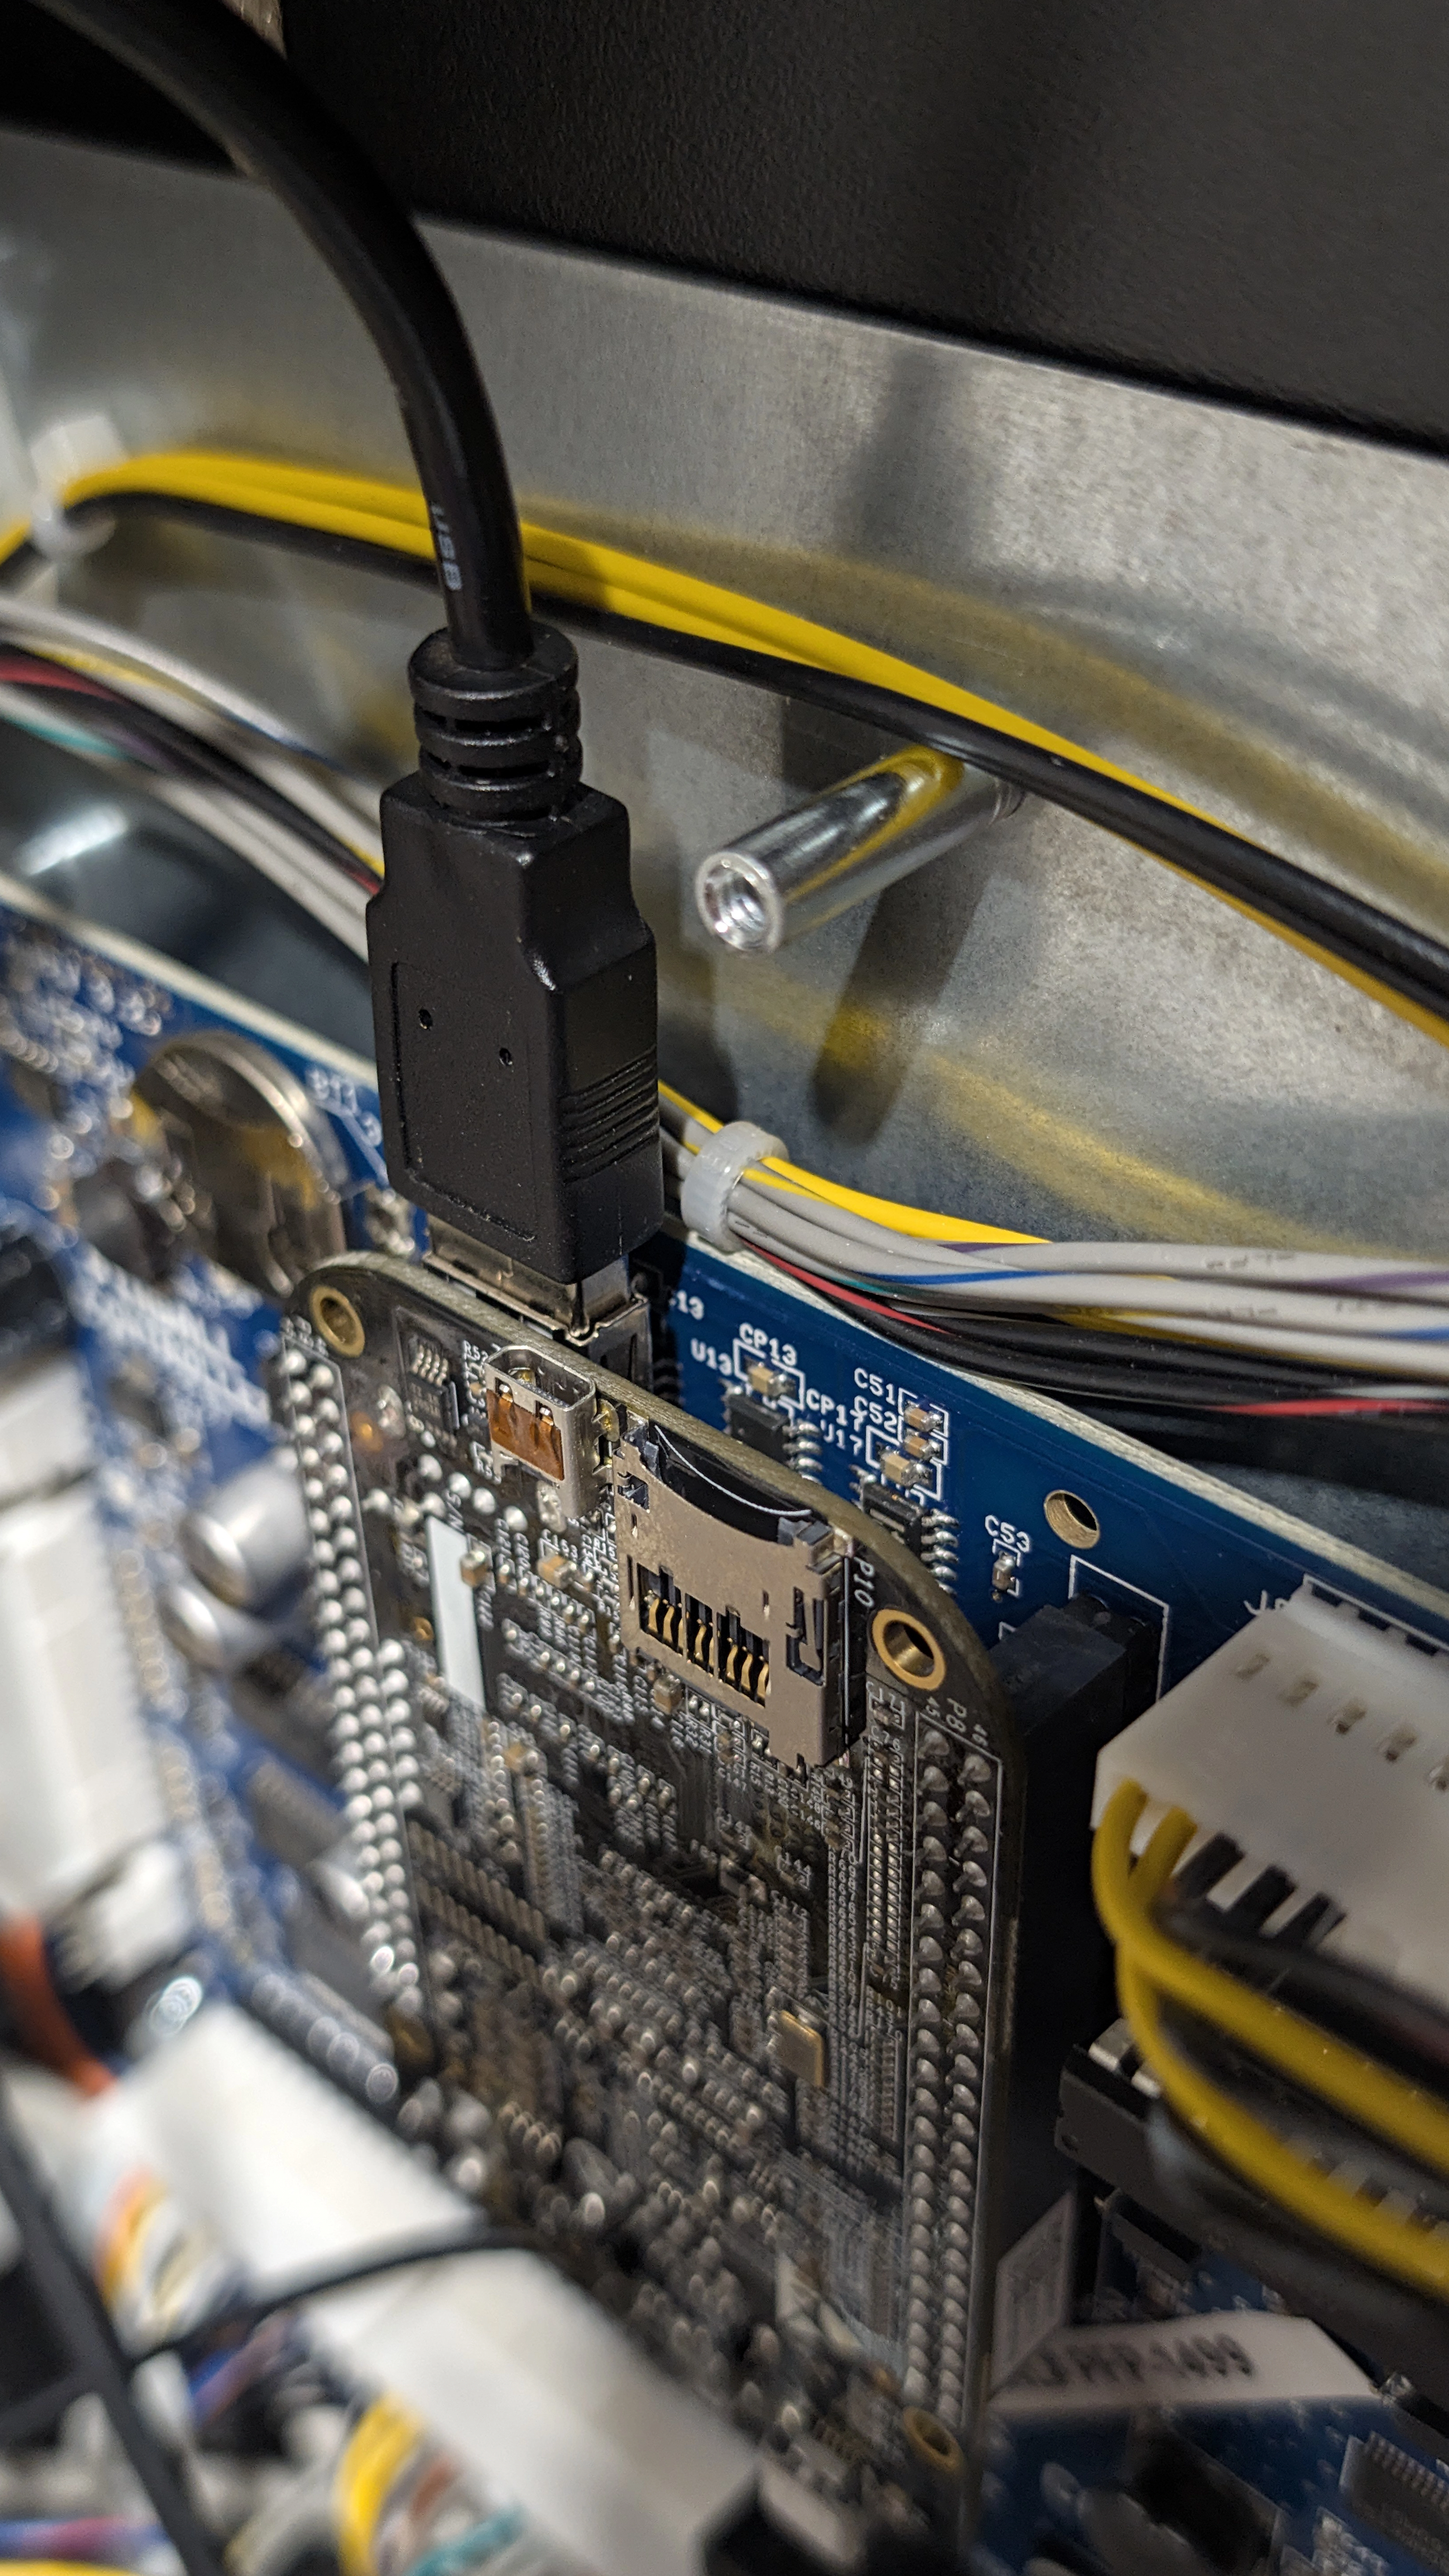
Run the other end of the cable out through the bottom of the backbox, following the existing cable management. Leave enough slack that nothing pulls tight when the backbox is folded down.
Run Cable Along Bottom of Playfield
Remove the balls from the playfield and lift it up. Run the USB cable along the underside of the playfield toward the apron, using the existing cable management or velcro or cable ties. Keep the cable away from solenoids and other moving parts that could catch on it.
Remove the Original Instruction Card
The kit goes on the left side of the apron, beneath the playfield glass, next to the Pulp Fiction logo. Slide the glass out and remove the original instruction card from the left side of the apron. Keep the original card in case you ever remove the kit.
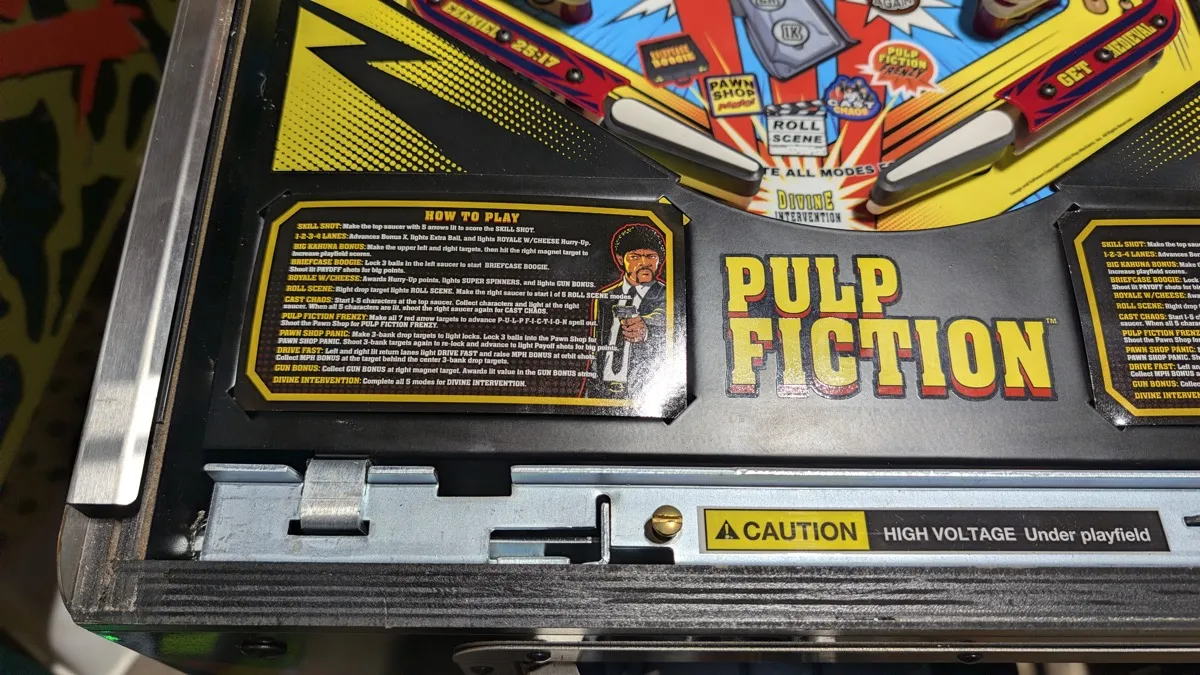
Feed the Flex Cable Through the Apron
The flex cable comes already connected to the Tap Pad. Hold the kit above the apron and feed the free end of the flex cable down through the slot at the back of the instruction card area, to the underside of the playfield. You can fold the flex cable to route it, but never fold it more than once in the same place, because that damages the cable.
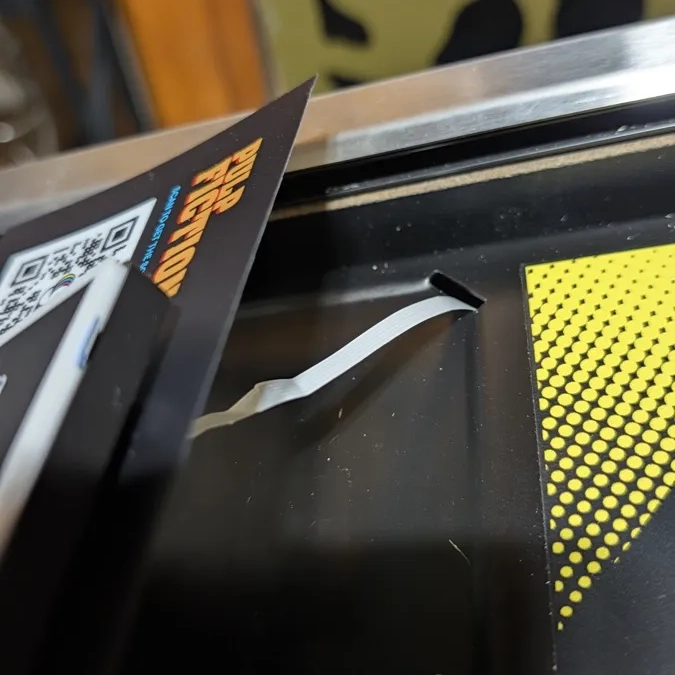
Connect and Mount the Flex Connector
After you feed the cable through the slot, attach the small flex connector board to the end of the flex cable. The connector is a ZIF ("zero insertion force") connector, designed to accept the cable with slight pressure. Insert the cable with the blue tab facing up and the exposed metal contacts facing down toward the board.
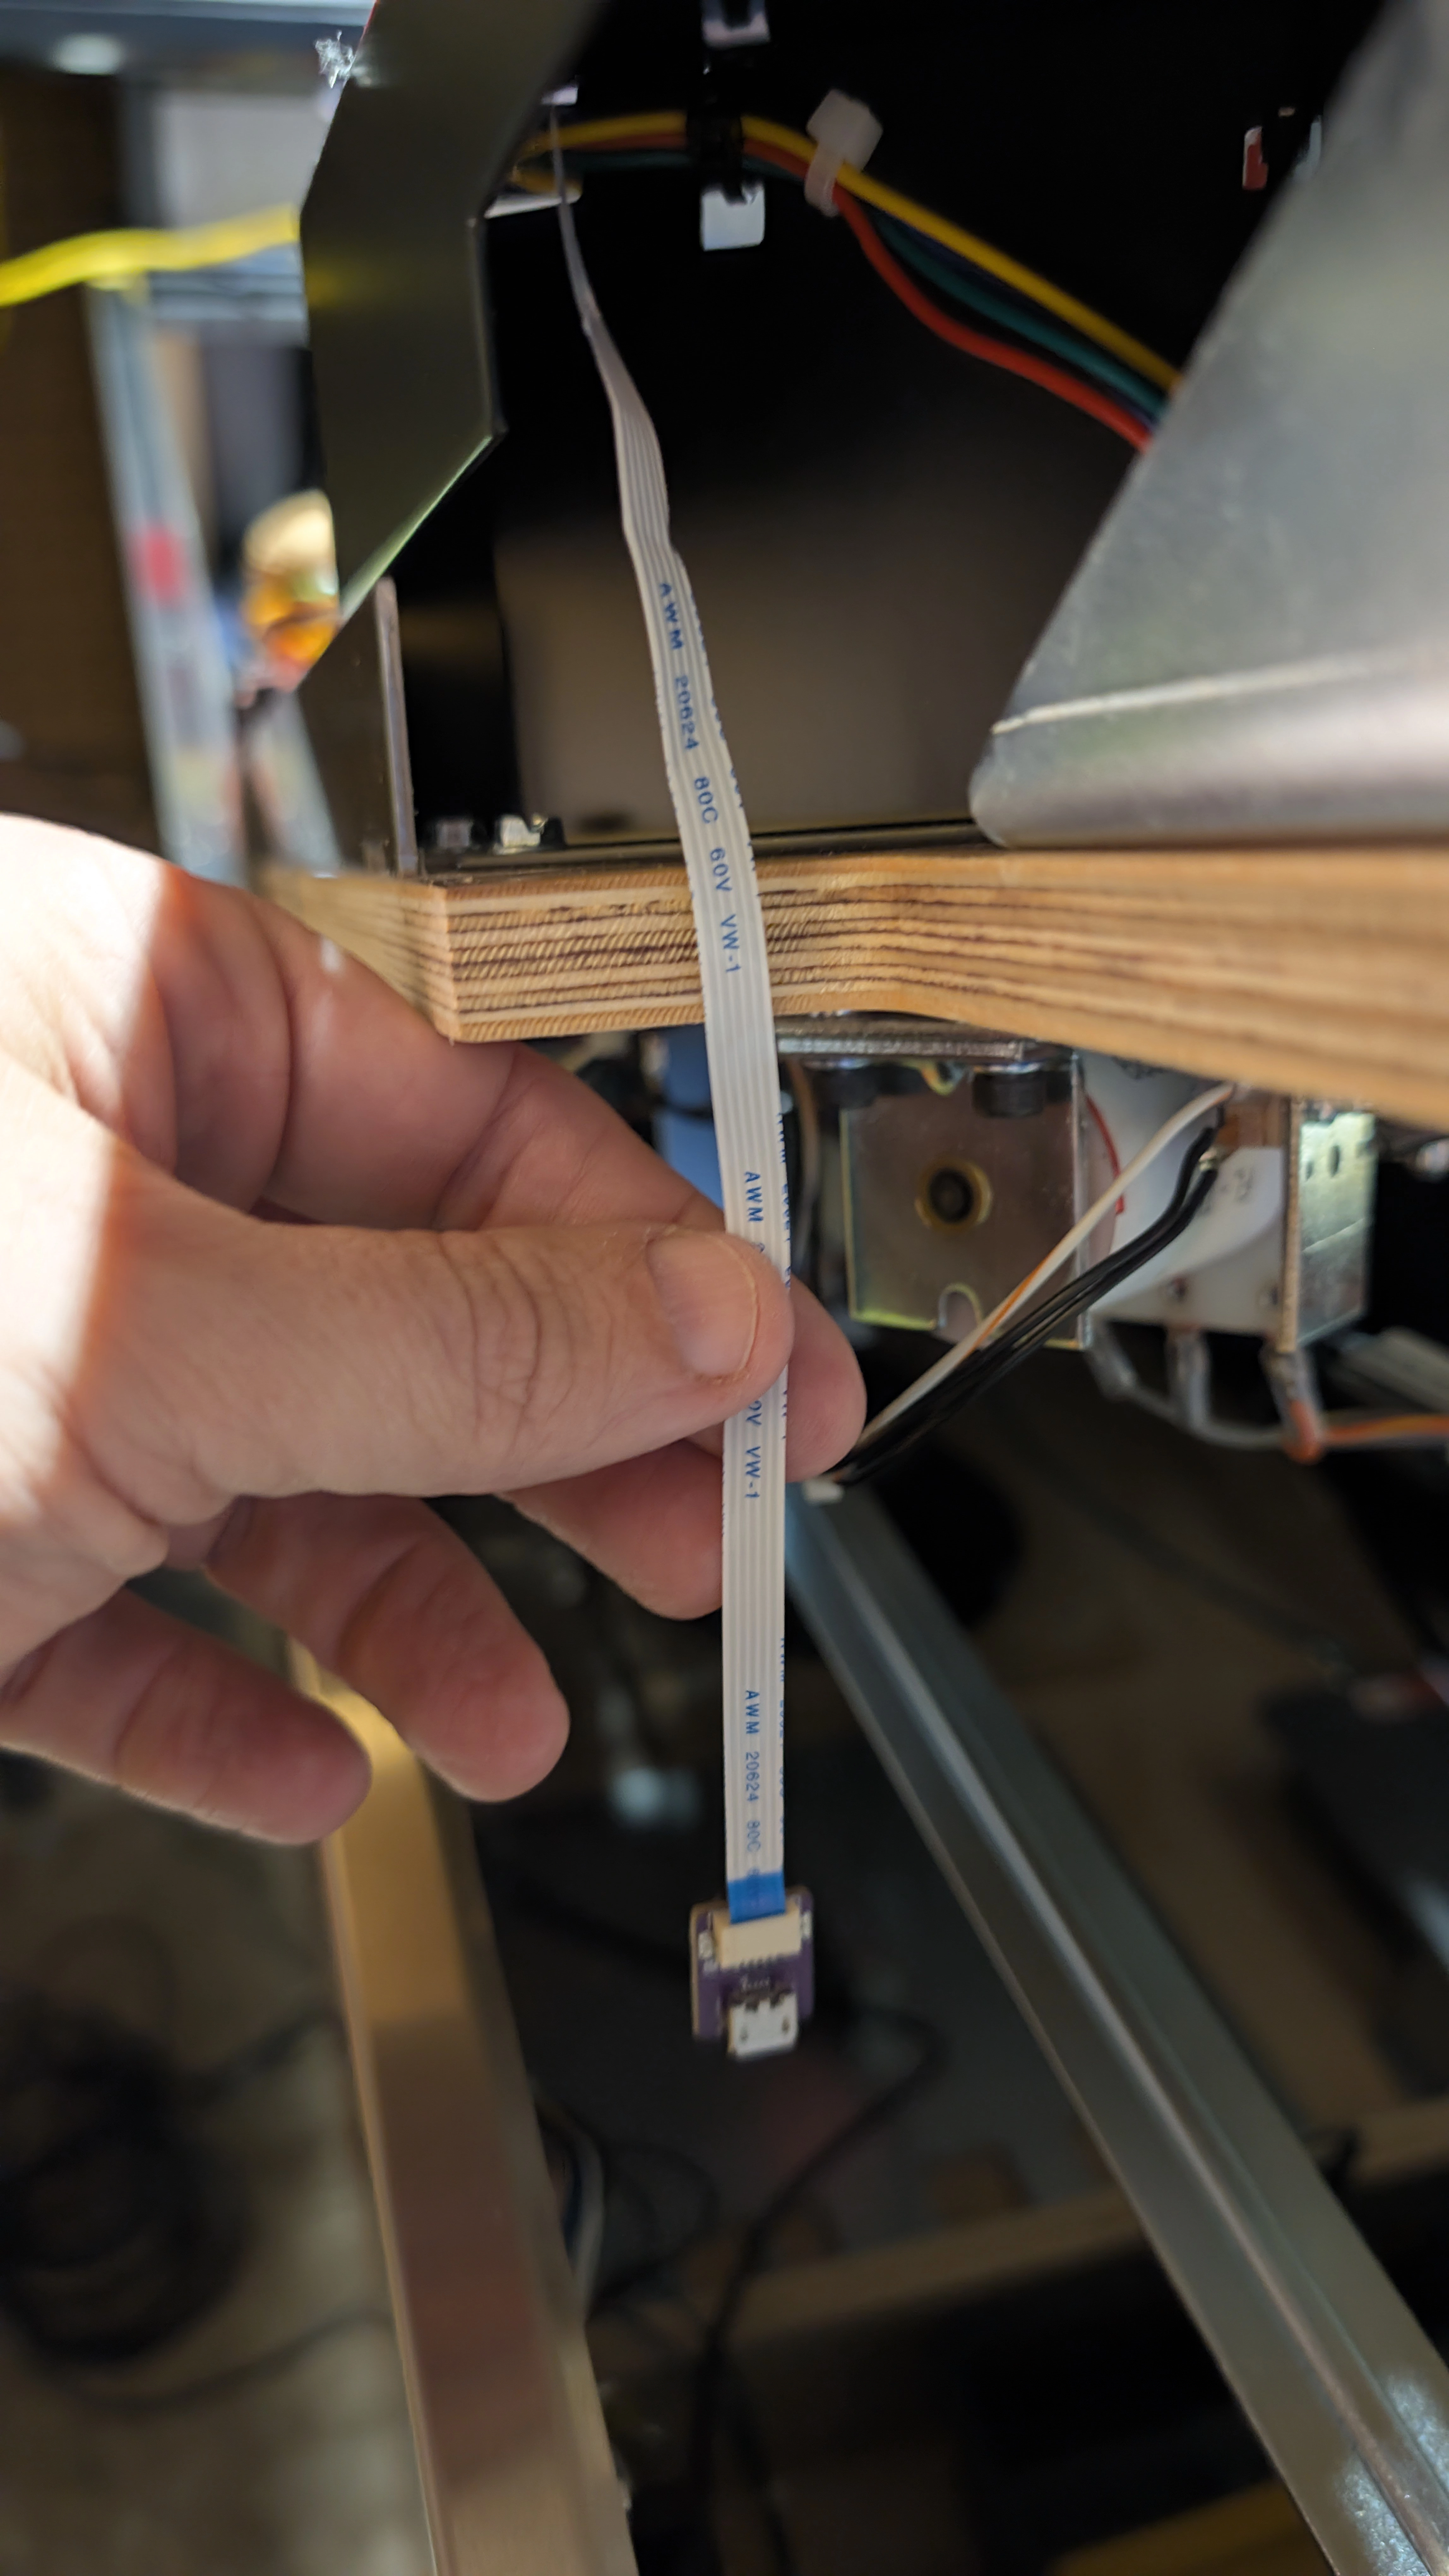
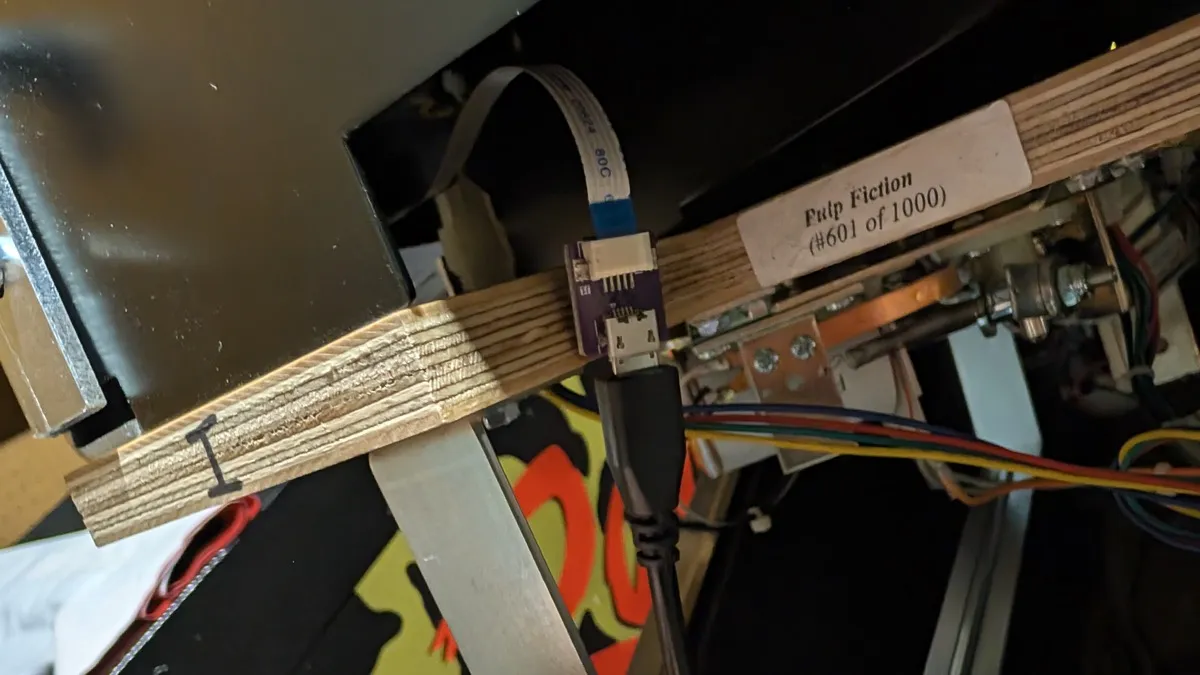
Use double-sided tape to attach the flex connector to the underside of the playfield, between the playfield and the apron, where it is unlikely to get caught when you lift the playfield for maintenance. Plug the micro USB end of the long cable into the flex connector. Position the connector and USB cable so that repeated maintenance does not stress either cable.
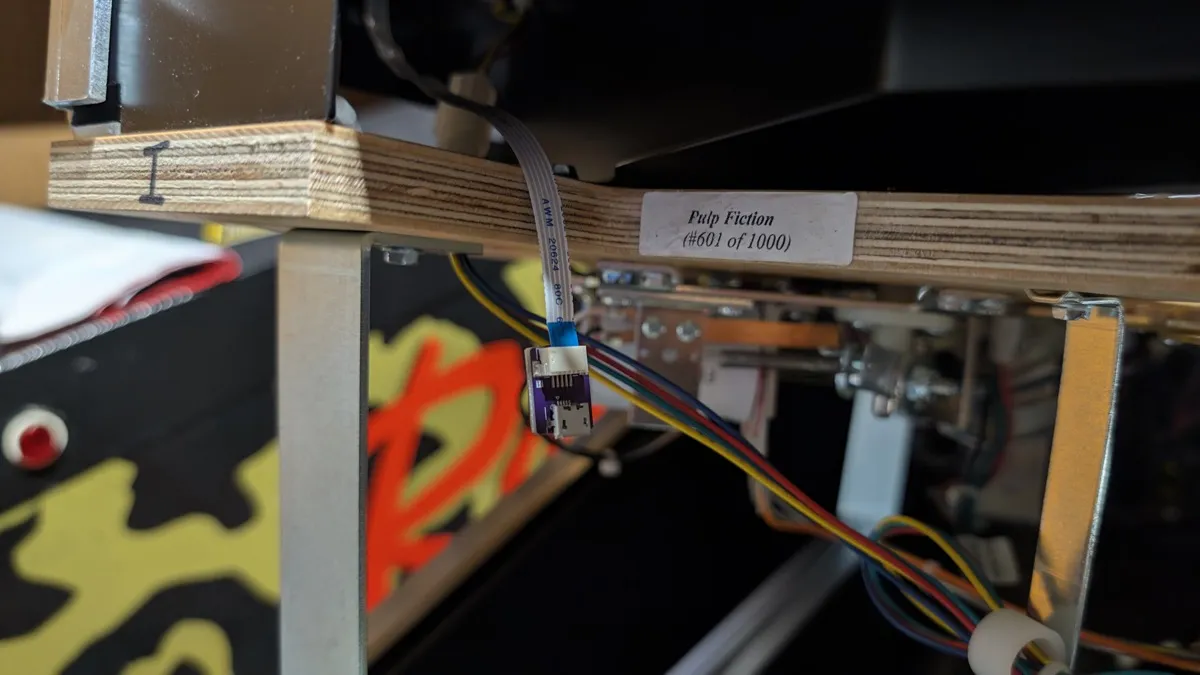
Install the Kit in the Instruction Card Slot
Slide the kit into the instruction card slot, the same way the original instruction card fit. While you do this, gently pull any slack in the flex cable through from below so it lies flat and doesn't bunch up under the card.
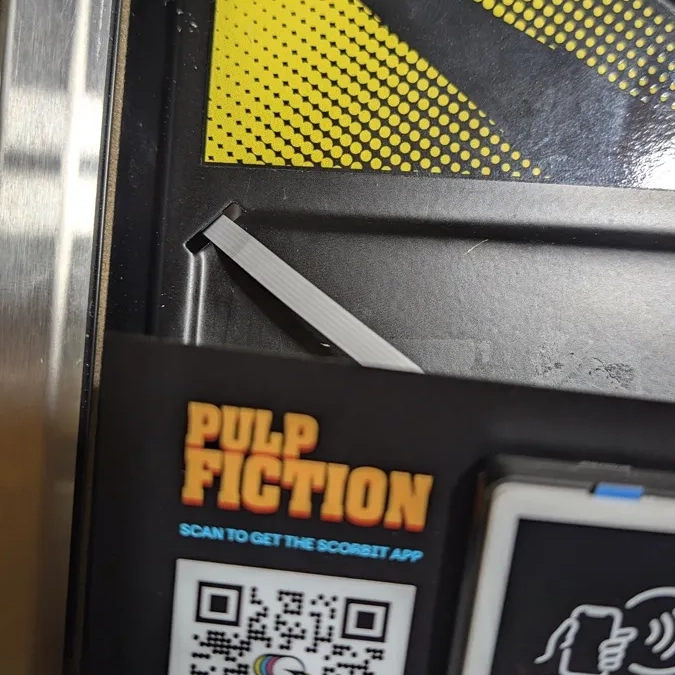
Slide the corners of the card into the slots, with the card sliding over the flex cable.
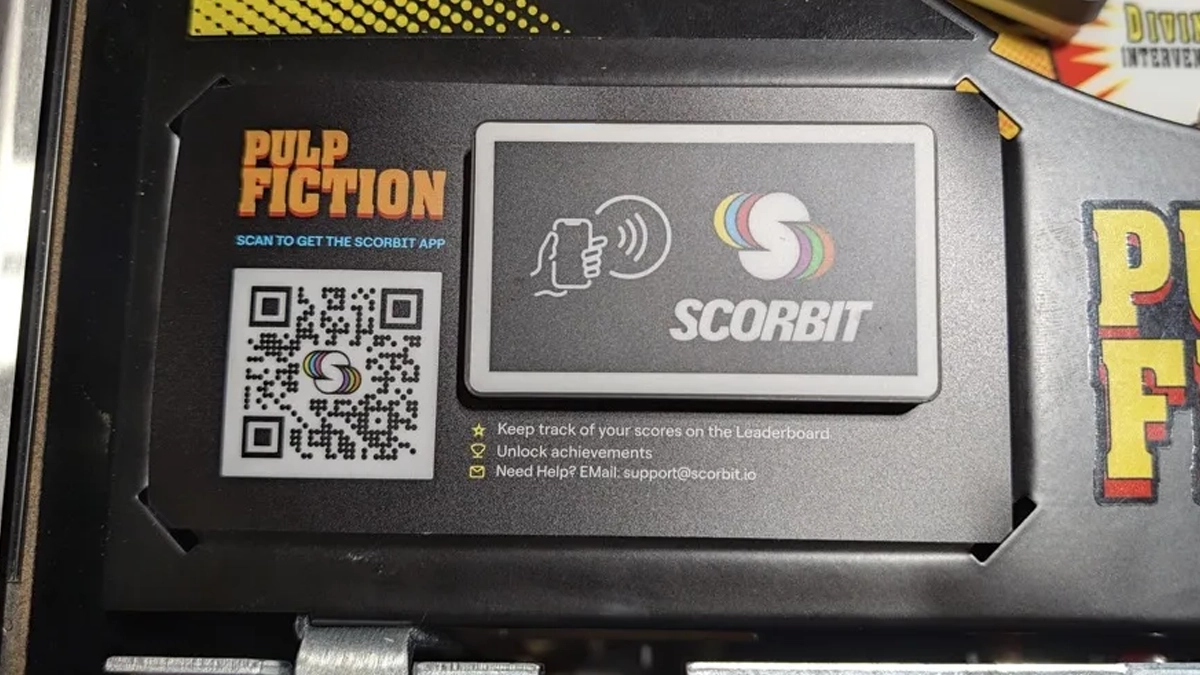
Lower the playfield and replace the glass.
Tap Pad Sensitivity
NFC has a range of only about 4 to 5mm. The kit holds the Tap Pad close to the underside of the glass. Make sure the card is fully seated in the slot so the pad isn't tilted or sitting lower than it should.
Tap Pad Clearance
The Tap Pad is designed to be extremely close to the glass. In typical field conditions, it is less than 1mm beneath the surface of the glass. As all pinball machines are manufactured to different tolerances, we recommend having someone with you to place their finger on the Tap Pad in case the glass touches the edge of the pad. Slight pressure on the pad drops it beneath the glass surface, allowing you to slide the glass easily once you remove the pressure.
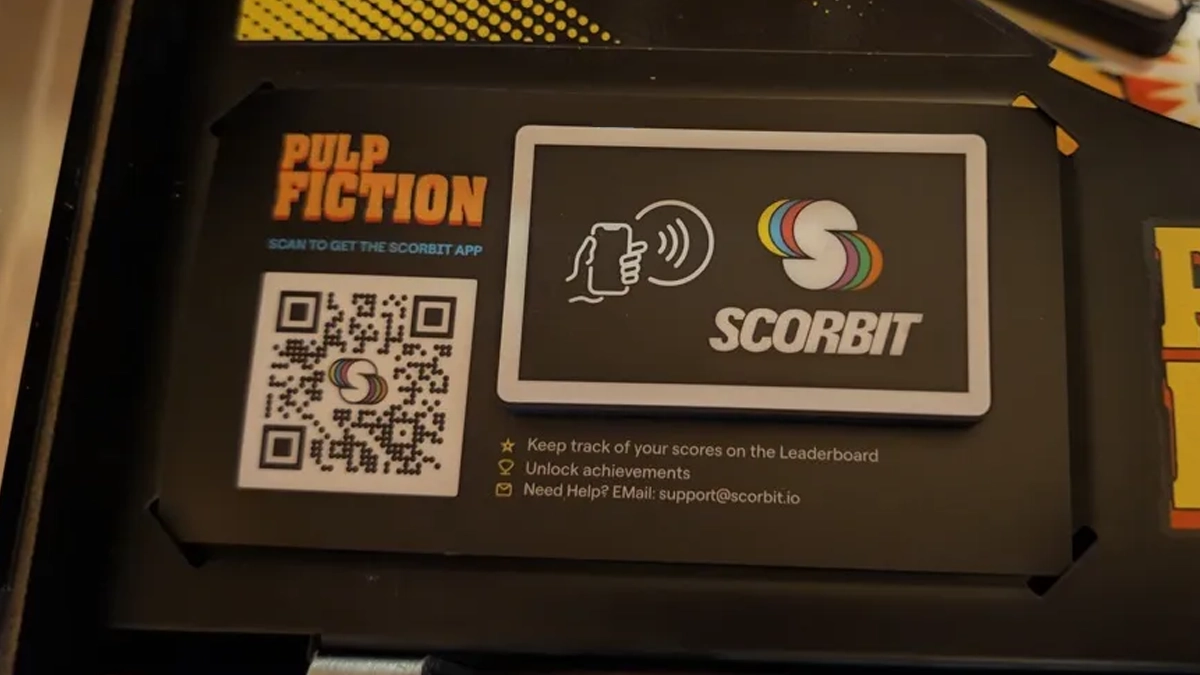
Part 2: Connect the Game to Your Network
Pulp Fiction does not come with built-in WiFi capability, but it does come with an easily accessible Ethernet port on the rear of the machine. This port can be used either for a direct Ethernet connection to your router or can be used with a WiFi to Ethernet Bridge. If you wish to use a bridge, we recommend the TP-Link TL-WR902AC or similar class device. These can be mounted easily to the rear of your machine and connected with a short patch cable to the Ethernet port, providing reliable wireless access.
Connect the Ethernet Cable
With the game turned off, plug one end of the Ethernet cable into the Ethernet port on the back of the game. Plug the other end into your router, network switch or a live wall jack.

Tip
The game gets its network address automatically (DHCP) from your router. You do not need to configure an IP address manually. If the game is far from your router, you can use a WiFi Bridge as mentioned above, such as the TP-Link TL-WR902AC. See Network Configuration Tips for more help.
Part 3: Update the Game Software
Scorbit features are included as part of the Pulp Fiction game software image. You install it by updating the game to the latest software. Pulp Fiction is produced by Play Mechanix and manufactured by Chicago Gaming Company, which publishes the game's software updates on its Pulp Fiction software update page. The steps below summarize that page and section 4.2 of the Pulp Fiction manual.
Prepare the microSD Card
- Download the latest update file from the Pulp Fiction software update page.
- Unzip the update file. You will get the Pulp Fiction update image file. On a Mac, you can use an app such as The Unarchiver.
- Insert the microSD card into your computer.
- Write the image file to the microSD card:
- Windows: Open Win32 Disk Imager. Under Device, select the microSD card. Click the folder icon, select the image file, then click Write. This takes about 10 to 15 minutes. Wait for the Write Successful message.
- Mac: Open ApplePi-Baker and enter your admin password. Select the microSD card in the Pi-Crust section, select the image file in the Pi-Ingredients section, then click Restore Backup. Wait for the Apple-Pi Ready message.
- Eject the microSD card from your computer.
Warning
Writing the image erases everything on the selected drive. Double-check that you selected the microSD card and not another drive.
Install the Update on the Game
With the game turned off, carefully remove the backglass. Insert the microSD card into the slot at the top of the BeagleBone board, with the label facing the back of the game. Push it in until it clicks into place.
Turn the game on. The backbox displays show that a new version is ready to install, with a countdown in the Ball in Play display. When the countdown reaches 00, the installation begins:
- The Player 2 display shows the new software version.
- The Player 3 and Player 4 displays act as a progress bar.
- The red Timer flasher in the backbox blinks slowly.
When the installation finishes, the game verifies it. Do not turn the game off while the Timer flasher is still blinking.
When verification is complete, the displays alternate between a success message and instructions to reboot. Turn the game off, then press the microSD card in to release it and slide it out. Turn the game back on.
Tip
To check which software version is installed, open the coin door and press the black BEGIN TEST button. The version and date appear in the Player 3 and Player 4 displays.
Part 4: Enable Scorbit and Pair the Game
Navigating the Game Menu
Pulp Fiction shows its menus on the alphanumeric score displays in the backbox. You navigate them with the four buttons inside the coin door:
| Button | In the menu |
|---|---|
| ⚫ Black (ENTER) | Enter the menu, open a sub-menu, or select or confirm an item |
| 🔴 Red (+) | Move to the next item or increase a value |
| 🔴 Red (−) | Move to the previous item or decrease a value |
| 🟢 Green (ESC) | Go back or exit without saving |
Open the coin door and press the black BEGIN TEST button to open the Main Menu.
Turn On Scorbit
From the Main Menu, use the red buttons to find the Scorbit setting. Press the black button to select it, use the red buttons to change it to Enabled, then press the black button to save.

Confirm the Network Connection
Press the green ESC button to return to the Main Menu. Scroll to the Online Menu and press the black button to enter it. Select Display IP Address (10.01).
The display should show an IP address, such as 192.168.1.42. If no address appears, check that the Ethernet cable is firmly connected at both ends and that the router or switch port is working, then restart the game and check again.

Create Your Machine in the Scorbit App
Download and install the Scorbit app. If you haven't registered yet, sign up and verify your account.

.png)
In the app, go to your user profile, tap the settings icon at the top of the screen, and select My Machines.
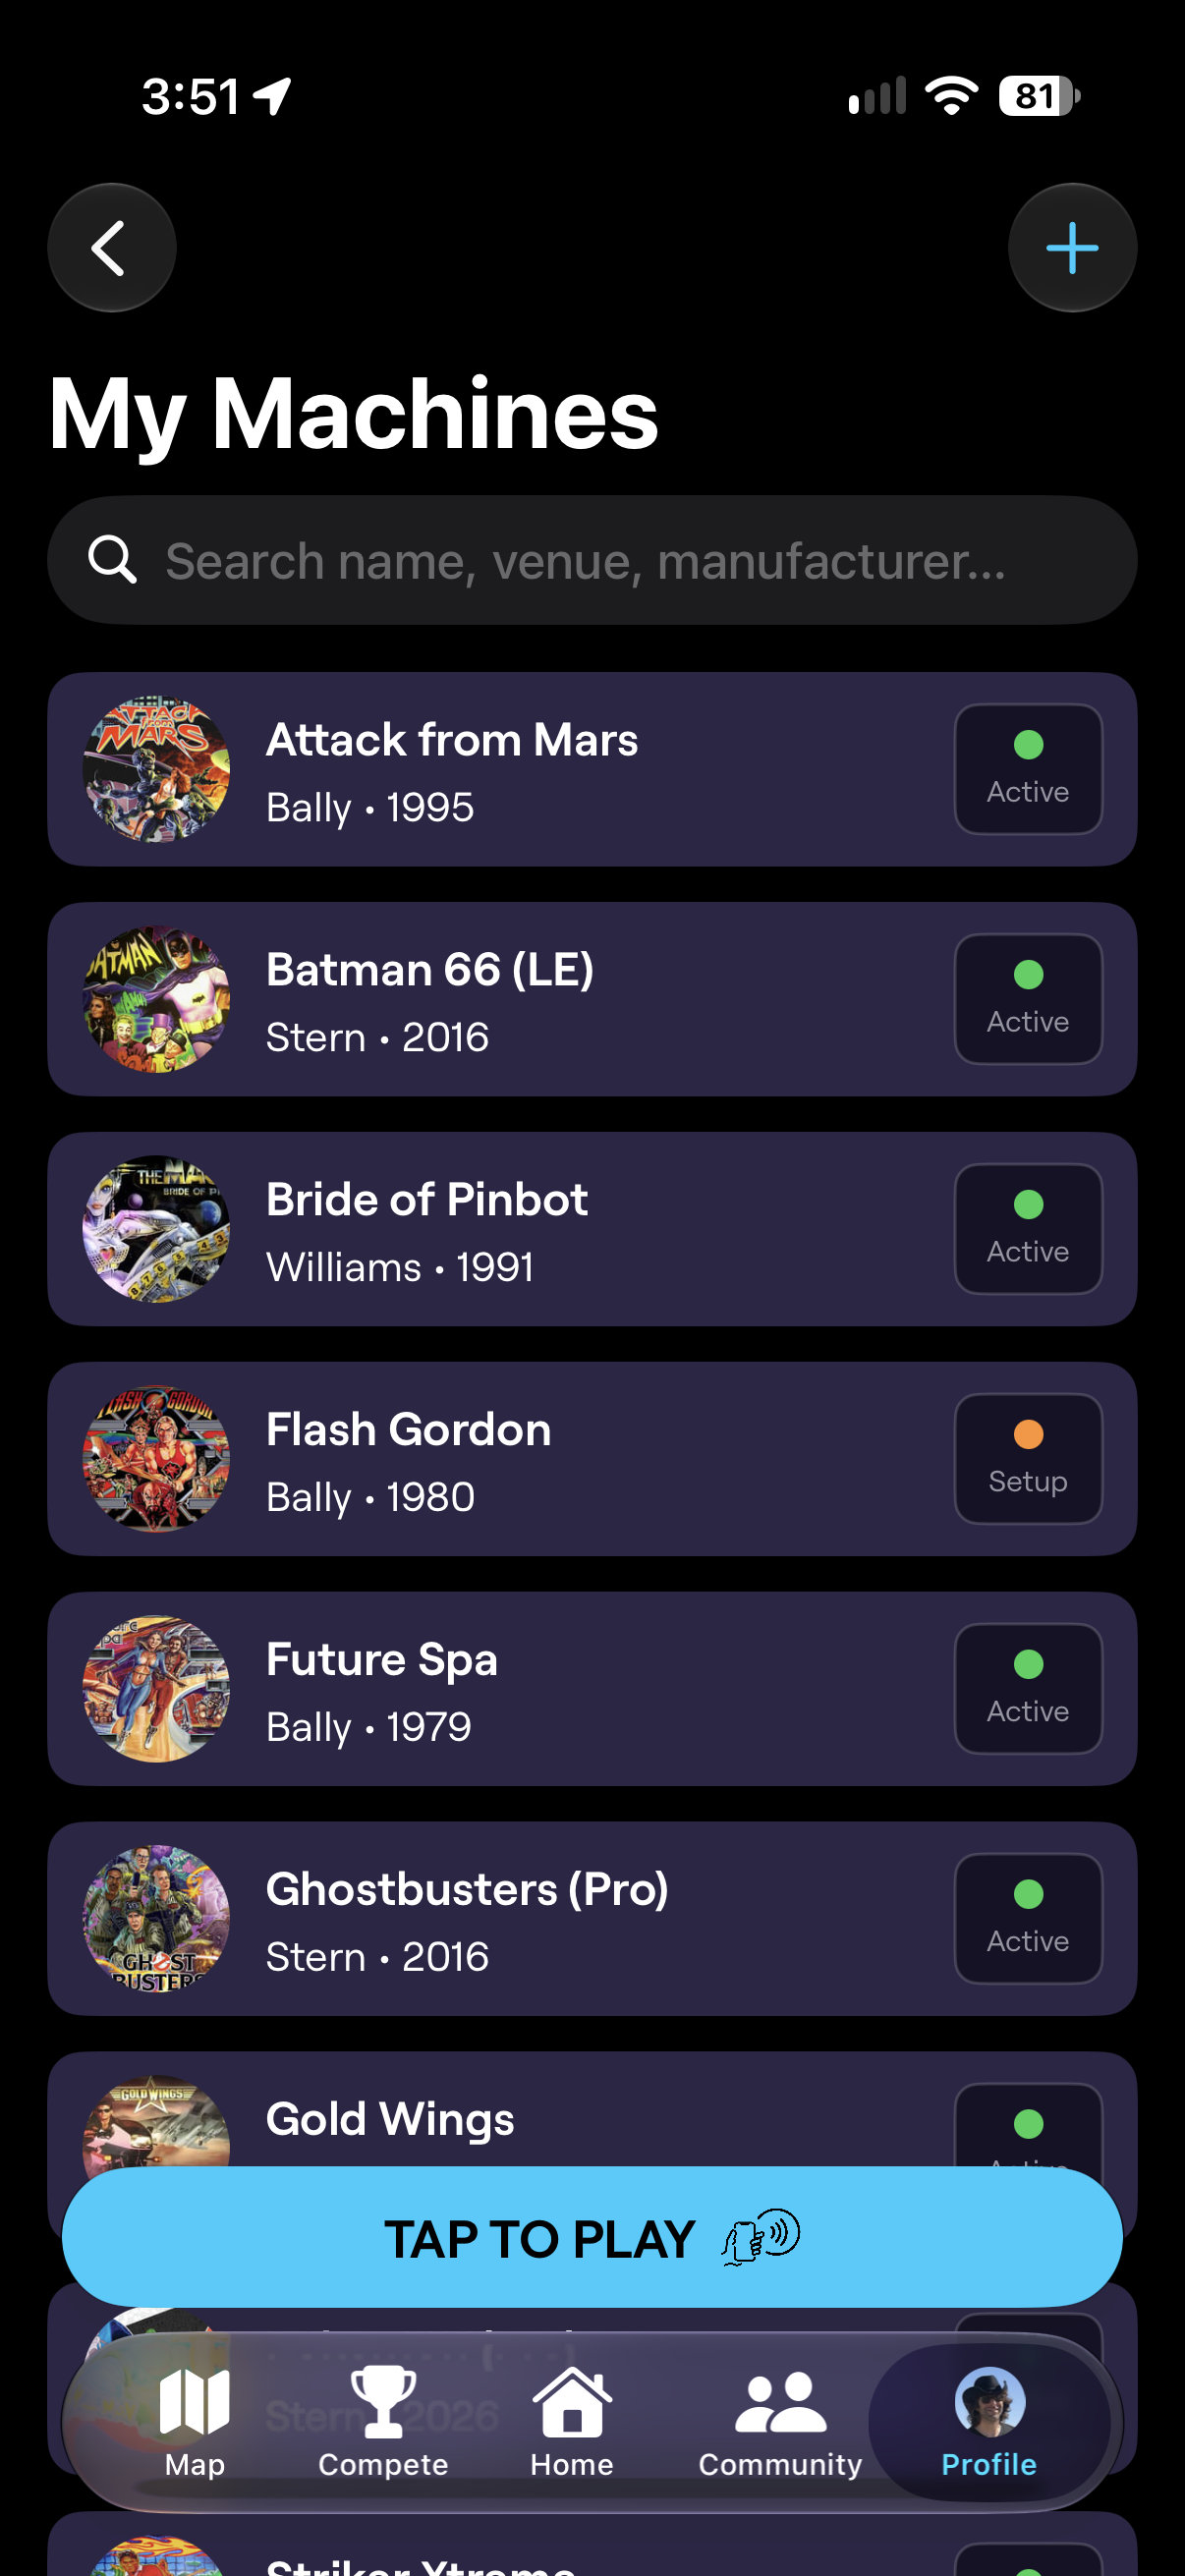
If Pulp Fiction is already listed, tap the Setup icon next to it and go to the next section. Otherwise, tap Create Machine or +, search for Pulp Fiction, and choose the variant (and optional venue) that matches your game.
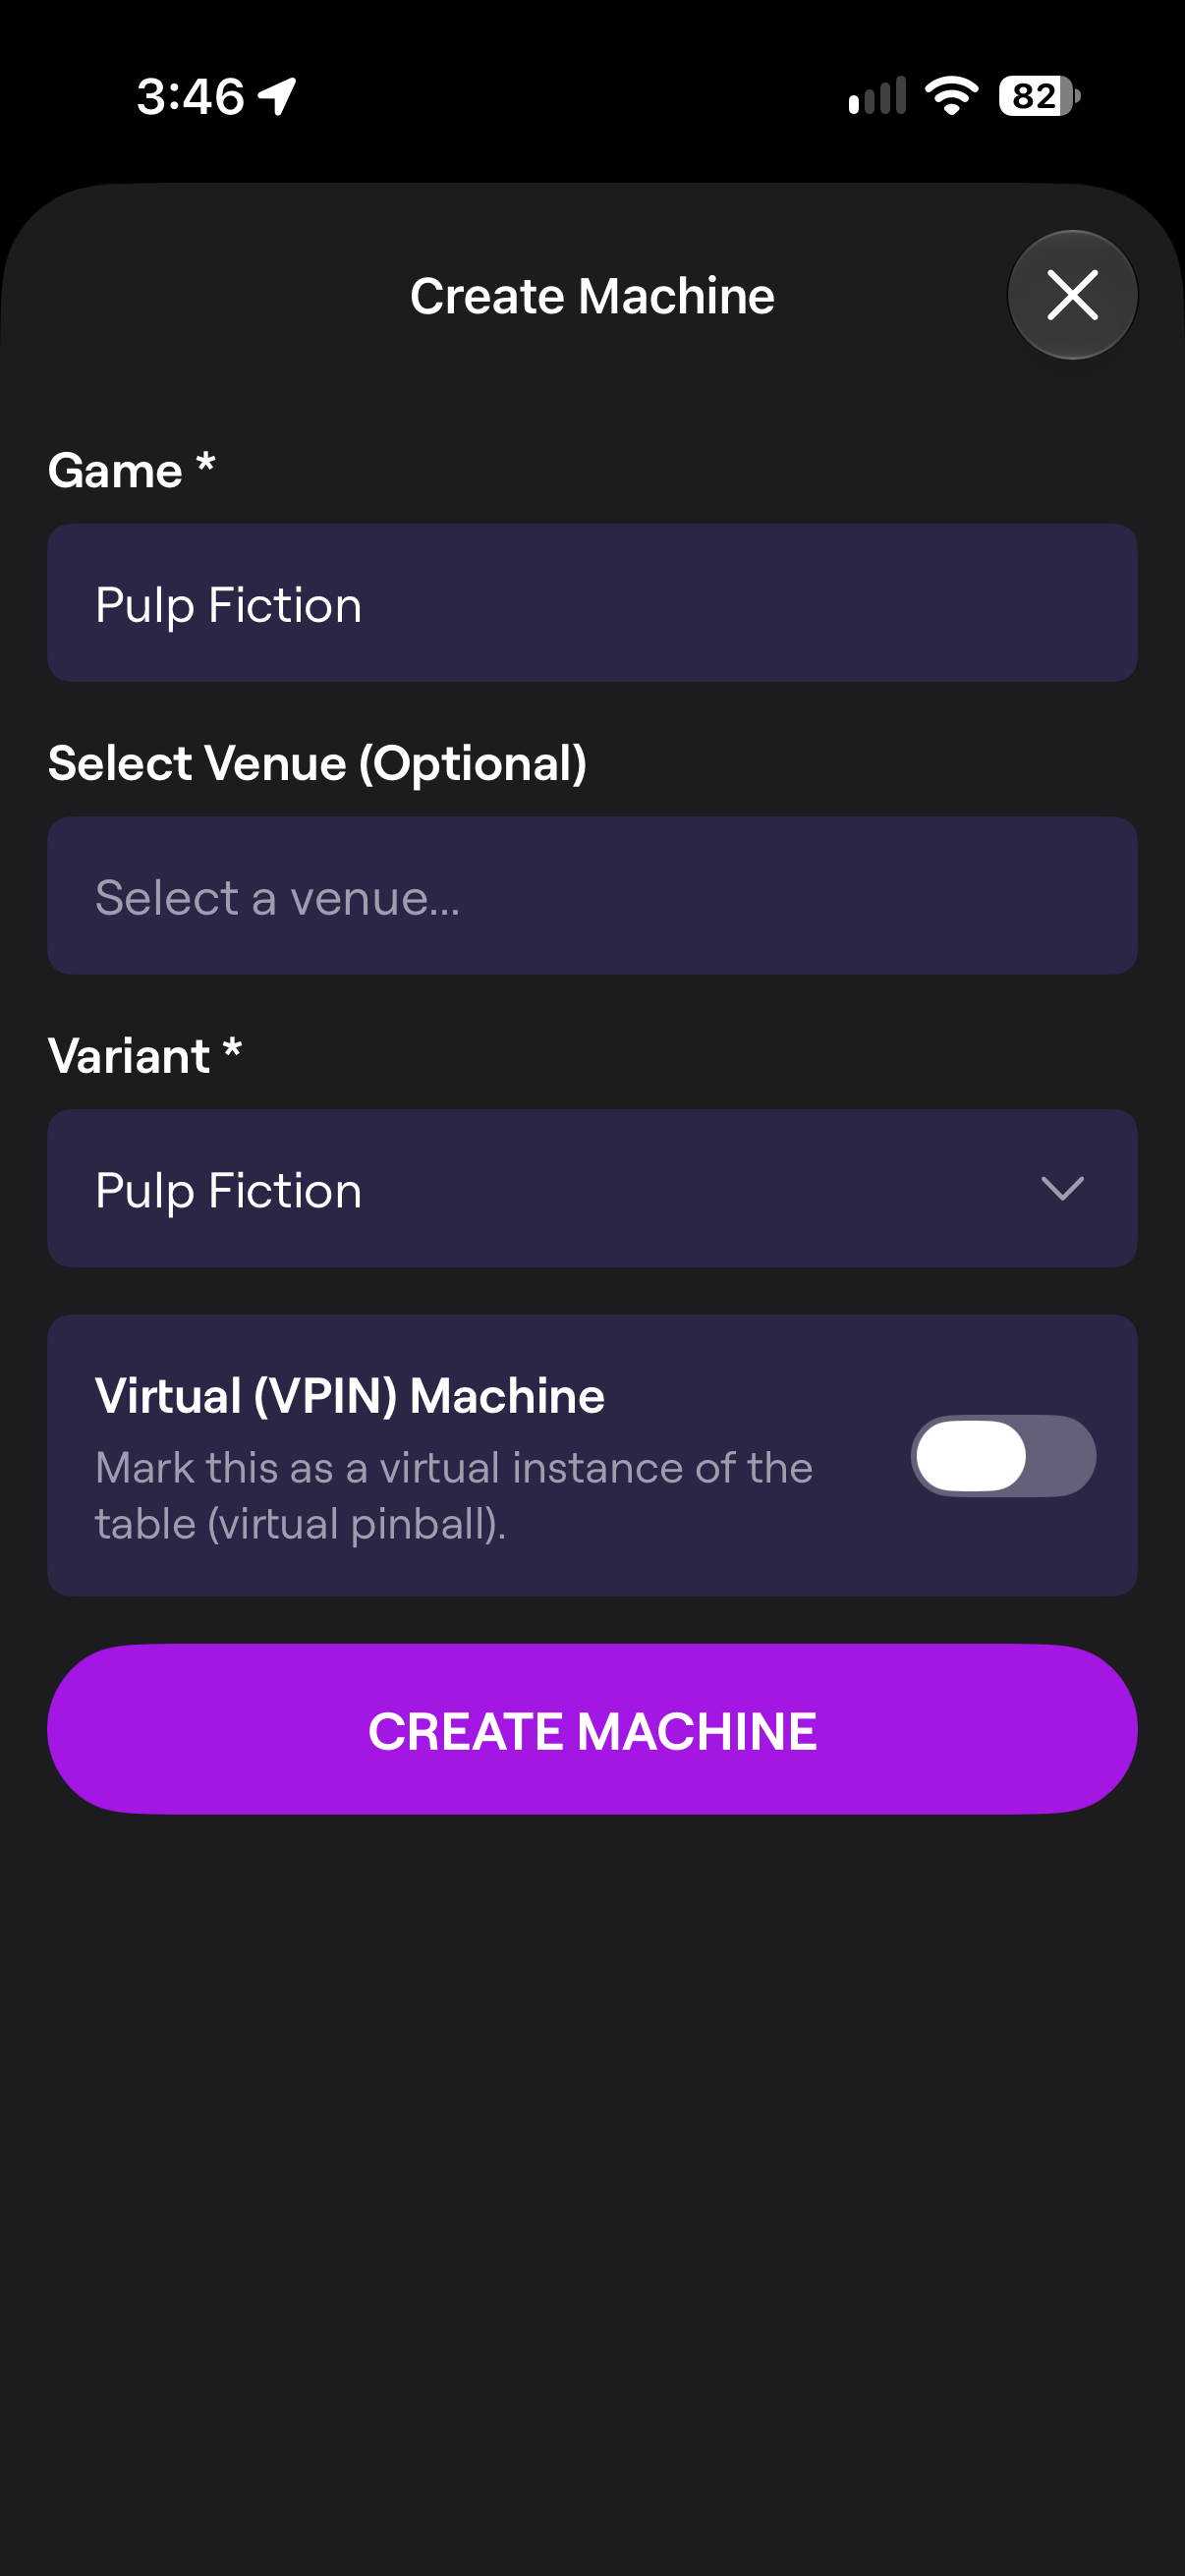
Tip
Make sure you pick the physical machine and not a VPIN (virtual pinball) variant.
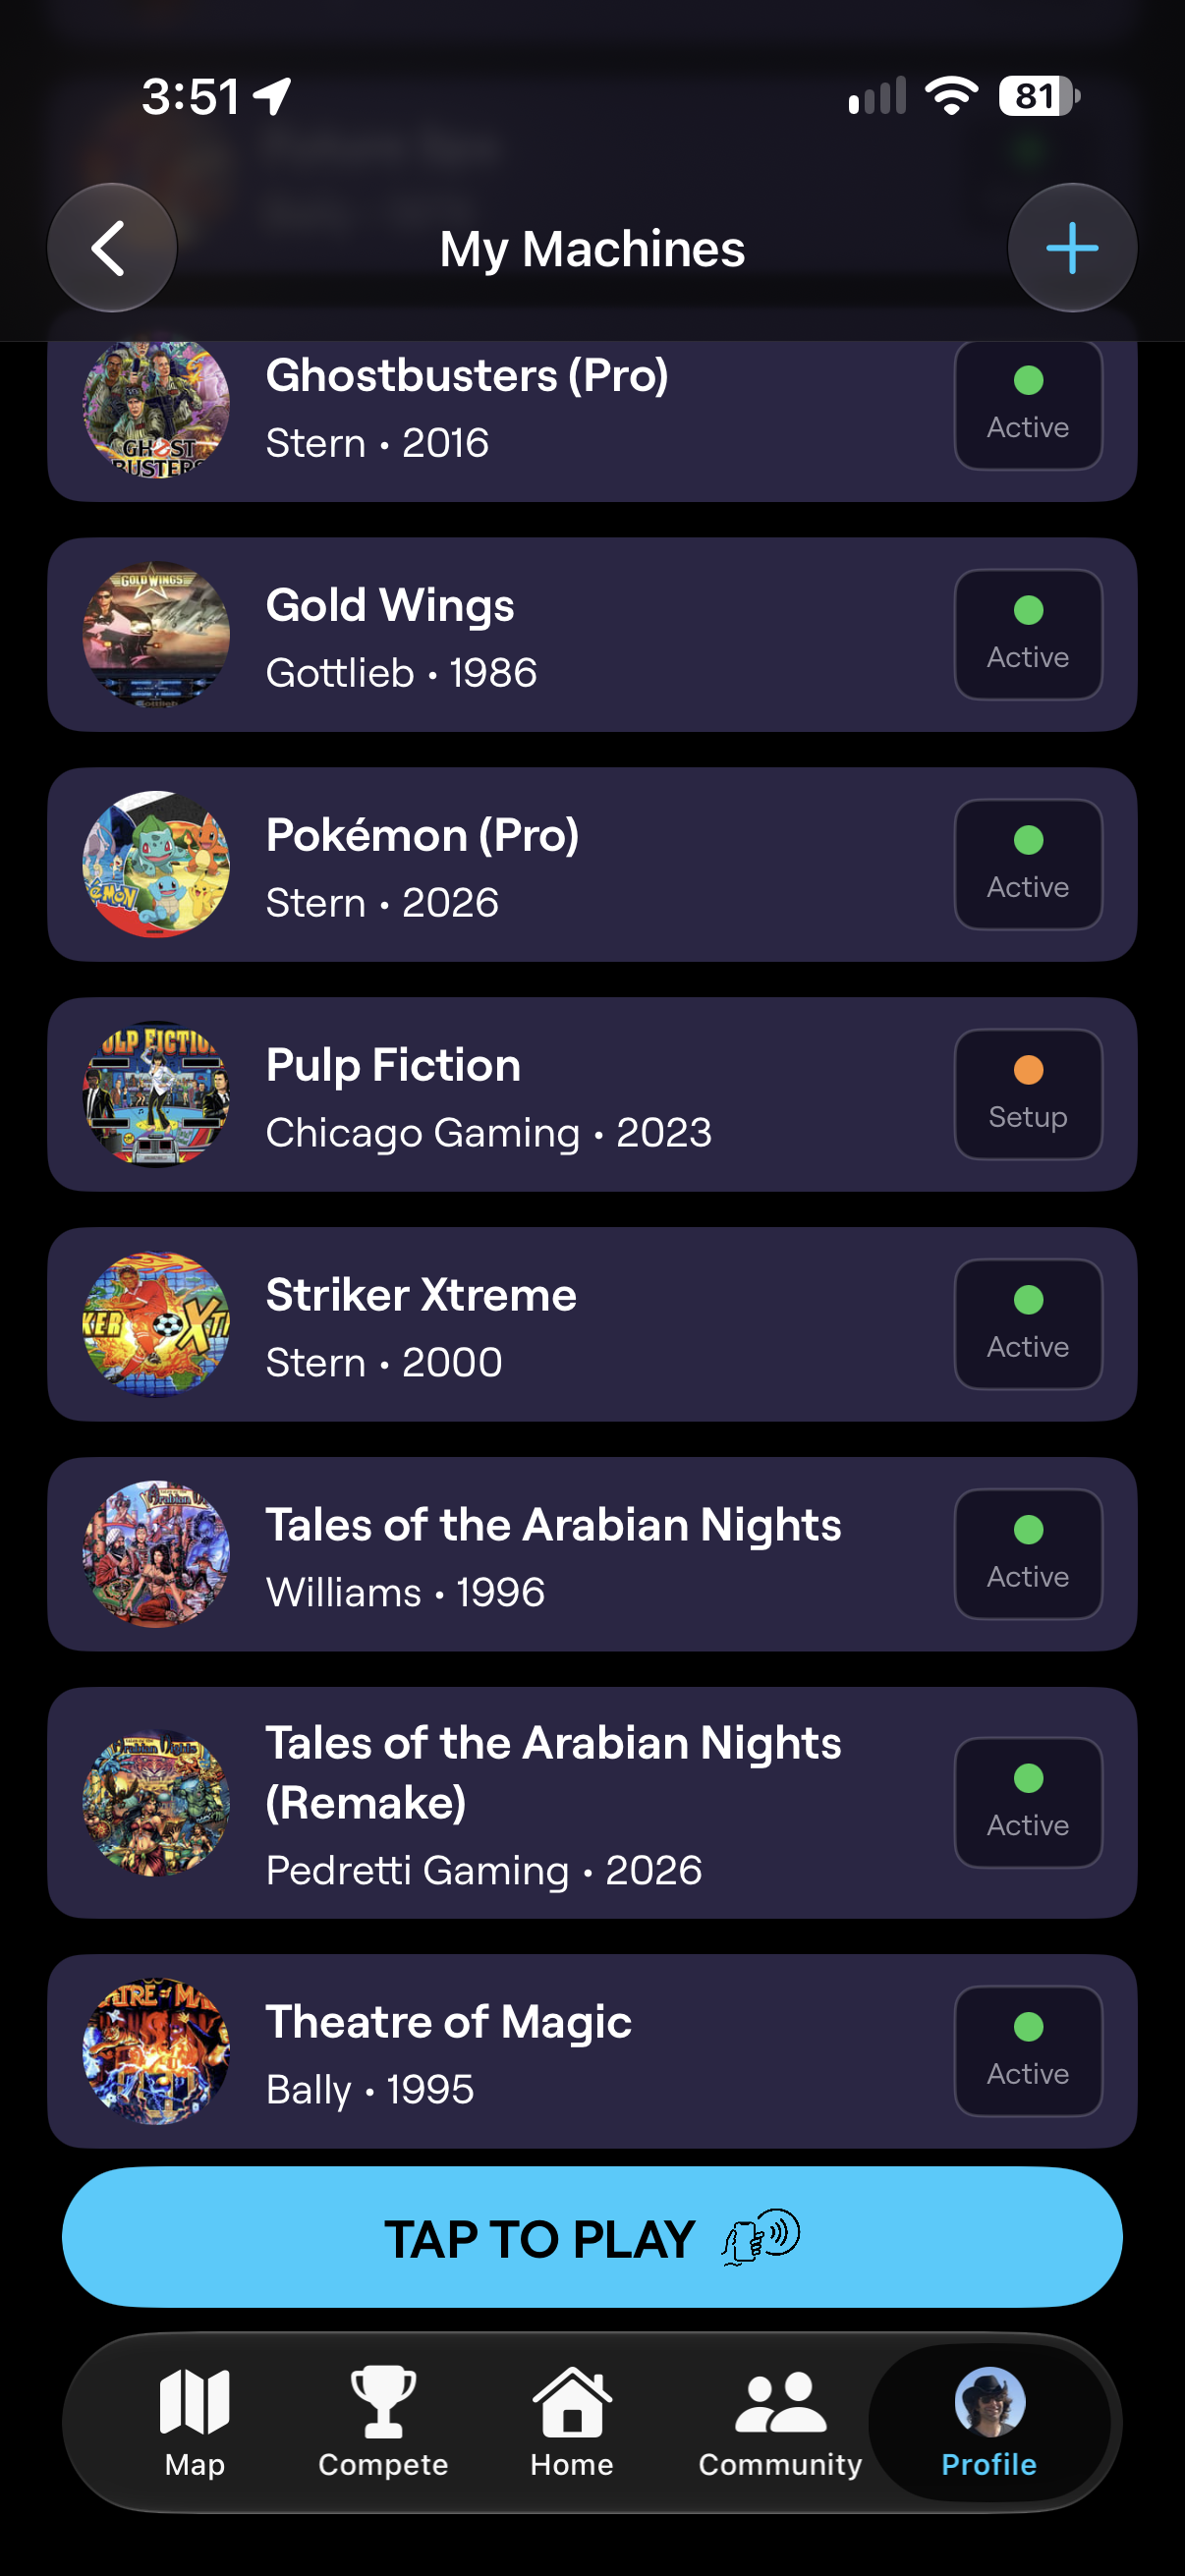
Once the machine is added, you return to My Machines. Now tap the Setup button next to your Pulp Fiction entry.
Get the Pairing Short Code
At the game, return to the Main Menu and find the Pairing Short Code item. Press the black button to show it. The code appears on the backbox displays. Leave it showing while you complete the next step.

Enter the Code in the App
In the app's Machine Settings, tap Activate Scorbit.
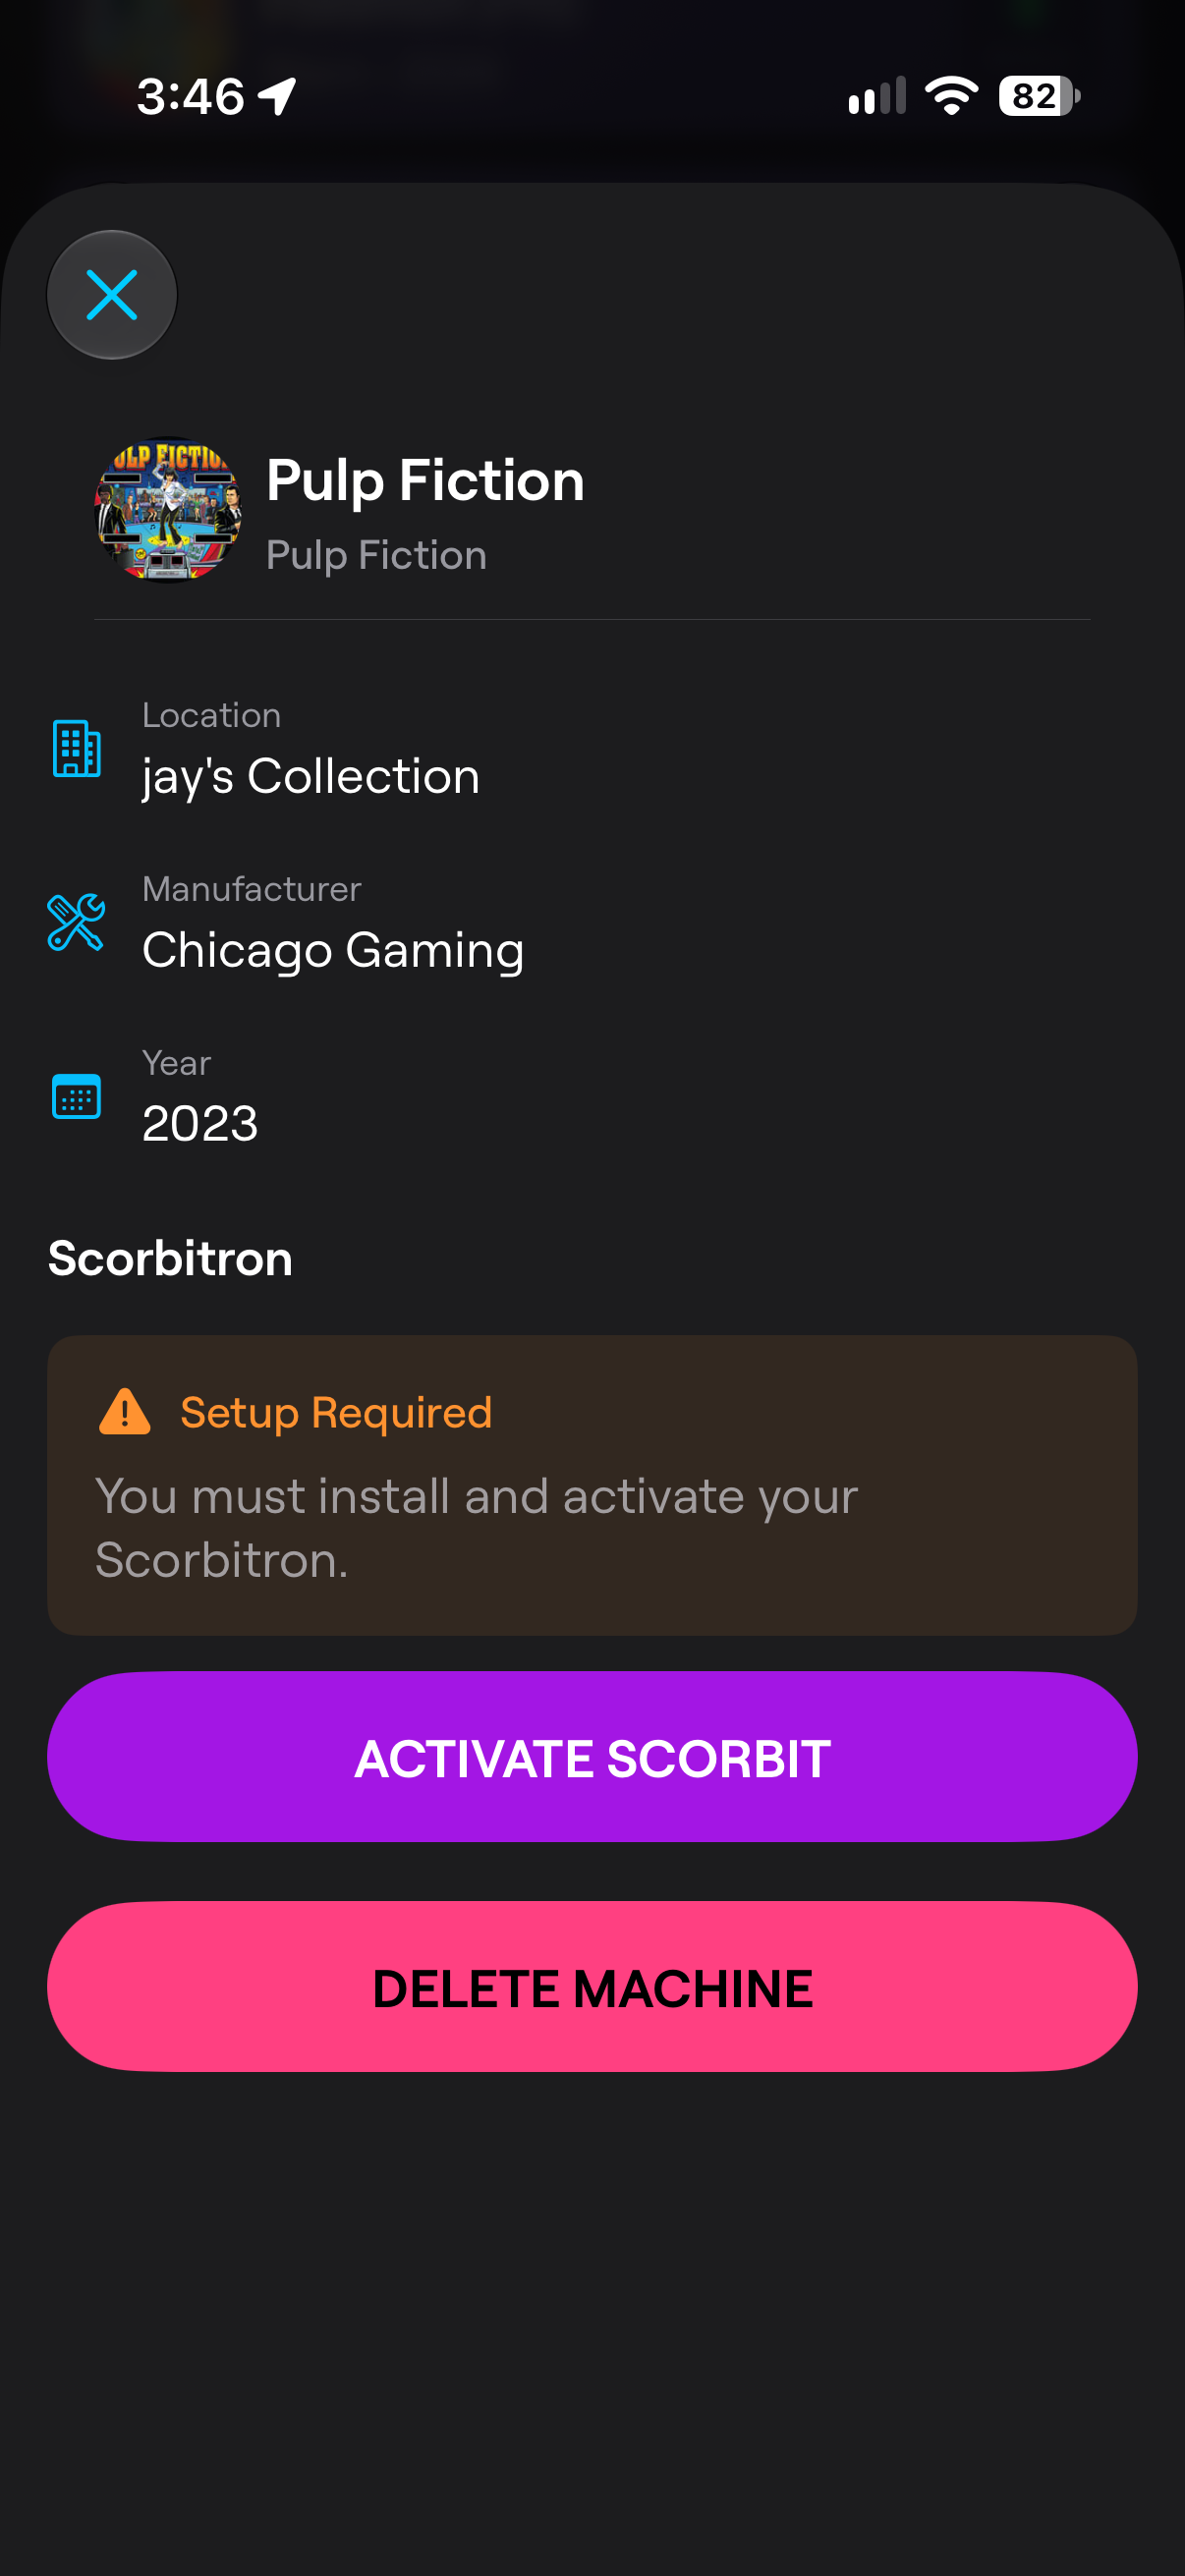
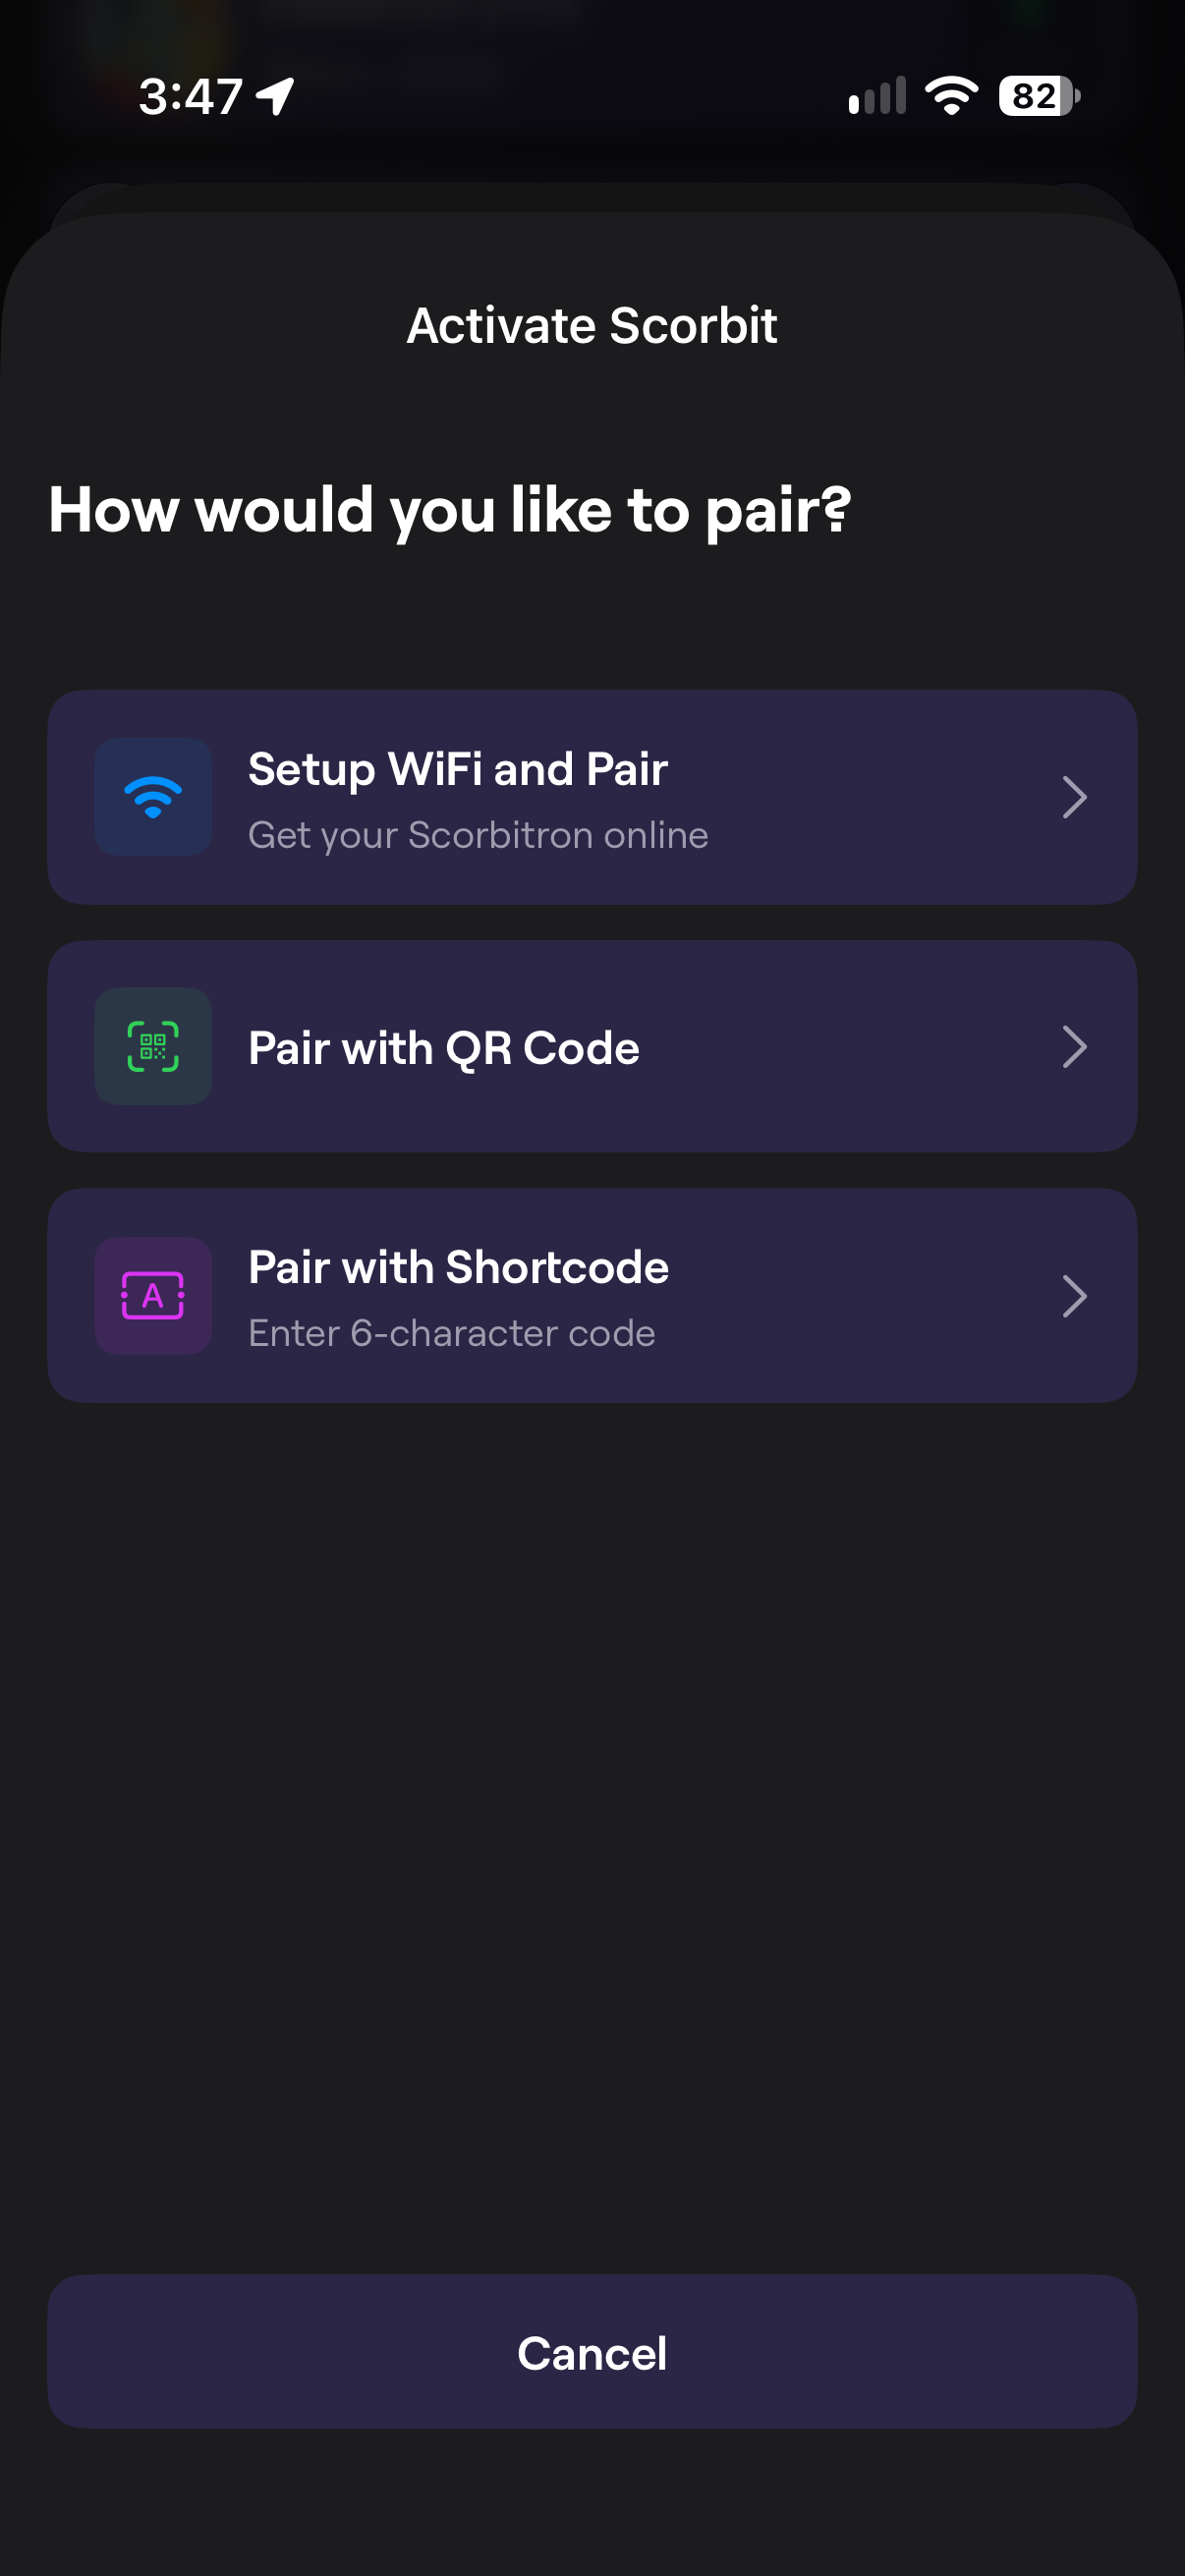
You then are given an option of how to pair. Choose the option to Pair with a Shortcode.
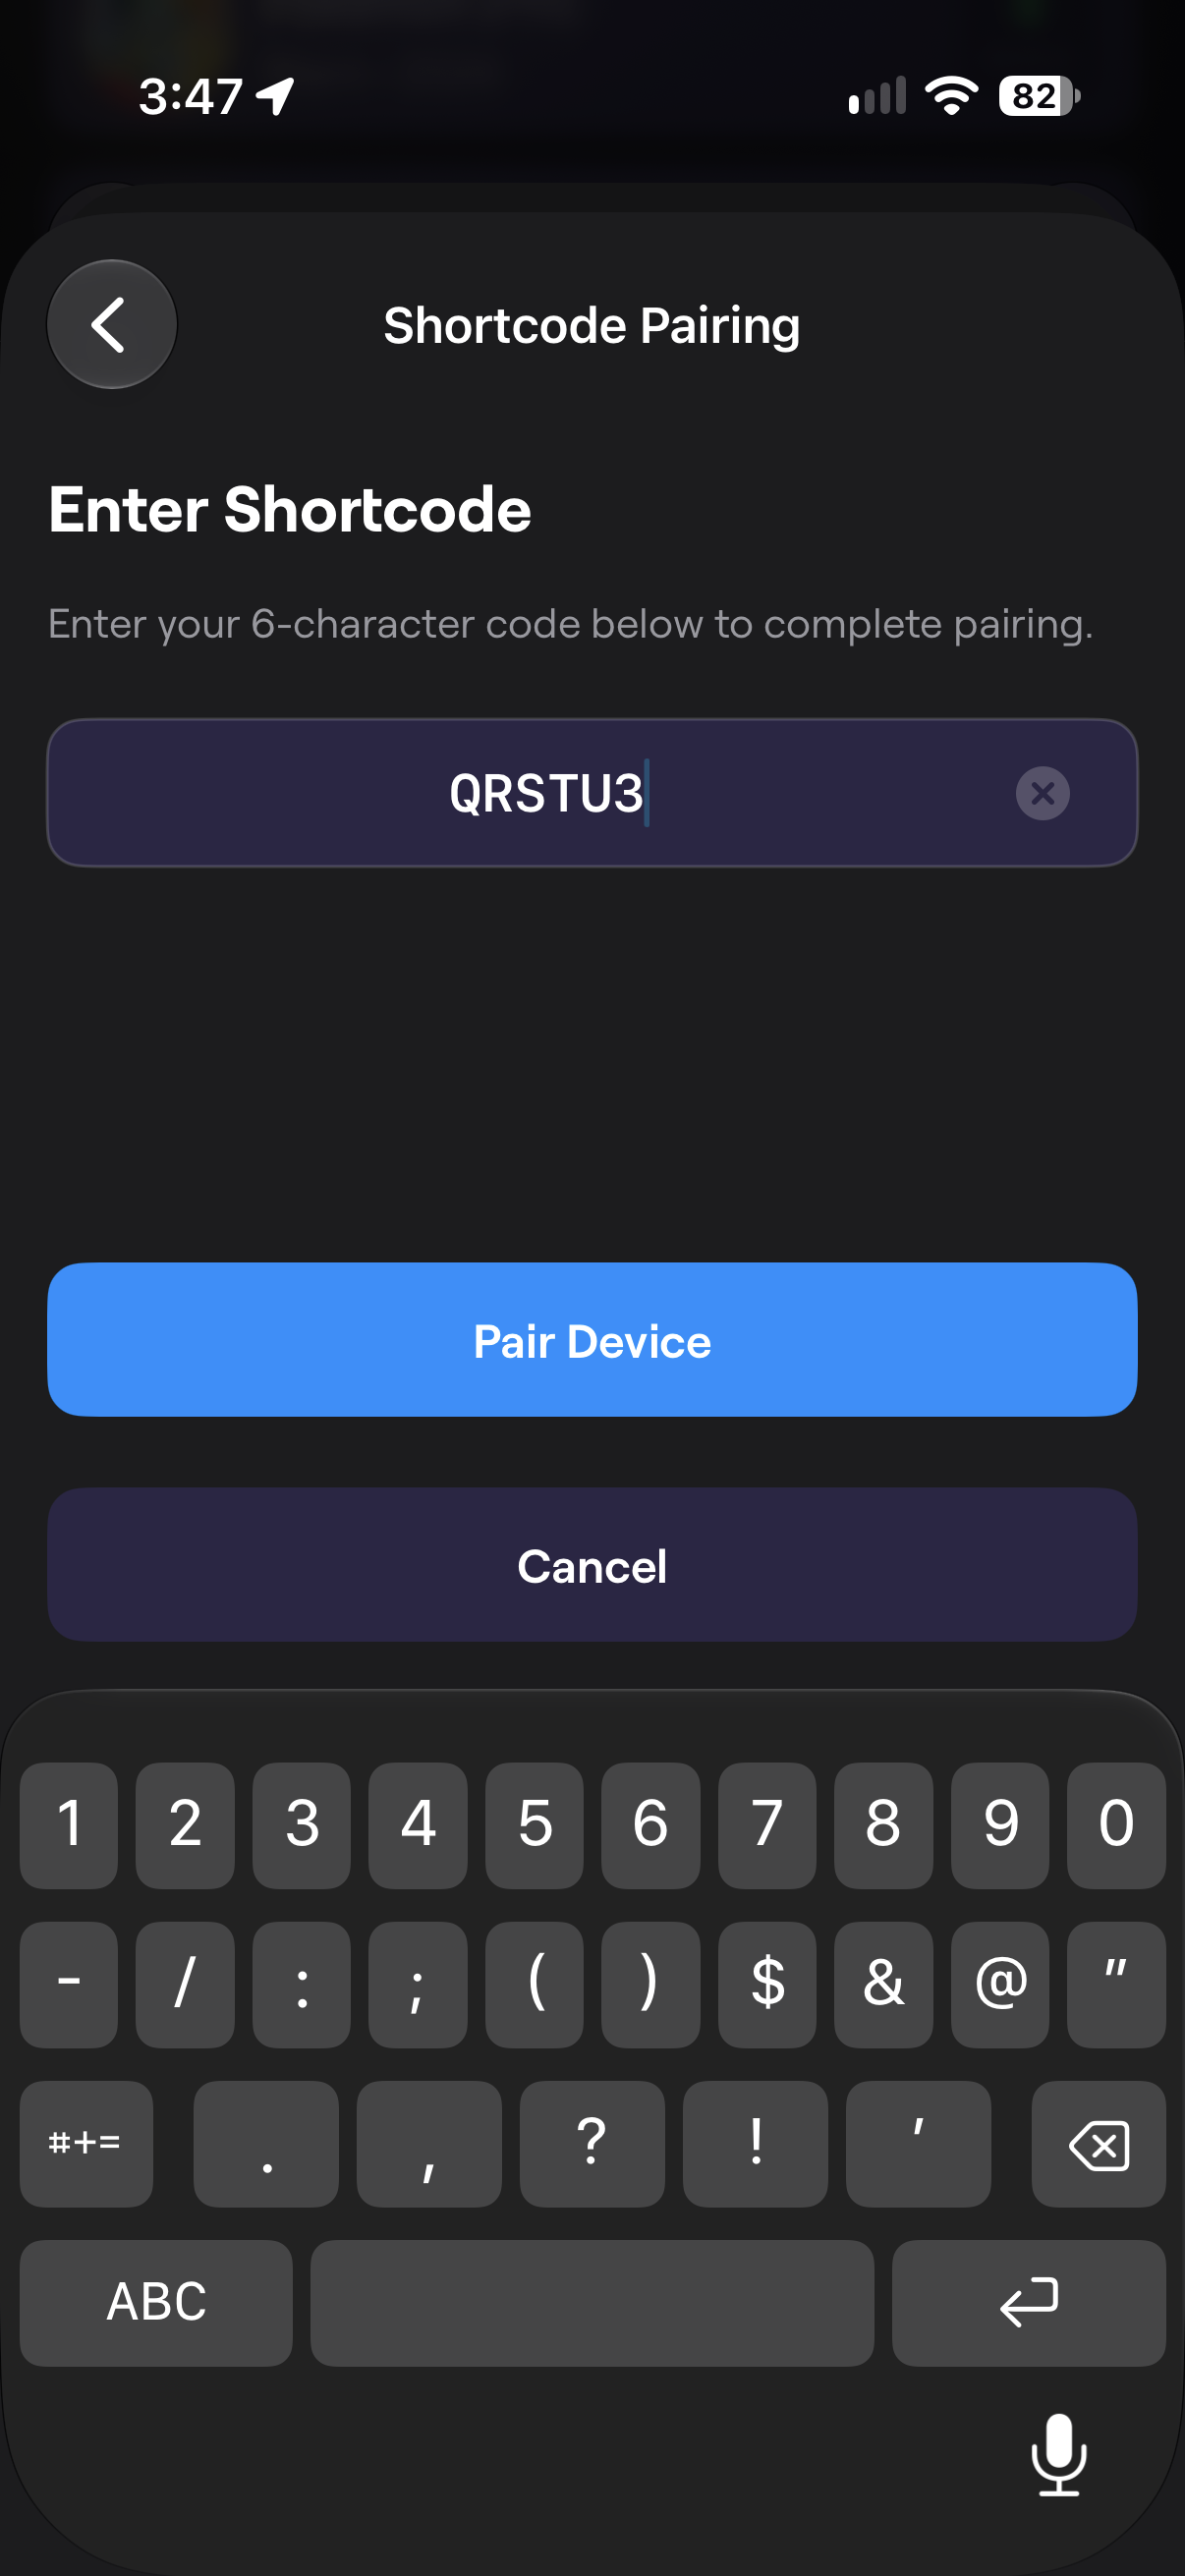
Enter the pairing short code precisely how it is displayed on the game's alphanumeric display.
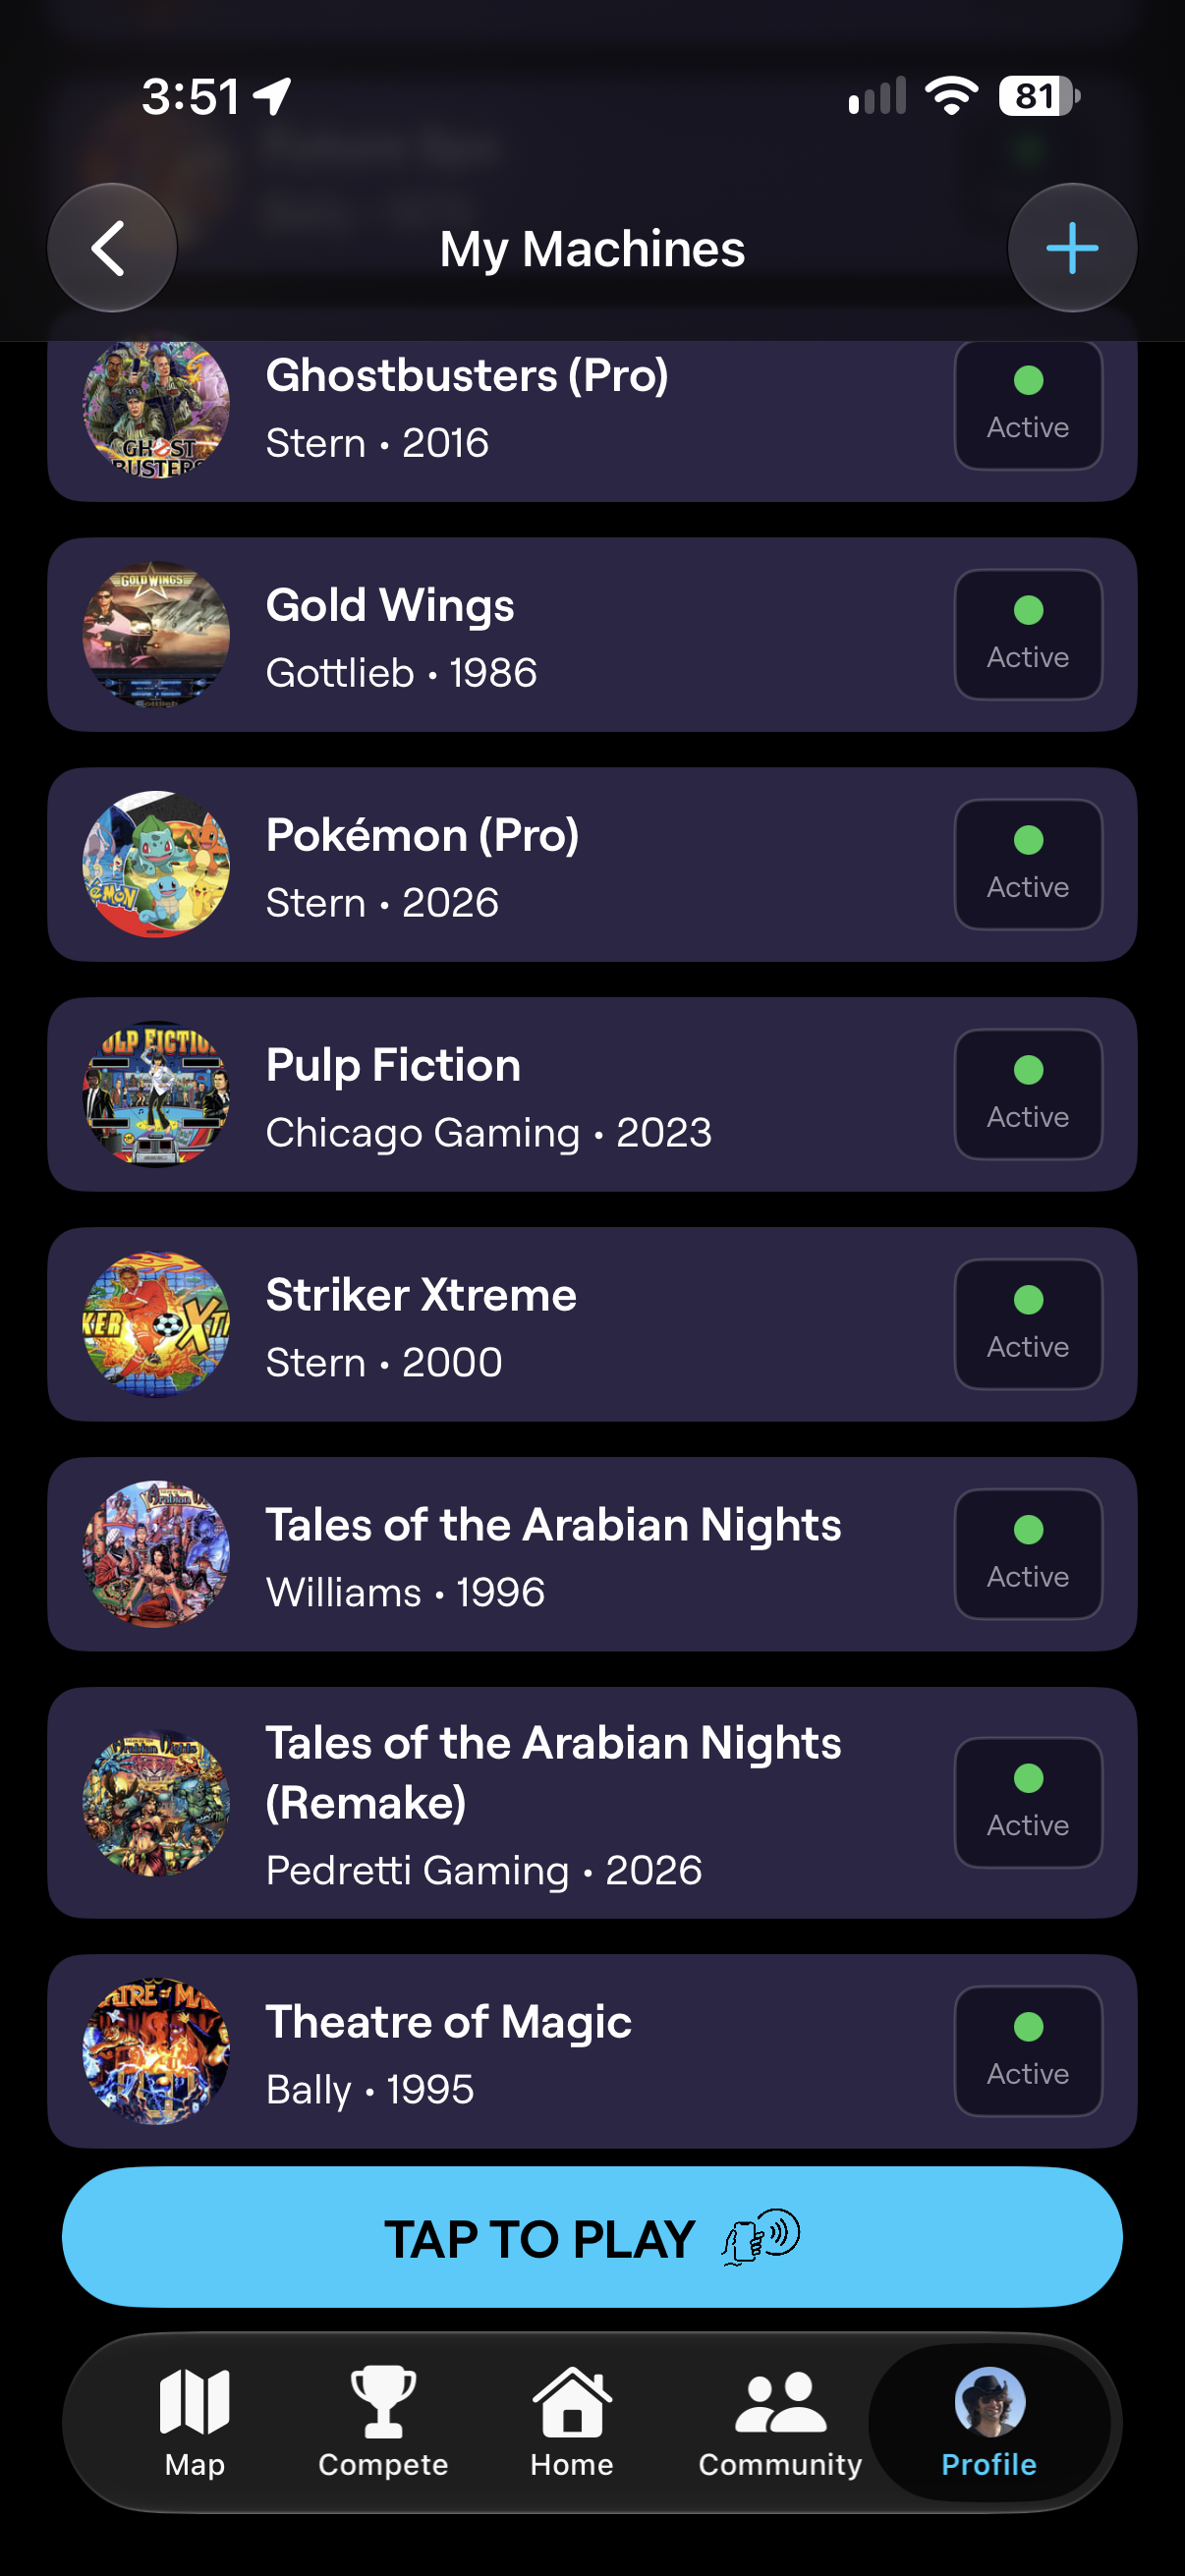
When pairing succeeds, the app shows a success message. Tap FINISH to return to your machine list, where your Pulp Fiction now shows the Active indicator.
Back on the physical game, press the green ESC button until you leave the menu, and close the coin door.
If you run into problems, see Troubleshooting or contact support@scorbit.io.